Tag Archives: workshop

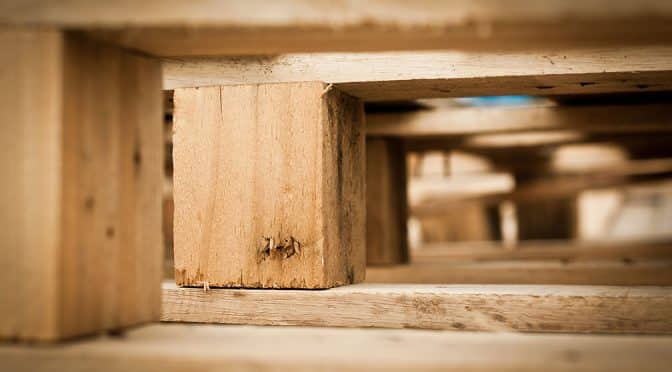
DIY Pallet Planter box – Easy to build & Recycle!

Here’s a DIY planter box (with some character) made from an old wooden pallet! Here’s some inspiration for your own project.

DIY pallet planter box
Here you can see the planter box finished. The box is made from recycled pallet wood and some various other recycled materials.

To complete this project, I basically needed:

  • Pallet(s)I literally got one of these of a nearby footpath, you might need two depending on the size.  I used two small pallets to make this big box but you could easily make a small planter box from one pallet.
  • Saw or eletric jigsaw – handsaw is more than fine, a eletric jigsaw obviously quicker
  • Sand paper or electric sanderwe’ll use this to give a better finish and smooth off the edges and surfaces of the box
  • Measuring tapeyou’ll need this for some planning
  • Strong nailsfor holding it all together
  • A bunch of sunny daysbecause it’s nice to get outside, but useful for paint drying off.
  • Outdoor paintI used red for the outside of the box and black for the inside.
  • Hammer and crowbarfor hammering of course and removing the old nails from the pallet.
  • Compostfor the plants, I used half from a composter I have in the garden and half is purchased
  • Stones – to lay at the bottom of the box to enable better drainage and space out the bottom of the box
  • Plastic lining – I used some basic sheeting and cut to size.
  • Stapler – for keeping the plastic sheet in place in the box
  • Stanley knife – for cutting the sheet

     Planning the size of the box

The size of the box is basically limited to the size of the wooden panels you will salvage from the pallet.  So basically, if you manage to get a really long pallet, you’ll be able to create more planks for your box.  I kept things relatively simple and that was to have a box made up longer sides and then shorter sides.

Building a planter box from a pallet- plan!
Pallets come in sorts of shapes and sizes, remember to keep things simple for your planter box if you want to ensure you have enough wood to finish your project!

The shorter sides would be roughly half the size of the longer sides.  That made it quite easy for me to work out how many planks I needed to build up the side of the boxes.

The best thing to do at this point, is find yourself a pallet and start breaking it down then review what wood is available for use.  There will almost be some panels that come away badly from the pallet and will split or breakup, which can render them unusable. So, remove the nails and panels from the skip carefully as possibly but don’t worry, you can always get yourself another pallet.

Find and then break up the pallet

Once you’ve got yourself a pallet, start using a the crowbar and hammer to pull apart the panels.  To speeden up the process, what I did was to cut away the edges in a straight line fashion like this:

planterbox-pallet-cutting

Use a marker pen,  you could even measure up the length you need and cut to length now but don’t worry if you don’t know what the lengths are going to be, you can always shorten them later on in the project.

That left panels held together with the blocks in the middle.  Removing the edges, has made it easier to remove the nails and middle blocks.

planterbox-pallet-cut

Remove the panels from the centre holding plank and blocks.

Attempt to fit the crowbar down the sizes of the panel and leverage the panels from the center.  Another technique is to hammer the crowbar into the panels to get behind the nail, the pry out the nail.

Once this is done, you should be left with nice panels.  This isn’t easy work, so don’t be afraid to give it some might! If you have some panels with some dirty sides, face them inwards, leaving the better side facing outwards.

wooden-planks-from-a-pallet

Remember to hammer out the nails from the blanks!

When you’ve finished salvaging planks from the pallet, you should have some nice planks ready for your DIY planter box. 

Don’t worry about any marks or roughness, we’ll sand those out later and a good paint will hide any stains in the wood.

Do some planning and cut the planks to length.

Unfortunately, I didn’t take nearly as many pictures as I should have done, apologies for that but basically here’s what we are trying to achieve at this point:

DIY planter box design

I’ll list the steps for constructing the foundations of the box.

Create the foundations of the box.  Red are the long sides with blue shorter planks laid upon them.  Then nail them to each other.Box Design 1

Now, we’ll add some side panels.

Box Design 2

The yellow panels are upright and form the foundation of the walls. Again, nail everything together.

IMG_6484

Keep building up the walls in the same fashion until you get to the height you want.

If you find yourself getting some planks a bit longer than needed, cut off the edges with the handsaw or jigsaw.

I built up the sides of box with planks of wood as far as to hiding the inside four corner supporting posts.  Remember to nail some corner posts!

Nailing the box side panels

I used four nails for each plank.  That’s two at each end nailing the plank to the supporting corner posts.   Basically, nail where you think the support is needed, and use nails to nail planks to planks around the corners.

IMG_6486

Hopefully, your box will start to look a little something like this.

Sanding and preparing the planter box for painting

To smooth things over a little, use some course 60grit  sanding  paper and block OR an orbital sander.  Go over all of the box surfaces and round off the top and corners of the box a little to your taste, this will give a nicer finish.

sanding pallet wood down

Paint the inside of the planter box

You don’t have to do this but I thought it was best to protect the wood as much as possible from the elements, it might add some more life to the box after all.  I used some spare black paint in the workshop.

IMG_6488
Work in progress, paint the inside of the box black.

Adding feet to the planter box

You can pretty much use anything for the feet, but I took an old wooden pole and divided it into four equal lengths and then screwed them to the bottom of the box in equal distances apart.

The next picture shows the feet attached to the bottom of the box.

IMG_6490

The box is ready for painting

Choose any colour you like but make sure it is suitable for protecting wood and you’ll get plenty of life from the box.  I chose a traditional red colour for the box and got my local DIY store to mix the paint for me.  This didn’t cost much and is so far the only new material I have purchased for the project.  Everything else including the screws and nails have been recycled.

Start to paint the wood, you’ll need at least a 2-3 coats of paint and you can leave about 15-20 minutes on a sunny warm day between each coat.

Painting a planter box
Make sure you have enough paint for two to three coats of paint.

IMG_6492

When finished painting, leave it to try for a day.  You might then need to do some touching up or paint the edges of the top of the box to leave a nice finish.

Move the box into position, because when you have filled it, it will be very difficult to move.

Red traditional painted planter box
Tip the box over and check it, do some finishing touches like around the edges.

Now the box is pretty much ready but before that we should add some plastic lining.  Use any strong plastic lining, I would not use plastic bags for example but something quite strong.

IMG_6498

You should cut the plastic lining more than three times the length and width of the box.  This is to ensure that when we stuff it into the box, it comes up to edges on all of the insides of the box. Like so …

IMG_6500

Start to fold and layout the lining so that it is need, this is little like wrapping a gift! You’ll need to overlap and fold over the plastic sheeting but bascially get it into position where you can start to cut off excess and staple it into position.  Use some retaining screws if you need to hold things in place to make it progressively easier to neaten the lining.

When you have the lining neatly attached to the box, use a screwdriver to pierce holes evenly through the plastic lining at the base of the box to allow for the drainage of excess water.

IMG_6499
Some essential things, the screws are washer screws, great for retaining plastic lining

Lay granite stones in the base of the box, enough to cover the surface one time.

granite-stones-for-planter-box

Bigger ones at the bottom and smaller on the top.

Then you can start to add the compost, I used a mix of compost from the composter and from bags that I purchased.

When you think you have enough compost, now for the fun part, add some flowers and water them in the evening.

DIY pallet planter box

And hopefully, you should have something like mine above…

So, there you are! I hope you found the post useful and inspirational for your own project – good luck!

Let me know how you get on with your project, post a quick comment below and a pic of your own planter box below!

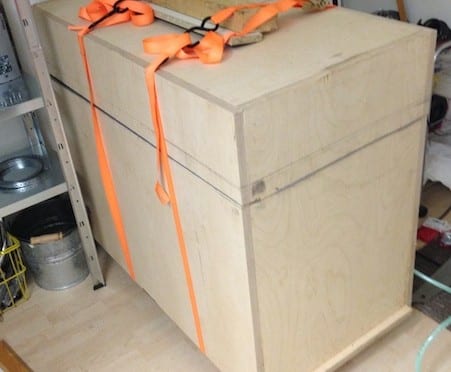
DIY Soundproof box for noisy air compressors

I have a 1.5 horsepower air compressor and it’s noisy, about 95db…

…and here’s how I solved the problem.

I built a soundproof box for it.

What it looks like finished. The orange straps keep it together sealed.
This is what my design of an  air compressor soundproof box looks like finished. The orange straps keep it together tight and it’s placed upon wooden blocks until I get some decent castor wheels.

To be honest, when I was designing and building the box, I had some fears that it wouldn’t be very effective – for example, the compressor I have is simply noisy and there wouldn’t be anything I could do about it.

Saying that, I soldered on and with a bit of science and thought into the design, things worked out and here’s the results.

Daytime ambient workshop noise 40-50db.

Compressor running (no box or soundproofing) –
about 90-95db.

Compressor running in my box –
about 70 db.

My box design reduces compressor noise and dampens frequency ranges roughly by 30db.  Enough to be able to  talk, converse and hear the radio playing whilst it is running.

and… I’m no longer worried at least for the neighbours sake!!

soundproof-box-for-air-compressor
Here’s basically how the compressor soundproofing box works

I realise the design isn’t absolutely 100% perfect and there are some improvements to be made but it’s a good first build on the project and I am very pleased with the results- after all, I didn’t spend that much on the materials required for building it; just my time,  supplies and some recycled wood.

There is no heat ventilation but that’s not important in my case because I use the compressor sparingly.  It’s pumps at least 4-5 times from empty and it gets warm inside but it’s no way too hot to cause any problems. If I was to make an improvement to the design, I’d make another dampened outlet for hot air, the other thing would be to have some kind of cooling device inside.

My main aims for the soundproofing box was:

  • Have an outer box structure containing an inner chamber to hold the compressor.  On top of this will be a lid that has a muffler style channel allows the movement of air.
  • Outer box is ‘air tight’ using glue and sealant to prevent sound travel and leaks.  Additional to this the inner box is ‘air tight’ to reduce sound travel into the void between the outer and inner chamber.  The void is stuffed tight with rock wool cavity.
  • Sound treatment foam boards used where possible to minimise mid and high range frequencies.
  • Rock wool used to reduce bottom and mid range and reverberation in the box.
  • All chambers independently sealed to isolate sound.
  • Air compressor is suspended using bungee cords (prevents vibration and reverberating), although I found some nice bed springs that I might install to replace.
  • Air compressor pulls air in through a purpose built complicated air path, works similar to a exhaust car muffler.

Anyway, so here’s how it’s done:

Cut and prepare four pieces of 3/4 inch (~1.9cm) thick plywood.

1. Prepare four equal measure of plywood
Here are the full-size square frame plywood sheets. Cut with a straight saw or perhaps get your DIY store to prepare them for you so you have four pieces.

Thicker the sheets the better but bear in mind the weight – it gets heavy…   You need two pieces of same length, then another two pieces of same height to create the rectangular design or you can choose the same metrics for all pieces to create a sqaure, it’s up to you but I didn’t want the box getting to big in my workshop!  The width should be the same for all pieces.

Just bear in mind we’ll be cutting a lid from this.

The study and measuring

I can’t really tell you exact measurements, you will need to decide exactly how long the pieces are, the measurements are based on the height and width of your compressor + 20-30% and give allowance of space between the machine and surrounding wooden panels.

The 20-30% is the allowance to cut a lid.

Remember to subtract the thickness of the panels from the height if you want the box to be perfectly square, otherwise cheat and use a router!

Here’s one example of working out the box dimensions.

http://www.wikihow.com/Image:Build-Plyo-Boxes-Step-3.jpg
Image from: http://www.wikihow.com/Image:Build-Plyo-Boxes-Step-3.jpg

In addition to the four pieces, you obviously need two side panels to complete the box.

Start glueing the panels to form the box

You can lay one side on the floor, then start glueing everything together, only do one side for now and use a  super strong wood glue.

To be honest, any standard or strong wood glue should work a treat, I used a ‘strong’ wood glue.  Leave the glue for a good 24 hours.

2. Glue the edges with a strong wood glue
So in the picture you’ll see I’ve laid a side on the floor and glued the side panels together standing up on the side. I’ll do the other side later on.
3. Assemble and hold together with a clamp
If you can get hold of a clamp, use it to prevent anything moving or slipping until fully dried.

Once the glue has dried, check everything. Make sure there are no gaps – we  obviously want this to be integral as much as possible.

Cut the box to create a lid

Moving on, it’s time to cut the lid.  Check your measurements and make sure you give enough room for your compressor.  I was aiming to have a 100mm vent path in the side, so I know straight away, I’d need at least say… 150-200mm height in the lid.

4. Now cut 20 percent from the top
Cut the lid with a straight circular saw or use a jigsaw.

Glue the second side panel to the lid.

Now it’s time to glue the other side panel.

6. Glue the lid to the inside and clamp until dryGlue, clamp, put it aside for 24 hours.

When the glue has dried, you can use a router if you have one to straighten the edges of the box so that when the lid is placed onto the box on finish, you have a nice straight fit without any gaps.

The lid and air vent passage

Take a little effort and time to complete this part of the box project. The picture shows the insides of the box and this is what we want to achieve.

Soundproof box lid for air compressor
Here’s the lid just before completion, it shows you the air path. The blue panel is taller than the others and is a part with several small holes instead of one 100mm hole, you’ll see later on what I mean.

Take the lid and install 5 pieces of wood

The first thing we need to do is install some thick insulating mat to the lid.  The type of thing you’d expect to be uesd as a gym exercise mat.  This will add some extra sound treatment to the lid before we start installing the 5 panels needed to make up the air path.

sound insulating mat
Cut and install some soundproof mat to the lid.


A quick note: to seal the lid air path effectively, we’ll use panels (mine were about 1/6 inch 4mm), so make sure you give enough for the panels to lie over the passage and meet the edge of the plywood square.  It doesn’t have to be completely spot on since we’ll seal it with sealant but the closer the better.

Panels
One panel on the left installed and another being prepared. I used two because I simply recycled a couple of spares in the workshop but you could measure and cut one length.

The first thing to do is to cut 5 equal pieces of wood that fit inside the length and height of the lid.

Measure up and cut, remember one piece needs to be wider than the others, that piece marks the end of the passage – that part’s role will become clearer to you as we continue on…

Anyway, cut away and try them for size.

7. Measure and cut 5 pieces of wood
Sound mat has been installed and glued but I didn’t have enough for the hole box since my piece was recycled but now trying out the panels.

Then when you are happy, drill 100mm holes in the panels and begin to glue them into place.  The bigger panel needs to have several smaller holes, I drilled 7 smaller holes (not shown in this picture but further down).

8. Glue the insulating mat and cut holes then glue

When the glue has hardened, start applying sealant to all edges and holes in the lid.

9. When dried rub a filler around wood and all corners

Any good quality sealant is good, the one I used was an outdoor weather proof used for sealing gaps between doors and windows to brickwork.  There are acoustic sealants but the stuff I used here is still very effective and cheaply available.  It’s very flexible too even when dried and not messy or nasty to work with.

10. Should look like this

Here’s the seven holes I mentioned earlier, drill several small holes here.

11. Drill small holes in the big piece

Get in every crook and cranny.  There needs to be a good seal here.

12. Looks like this

Once this is done, we are ready to start applying the sound treatment boards.

Installing the sound treatment boards

Sound treatment boards are easily available from the internet and I ordered a large box of tiles, about 30 of them.

13. Get treatment boards like this
Here’s a couple of sound treatment boards

To install these to the lid, we’ll need to cut some up.  It’s a time consuming process but the most significant and important part of the lid.

My dog is trying to tell me something….

14. My pincher wants to go she is bored

Crack on with the measuring and cutting, every panel needs to be covered but don’t obstruct the 100mm air path and several holes. Panels can be applied to all visible sides.

16. sides too

15. install sound boards everywhere
Use a standard glue that will grip

17. air must be able to pass

If you are wondering what the water droplets are all about, the panels are recycled chipboard shelves from a local corner shop which was being renovated and had been used I believe to be as shelving for refreshments in their previous life.

18. getting there

Once you have finished cutting and adding the soundboards, a 100mm hole needs to be drilled with a hole saw at the end of the path.  Then add a vent guard if you wish!

19. drill a 100mm hole at the end of the channel

20. grab a vent guard if you like
Sealant or screws hold the vent in place


21. then install a vent cover
This vent came with an adjustable cover although it wont really make much difference and it will always be open.

…and here it is.

22. neary done


You’ll need to decide if you want the holes for compressed air and power in the lid or the base.  At some point, drill two holes for air and power.

23. Drill two holes for air and power


26. fasten and seal with rubber filler

Install and secure and apply the suspicious looking brown sealant.

For the power, I used a recycled power extension.

27. do the same for power

Mounting a power extension inside.  I decided to add the Power and Air holes into the lid.  I just designed it this way, probably would have been better to make the holes in the lid side wall but there you go!

28. Mount internal power extension block

 Securing the panels

Now it’s time to measure some panels and secure them to the top of the air passage. This is some thin plywood.

29. Measure and cut a plywood panel to cover the lid

31. Cut and check they fit

To secure the panels, I used a line of sealant on each panel. I will position and placed the panel half way across the beams.

34. use sealant on each row

as so

32. If using multiple panels allow surface area for two panels on join

Then secure with washer screws.  This will also help create and maintain an air tight seal in the joins.  Onto the second panel.

36. then the remaining panels
I used two panels because they were recycled and not very big, obviously one panel would be better.


39. ensure plenty of filler sealing the edges

Use sealant around the edges and secure the panel with washer screws if needed.  Then start covering the remaining surfaces with sound treatment foam-boards.

40. Place and stick acoustic boards on the panels
Placing soundproofing boards on top of the plywood panelling.


Keep foam-boards well within the edges because we need to make sure that the lid will sit into the base.

41. Cover the entire area

Give yourself a pat on the back if you get this far, the lid is pretty much complete.  When the lid is placed onto the base later on, you might need to make adjustments but we’ll come back to that later on.

Completing the soundproof box base

Now back to the base… it currently should look like this but with the glue hardened.

2. Glue the edges with a strong wood glue
Outer Box / Chamber

Next, take some more of the acoustic matting used earlier and place a layer in the bottom of the box.  Give plenty of glue. Placing the matting on the base will help to prevent reverberation of bottom end through the base of the box.

The Inner chamber

Earlier, I mentioned the construction of the outer and inner chamber.  There are probably better terms but what we are making is a box in box and in-between the boxes will be a layer of tightly fitted thick rock-wool insulation.  Lucky for me, at the time of building my box, there was an office renovation and there was plenty of rock wool insulation up for grabs.  So I recycled some thick panels, like shown below.  If you are recycling some too, avoid the broken ones if you can or buy a roll from the DIY/Builders shop and chop it into shape.

42. Get thick rock insulation

Take the rock wool panels and place into the box base and plan the construction .  You’ll need to use plywood panels to create the inner box and ensure the rook wool is firmly pressed – reducing the air as much as possible in the void.

43. Pad the edges of the box and place wood sheets use long screws and glue into position

You’ll see from the picture above that I’ve used plywood no more than half the thickness of the outer box and some chipboard.  I recommend using plywood for the entire inside but I ran out of lengths since I was recycling materials.

Use some long washer screws to hold the inner box panels into place and ensure the panels are pressing the rock wool firmly.  You’ll notice that I created and placed a wooden cover ‘s too (shown on the two left and right sides).  This part I guess is optional but I recommend it to give a better finished job and might help reduce the reverberation.

Then do the same for the floor (base) as shown below, cut the plywood panels to size and place rock wool underneath.

44. secure panels with screws and use sealant

45. This will form the chamber

You can add some more insulation if you have some left and/or the space.

Then get the sealant out and run sealant in all of the gaps and lines in the box. Seal all the gaps and ensure enough is applied to seal.

Suspending the compressor.

To stop vibrations, reverberation and external rattles, I placed some more soundproof tiling  (if I’m honest, I would have covered the entire inside of the box but I had run out of tiles – possibly could have reduce a few more db’s).

Anyway, in addition to this, I placed some hooks and installed bungee cords. The idea is to suspend the compressor rather let it rest on the surface of the box.  This means I can get my hands underneath it to drain it and to prevent vibrations.

46. Add hocks and install bungee chords to support compressor

Then, place the compressor.

47. Try your compressor for size

EDIT: At the time of building, I couldn’t find strong springs but then I found some at a recycling centre strong enough to suspend the compressor in the box.  I’ll now replace the bungee cords with these springs.

Plug everything in and make sure the box is clean from dust, wood, fibres, etc.  The next job will be adding a layer of seal material to the box edges and placing the lid.

Seals, Placing Lid and Adjusting

I hold the box together by using two ratchet straps and fasten them tightly.  The seal between the lid and base is a from a roll of plumbing heat insulation tap.  One side is super sticky.

Before applying the seal tape, run a router on the edges of the box, I still think this is worth doing. Keeping the outer box air tight is optimal.

48. Use this insulation tape to finish the edges


Cut up and apply some to the box.  Use a Stanley knife to get the correct cutting and finish.

49. like so and cut excess with a knife

Once this has been done, place the lid and lets hope it all fits together ;o).

The main problem that I had found was that I had to adjust the large panel (with several holes) in the lid to fit between the inner box and the soundproof tiles which were obstructing.  A little bit of chopping and adjusting here and there and I got a good fit.

50. Plug everything into compressor and place the lid on top, cut parts of wood away to get the lid to fit

I placed the box onto some temporary wooden blocks but I’d to install some castors one day.

So, there you are! I hope you found the post useful!

Now I can get onto painting some bikes!

https://www.facebook.com/fillari.helsinki