DIY Soundproof box for noisy air compressors

I have a 1.5 horsepower air compressor and it’s noisy, about 95db…

…and here’s how I solved the problem.

I built a soundproof box for it.

What it looks like finished. The orange straps keep it together sealed.
This is what my design of an  air compressor soundproof box looks like finished. The orange straps keep it together tight and it’s placed upon wooden blocks until I get some decent castor wheels.

To be honest, when I was designing and building the box, I had some fears that it wouldn’t be very effective – for example, the compressor I have is simply noisy and there wouldn’t be anything I could do about it.

Saying that, I soldered on and with a bit of science and thought into the design, things worked out and here’s the results.

Daytime ambient workshop noise 40-50db.

Compressor running (no box or soundproofing) –
about 90-95db.

Compressor running in my box –
about 70 db.

My box design reduces compressor noise and dampens frequency ranges roughly by 30db.  Enough to be able to  talk, converse and hear the radio playing whilst it is running.

and… I’m no longer worried at least for the neighbours sake!!

soundproof-box-for-air-compressor
Here’s basically how the compressor soundproofing box works

I realise the design isn’t absolutely 100% perfect and there are some improvements to be made but it’s a good first build on the project and I am very pleased with the results- after all, I didn’t spend that much on the materials required for building it; just my time,  supplies and some recycled wood.

There is no heat ventilation but that’s not important in my case because I use the compressor sparingly.  It’s pumps at least 4-5 times from empty and it gets warm inside but it’s no way too hot to cause any problems. If I was to make an improvement to the design, I’d make another dampened outlet for hot air, the other thing would be to have some kind of cooling device inside.

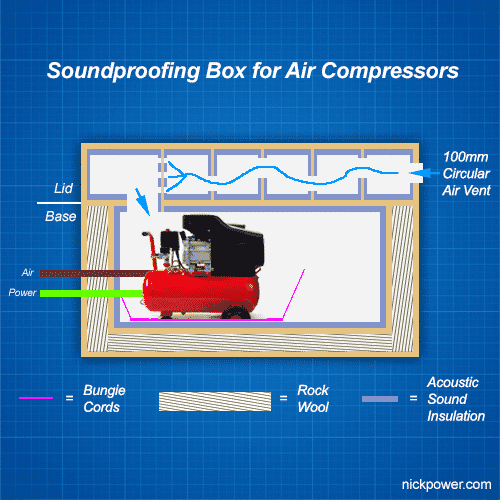
My main aims for the soundproofing box was:

  • Have an outer box structure containing an inner chamber to hold the compressor.  On top of this will be a lid that has a muffler style channel allows the movement of air.
  • Outer box is ‘air tight’ using glue and sealant to prevent sound travel and leaks.  Additional to this the inner box is ‘air tight’ to reduce sound travel into the void between the outer and inner chamber.  The void is stuffed tight with rock wool cavity.
  • Sound treatment foam boards used where possible to minimise mid and high range frequencies.
  • Rock wool used to reduce bottom and mid range and reverberation in the box.
  • All chambers independently sealed to isolate sound.
  • Air compressor is suspended using bungee cords (prevents vibration and reverberating), although I found some nice bed springs that I might install to replace.
  • Air compressor pulls air in through a purpose built complicated air path, works similar to a exhaust car muffler.

Anyway, so here’s how it’s done:

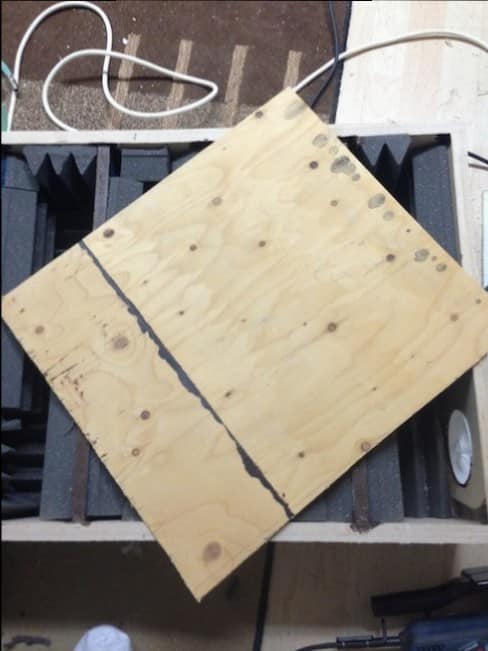
Cut and prepare four pieces of 3/4 inch (~1.9cm) thick plywood.

1. Prepare four equal measure of plywood
Here are the full-size square frame plywood sheets. Cut with a straight saw or perhaps get your DIY store to prepare them for you so you have four pieces.

Thicker the sheets the better but bear in mind the weight – it gets heavy…   You need two pieces of same length, then another two pieces of same height to create the rectangular design or you can choose the same metrics for all pieces to create a sqaure, it’s up to you but I didn’t want the box getting to big in my workshop!  The width should be the same for all pieces.

Just bear in mind we’ll be cutting a lid from this.

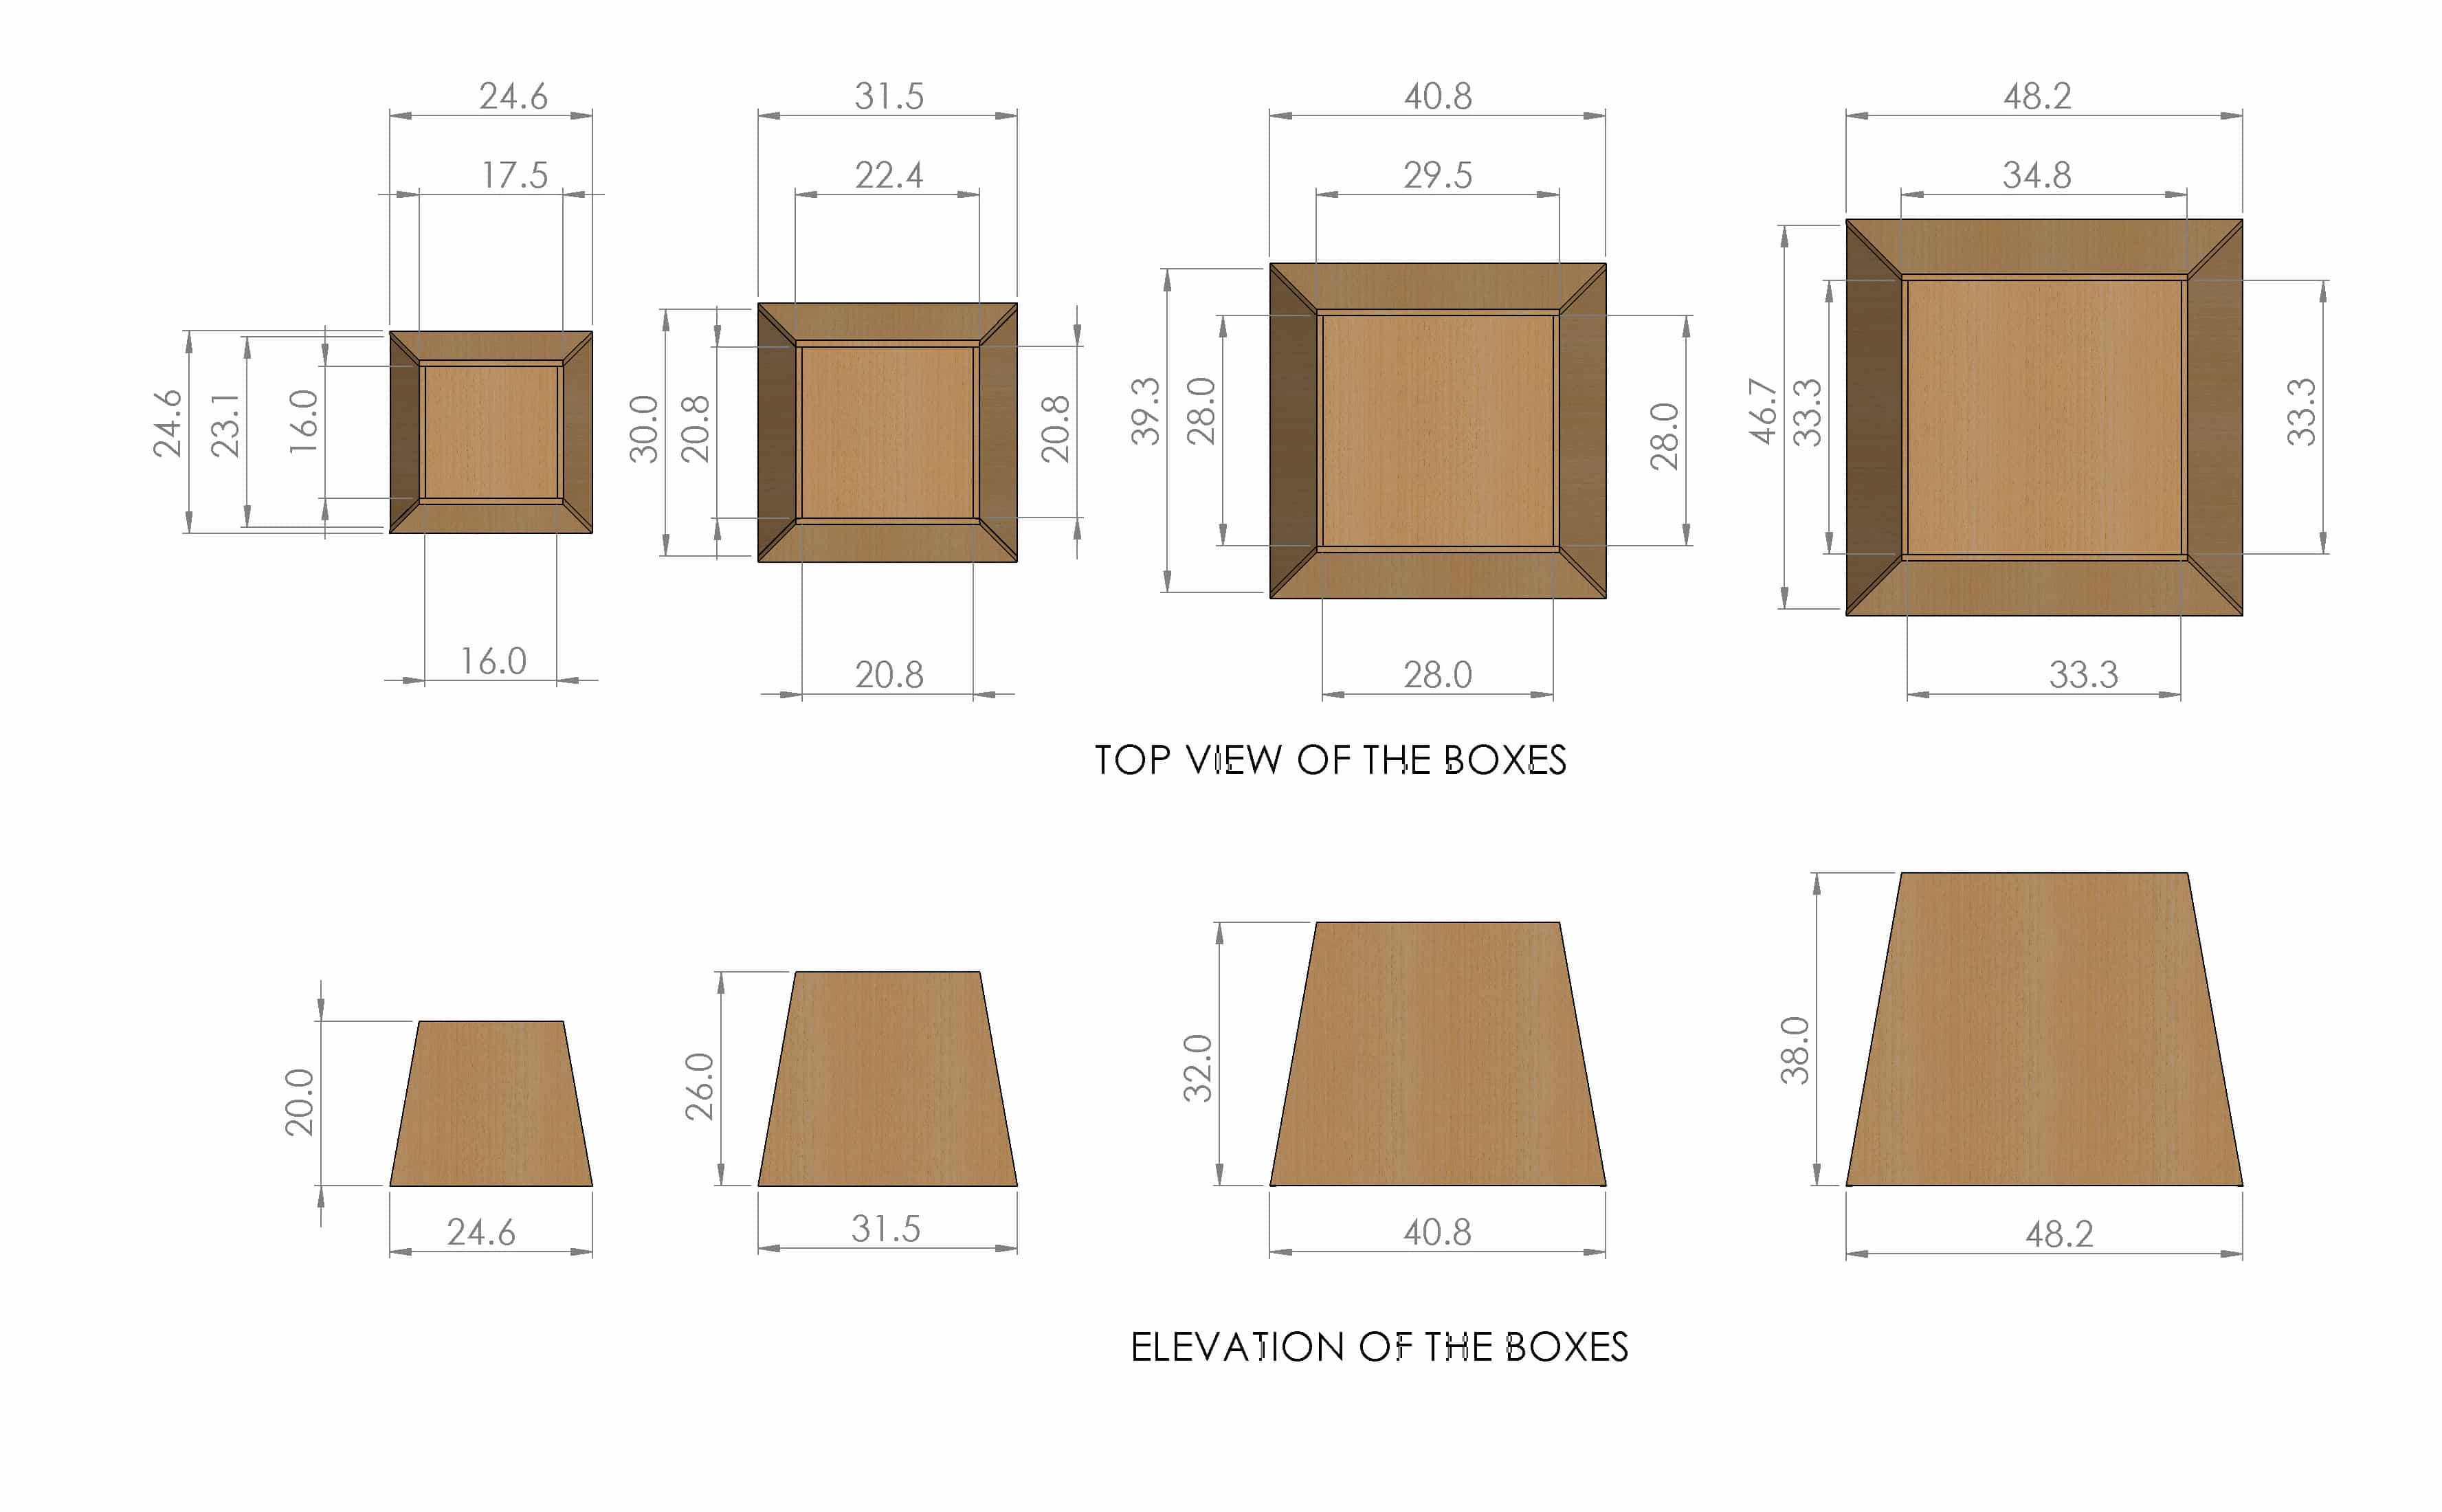
The study and measuring

I can’t really tell you exact measurements, you will need to decide exactly how long the pieces are, the measurements are based on the height and width of your compressor + 20-30% and give allowance of space between the machine and surrounding wooden panels.

The 20-30% is the allowance to cut a lid.

Remember to subtract the thickness of the panels from the height if you want the box to be perfectly square, otherwise cheat and use a router!

Here’s one example of working out the box dimensions.

http://www.wikihow.com/Image:Build-Plyo-Boxes-Step-3.jpg
Image from: http://www.wikihow.com/Image:Build-Plyo-Boxes-Step-3.jpg

In addition to the four pieces, you obviously need two side panels to complete the box.

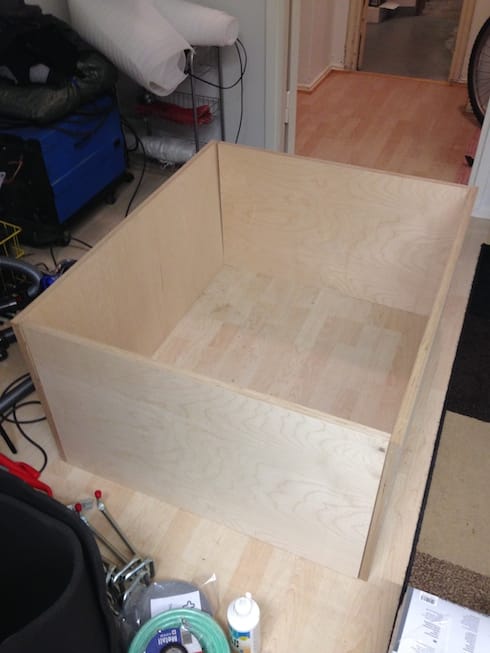
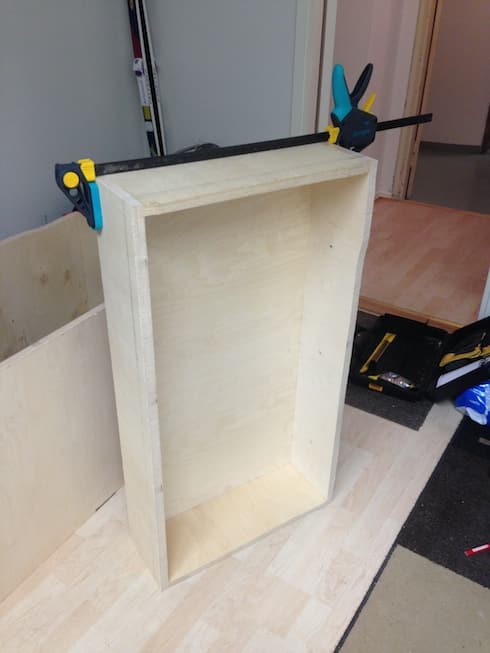
Start glueing the panels to form the box

You can lay one side on the floor, then start glueing everything together, only do one side for now and use a  super strong wood glue.

To be honest, any standard or strong wood glue should work a treat, I used a ‘strong’ wood glue.  Leave the glue for a good 24 hours.

2. Glue the edges with a strong wood glue
So in the picture you’ll see I’ve laid a side on the floor and glued the side panels together standing up on the side. I’ll do the other side later on.
3. Assemble and hold together with a clamp
If you can get hold of a clamp, use it to prevent anything moving or slipping until fully dried.

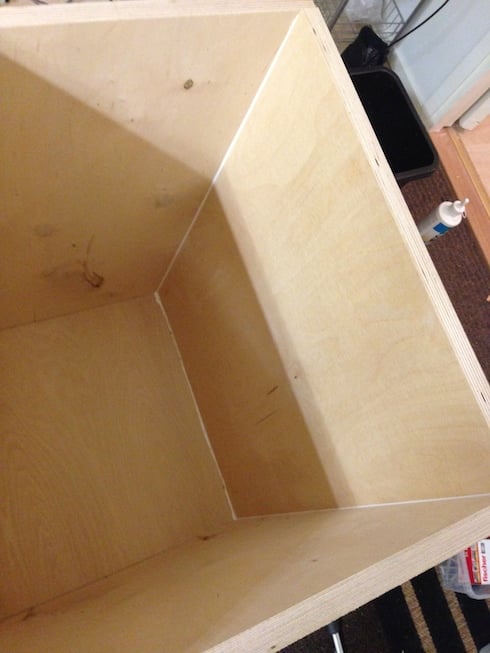
Once the glue has dried, check everything. Make sure there are no gaps – we  obviously want this to be integral as much as possible.

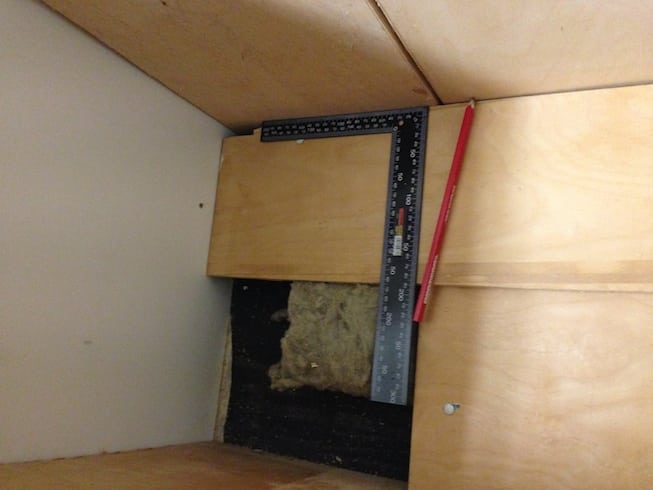
Cut the box to create a lid

Moving on, it’s time to cut the lid.  Check your measurements and make sure you give enough room for your compressor.  I was aiming to have a 100mm vent path in the side, so I know straight away, I’d need at least say… 150-200mm height in the lid.

4. Now cut 20 percent from the top
Cut the lid with a straight circular saw or use a jigsaw.

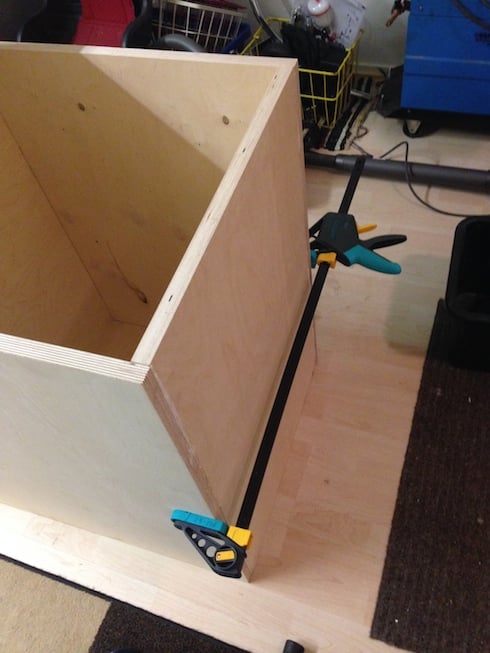
Glue the second side panel to the lid.

Now it’s time to glue the other side panel.

6. Glue the lid to the inside and clamp until dryGlue, clamp, put it aside for 24 hours.

When the glue has dried, you can use a router if you have one to straighten the edges of the box so that when the lid is placed onto the box on finish, you have a nice straight fit without any gaps.

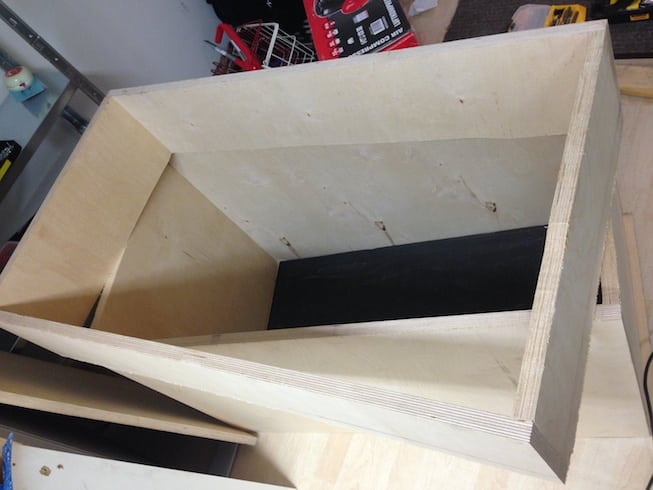
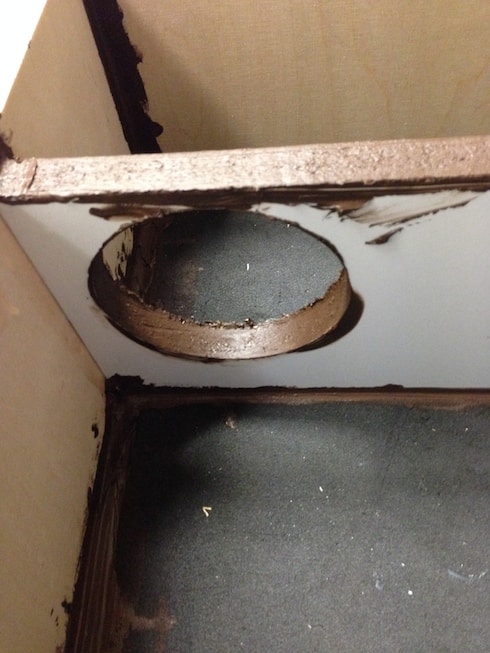
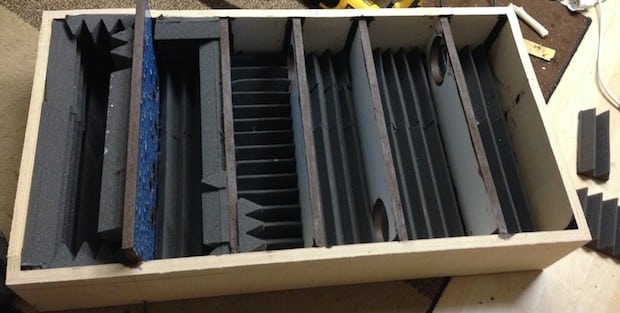
The lid and air vent passage

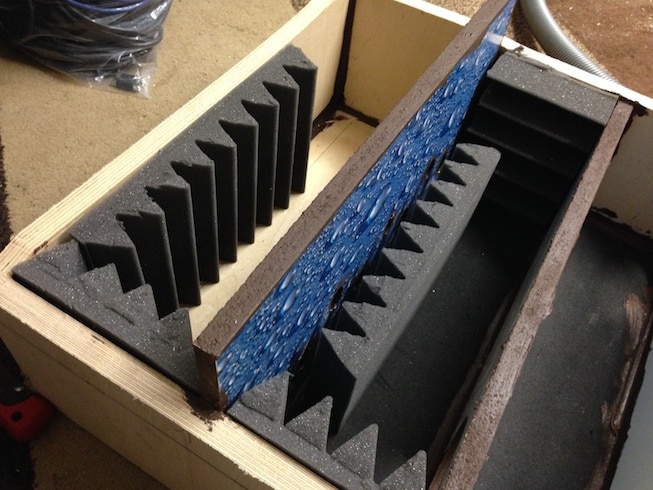
Take a little effort and time to complete this part of the box project. The picture shows the insides of the box and this is what we want to achieve.

Soundproof box lid for air compressor
Here’s the lid just before completion, it shows you the air path. The blue panel is taller than the others and is a part with several small holes instead of one 100mm hole, you’ll see later on what I mean.

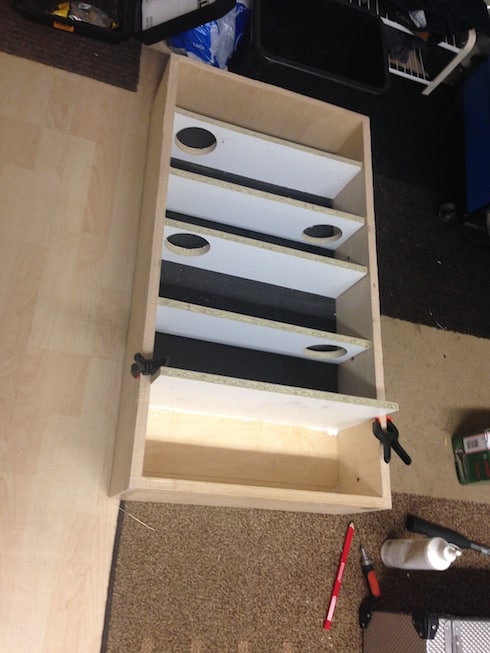
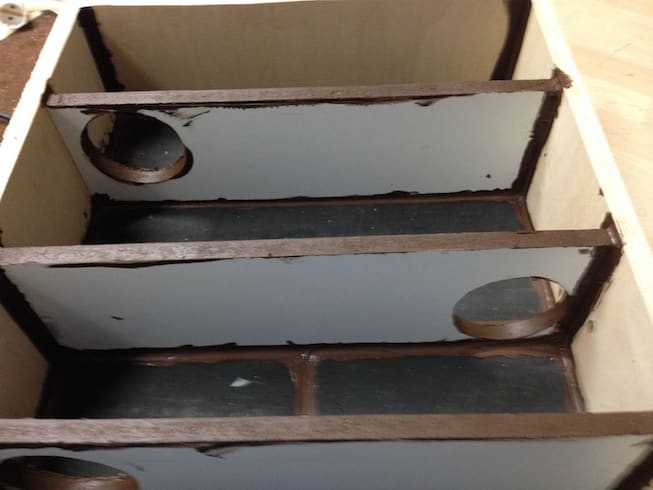
Take the lid and install 5 pieces of wood

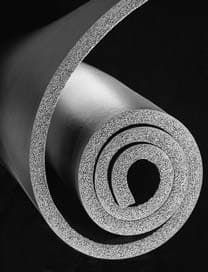
The first thing we need to do is install some thick insulating mat to the lid.  The type of thing you’d expect to be uesd as a gym exercise mat.  This will add some extra sound treatment to the lid before we start installing the 5 panels needed to make up the air path.

sound insulating mat
Cut and install some soundproof mat to the lid.


A quick note: to seal the lid air path effectively, we’ll use panels (mine were about 1/6 inch 4mm), so make sure you give enough for the panels to lie over the passage and meet the edge of the plywood square.  It doesn’t have to be completely spot on since we’ll seal it with sealant but the closer the better.

Panels
One panel on the left installed and another being prepared. I used two because I simply recycled a couple of spares in the workshop but you could measure and cut one length.

The first thing to do is to cut 5 equal pieces of wood that fit inside the length and height of the lid.

Measure up and cut, remember one piece needs to be wider than the others, that piece marks the end of the passage – that part’s role will become clearer to you as we continue on…

Anyway, cut away and try them for size.

7. Measure and cut 5 pieces of wood
Sound mat has been installed and glued but I didn’t have enough for the hole box since my piece was recycled but now trying out the panels.

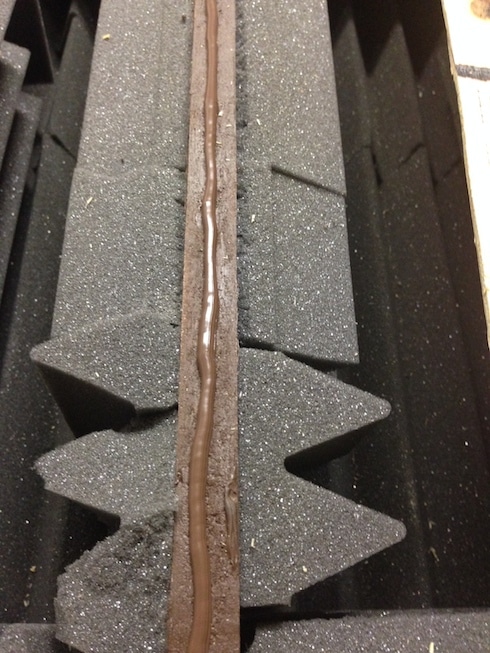
Then when you are happy, drill 100mm holes in the panels and begin to glue them into place.  The bigger panel needs to have several smaller holes, I drilled 7 smaller holes (not shown in this picture but further down).

8. Glue the insulating mat and cut holes then glue

When the glue has hardened, start applying sealant to all edges and holes in the lid.

9. When dried rub a filler around wood and all corners

Any good quality sealant is good, the one I used was an outdoor weather proof used for sealing gaps between doors and windows to brickwork.  There are acoustic sealants but the stuff I used here is still very effective and cheaply available.  It’s very flexible too even when dried and not messy or nasty to work with.

10. Should look like this

Here’s the seven holes I mentioned earlier, drill several small holes here.

11. Drill small holes in the big piece

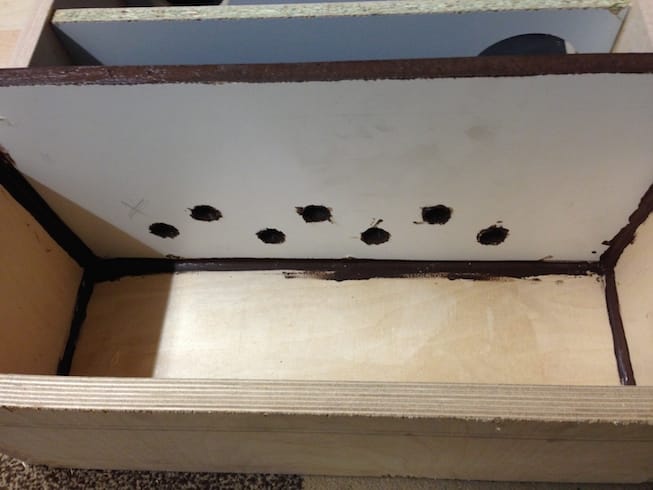
Get in every crook and cranny.  There needs to be a good seal here.

12. Looks like this

Once this is done, we are ready to start applying the sound treatment boards.

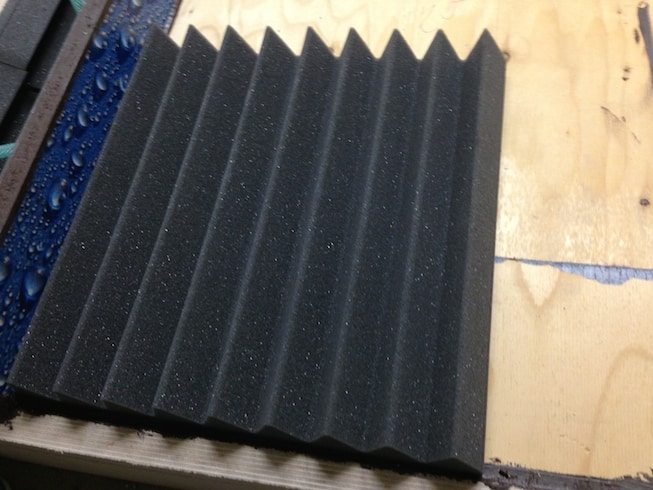
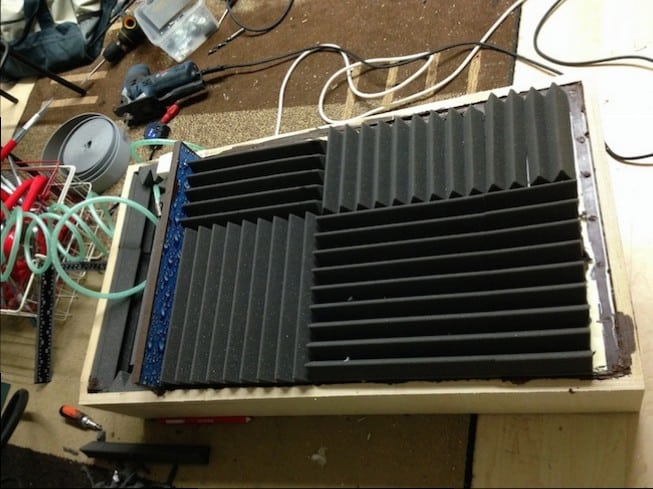
Installing the sound treatment boards

Sound treatment boards are easily available from the internet and I ordered a large box of tiles, about 30 of them.

13. Get treatment boards like this
Here’s a couple of sound treatment boards

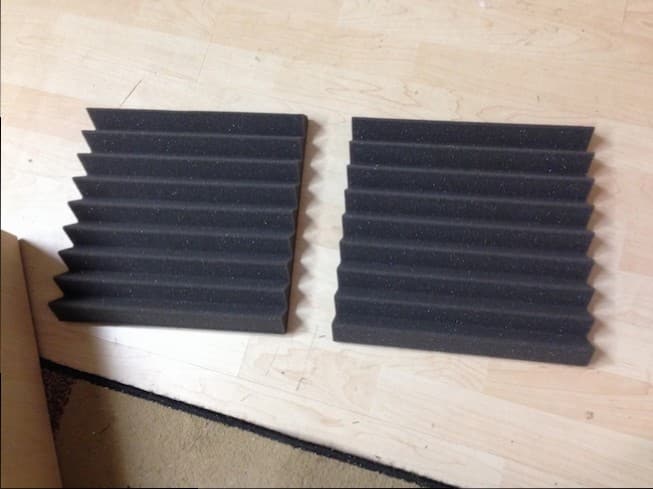
To install these to the lid, we’ll need to cut some up.  It’s a time consuming process but the most significant and important part of the lid.

My dog is trying to tell me something….

14. My pincher wants to go she is bored

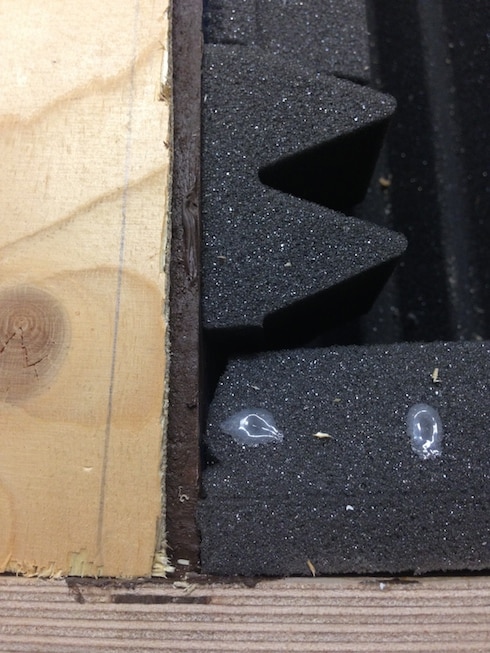
Crack on with the measuring and cutting, every panel needs to be covered but don’t obstruct the 100mm air path and several holes. Panels can be applied to all visible sides.

16. sides too

15. install sound boards everywhere
Use a standard glue that will grip

17. air must be able to pass

If you are wondering what the water droplets are all about, the panels are recycled chipboard shelves from a local corner shop which was being renovated and had been used I believe to be as shelving for refreshments in their previous life.

18. getting there

Once you have finished cutting and adding the soundboards, a 100mm hole needs to be drilled with a hole saw at the end of the path.  Then add a vent guard if you wish!
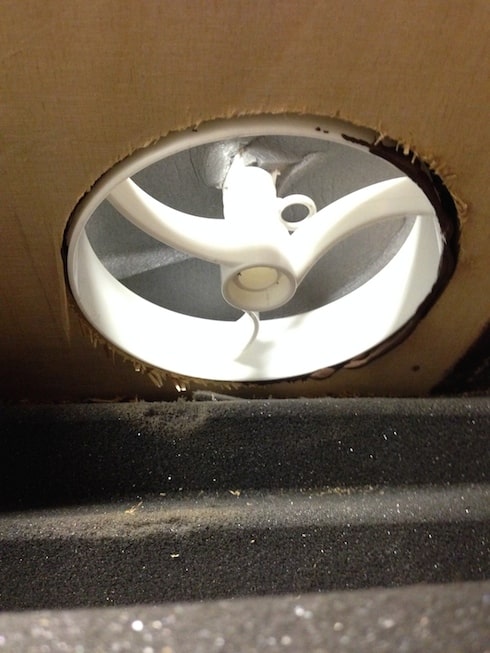
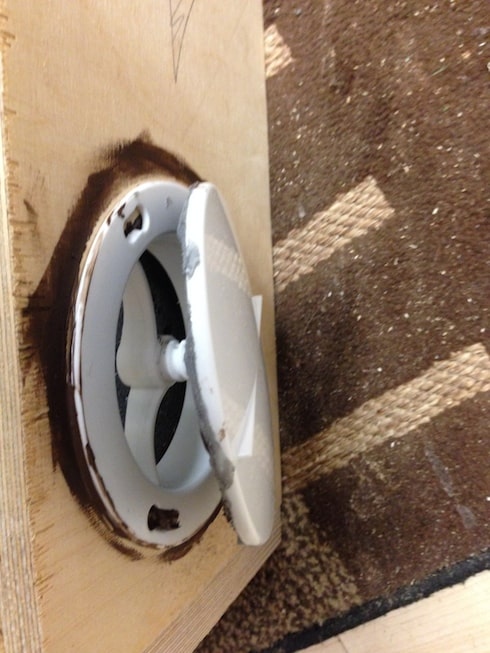
19. drill a 100mm hole at the end of the channel

20. grab a vent guard if you like
Sealant or screws hold the vent in place


21. then install a vent cover
This vent came with an adjustable cover although it wont really make much difference and it will always be open.

…and here it is.

22. neary done


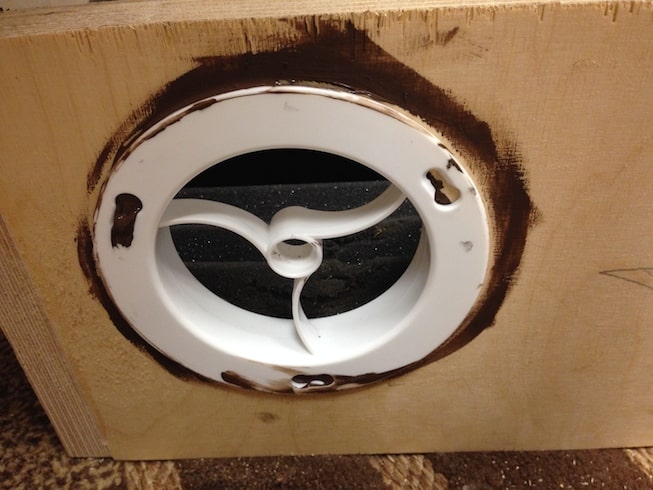
You’ll need to decide if you want the holes for compressed air and power in the lid or the base.  At some point, drill two holes for air and power.

23. Drill two holes for air and power


26. fasten and seal with rubber filler

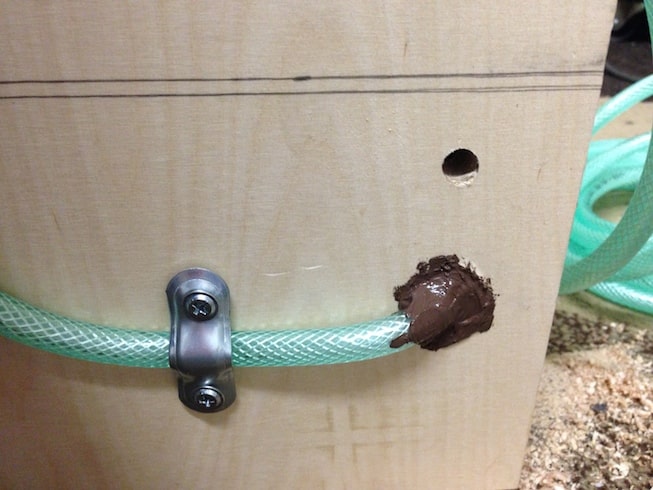
Install and secure and apply the suspicious looking brown sealant.

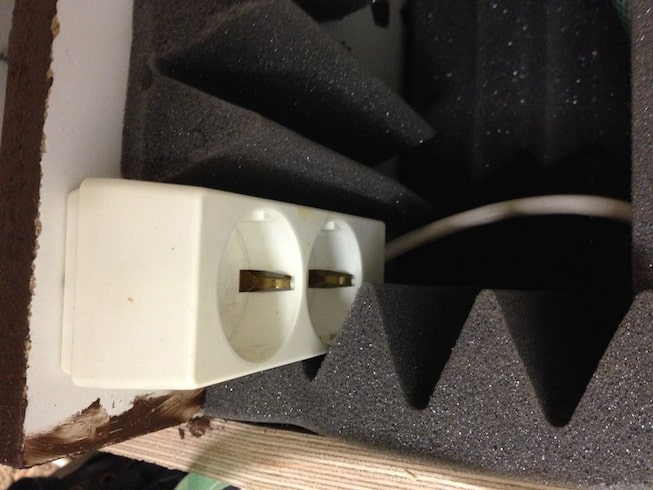
For the power, I used a recycled power extension.

27. do the same for power

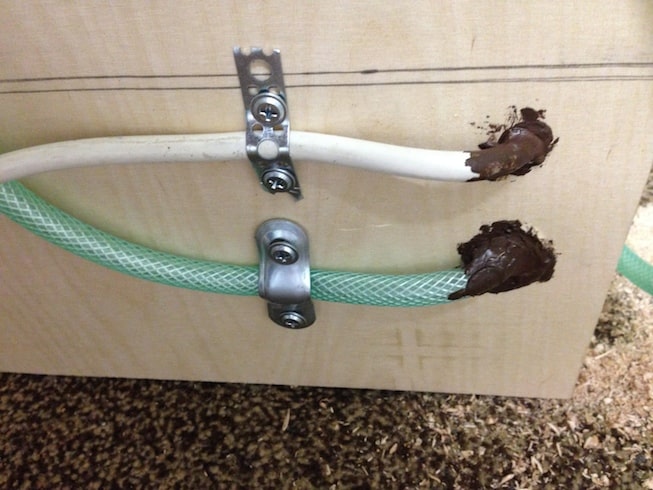
Mounting a power extension inside.  I decided to add the Power and Air holes into the lid.  I just designed it this way, probably would have been better to make the holes in the lid side wall but there you go!
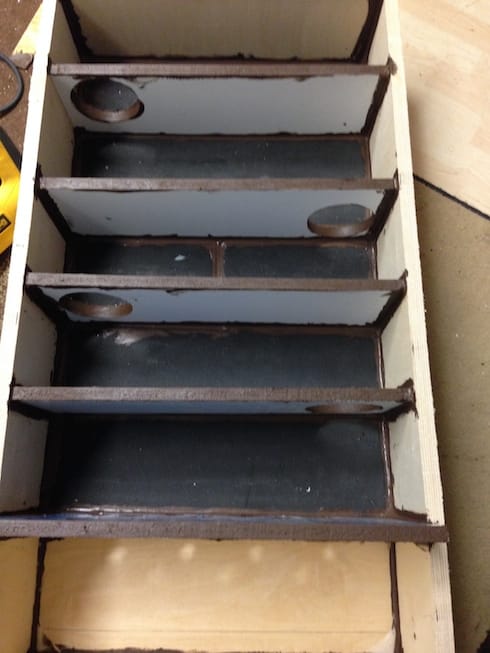
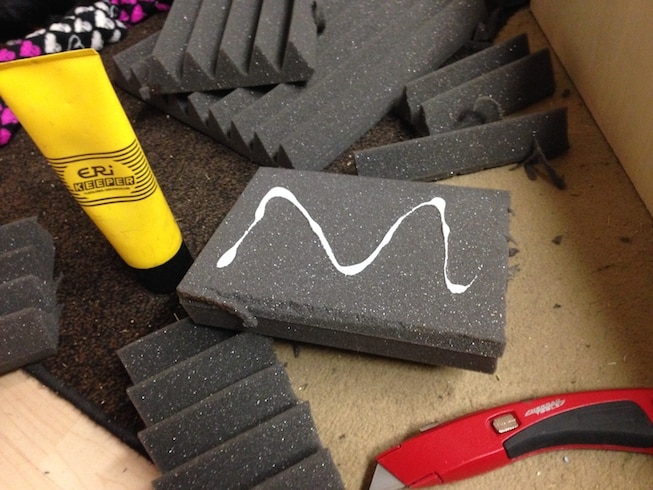
28. Mount internal power extension block

 Securing the panels

Now it’s time to measure some panels and secure them to the top of the air passage. This is some thin plywood.

29. Measure and cut a plywood panel to cover the lid

31. Cut and check they fit

To secure the panels, I used a line of sealant on each panel. I will position and placed the panel half way across the beams.

34. use sealant on each row

as so

32. If using multiple panels allow surface area for two panels on join

Then secure with washer screws.  This will also help create and maintain an air tight seal in the joins.  Onto the second panel.

36. then the remaining panels
I used two panels because they were recycled and not very big, obviously one panel would be better.


39. ensure plenty of filler sealing the edges

Use sealant around the edges and secure the panel with washer screws if needed.  Then start covering the remaining surfaces with sound treatment foam-boards.

40. Place and stick acoustic boards on the panels
Placing soundproofing boards on top of the plywood panelling.


Keep foam-boards well within the edges because we need to make sure that the lid will sit into the base.

41. Cover the entire area

Give yourself a pat on the back if you get this far, the lid is pretty much complete.  When the lid is placed onto the base later on, you might need to make adjustments but we’ll come back to that later on.

Completing the soundproof box base

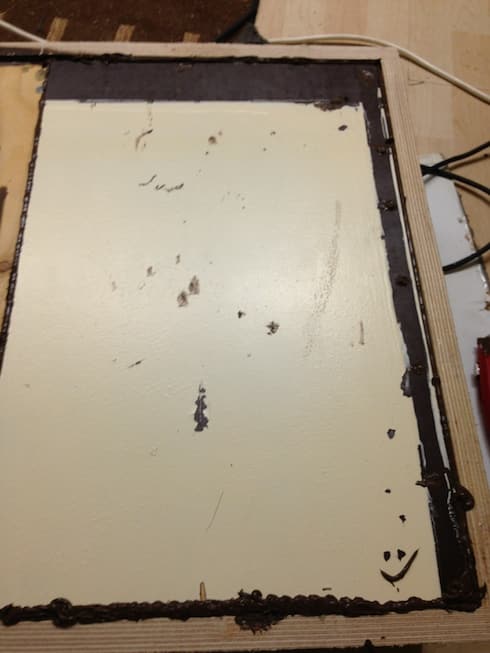
Now back to the base… it currently should look like this but with the glue hardened.

2. Glue the edges with a strong wood glue
Outer Box / Chamber

Next, take some more of the acoustic matting used earlier and place a layer in the bottom of the box.  Give plenty of glue. Placing the matting on the base will help to prevent reverberation of bottom end through the base of the box.
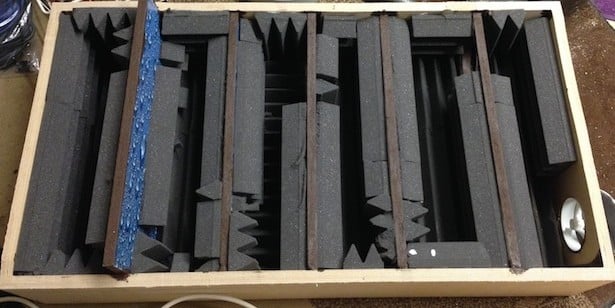
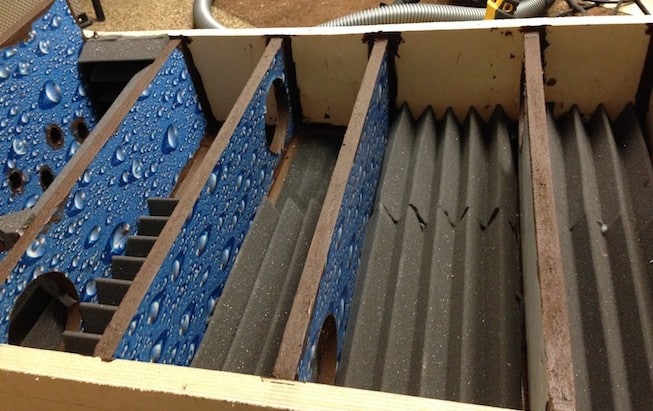
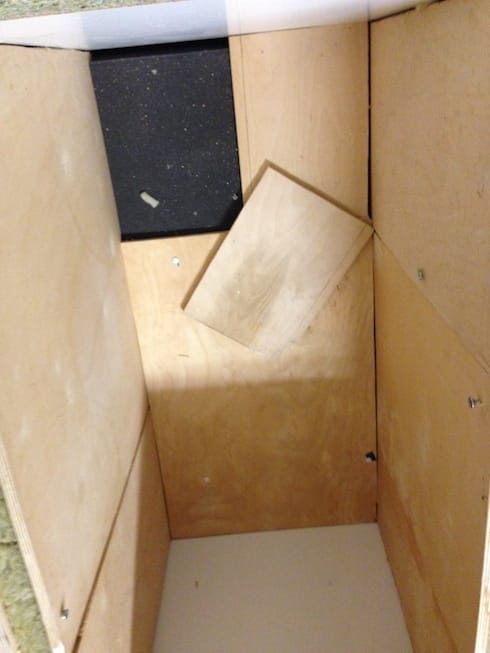
The Inner chamber

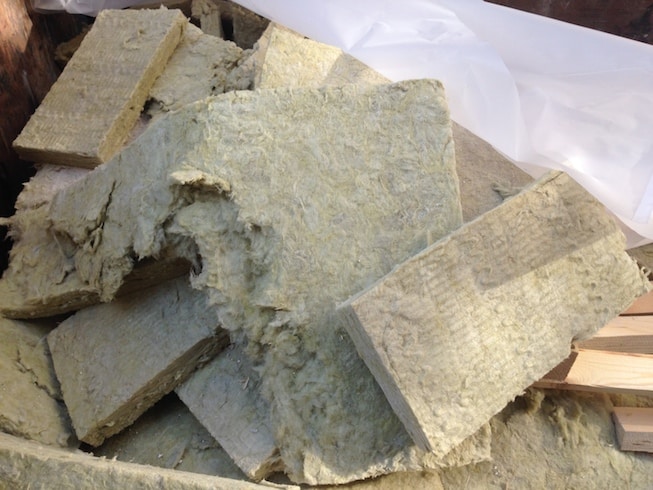
Earlier, I mentioned the construction of the outer and inner chamber.  There are probably better terms but what we are making is a box in box and in-between the boxes will be a layer of tightly fitted thick rock-wool insulation.  Lucky for me, at the time of building my box, there was an office renovation and there was plenty of rock wool insulation up for grabs.  So I recycled some thick panels, like shown below.  If you are recycling some too, avoid the broken ones if you can or buy a roll from the DIY/Builders shop and chop it into shape.

42. Get thick rock insulation

Take the rock wool panels and place into the box base and plan the construction .  You’ll need to use plywood panels to create the inner box and ensure the rook wool is firmly pressed – reducing the air as much as possible in the void.

43. Pad the edges of the box and place wood sheets use long screws and glue into position

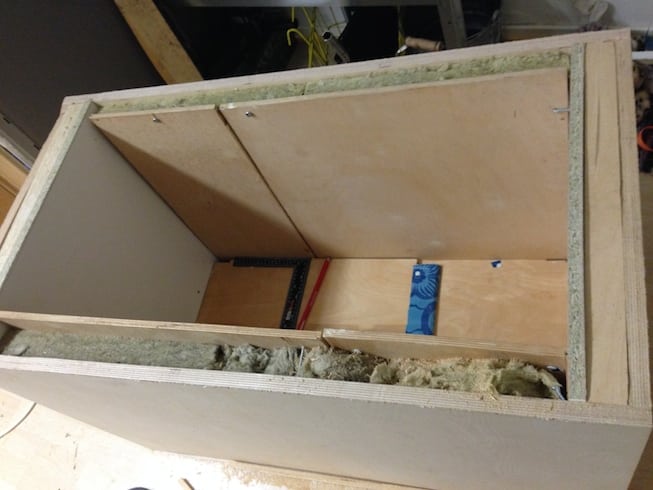
You’ll see from the picture above that I’ve used plywood no more than half the thickness of the outer box and some chipboard.  I recommend using plywood for the entire inside but I ran out of lengths since I was recycling materials.

Use some long washer screws to hold the inner box panels into place and ensure the panels are pressing the rock wool firmly.  You’ll notice that I created and placed a wooden cover ‘s too (shown on the two left and right sides).  This part I guess is optional but I recommend it to give a better finished job and might help reduce the reverberation.

Then do the same for the floor (base) as shown below, cut the plywood panels to size and place rock wool underneath.

44. secure panels with screws and use sealant

45. This will form the chamber

You can add some more insulation if you have some left and/or the space.

Then get the sealant out and run sealant in all of the gaps and lines in the box. Seal all the gaps and ensure enough is applied to seal.

Suspending the compressor.

To stop vibrations, reverberation and external rattles, I placed some more soundproof tiling  (if I’m honest, I would have covered the entire inside of the box but I had run out of tiles – possibly could have reduce a few more db’s).

Anyway, in addition to this, I placed some hooks and installed bungee cords. The idea is to suspend the compressor rather let it rest on the surface of the box.  This means I can get my hands underneath it to drain it and to prevent vibrations.

46. Add hocks and install bungee chords to support compressor

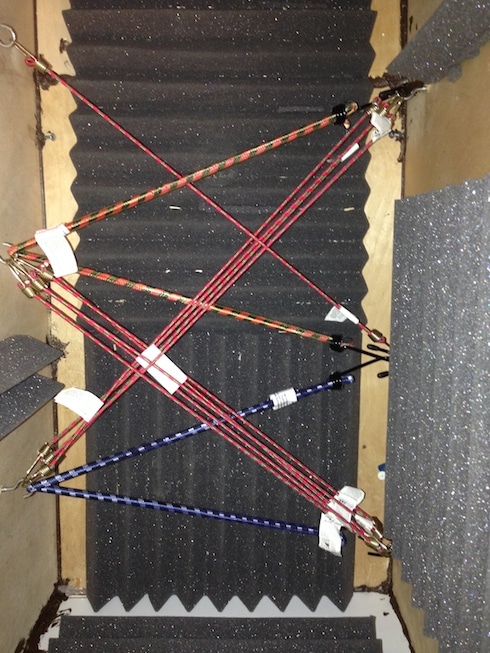
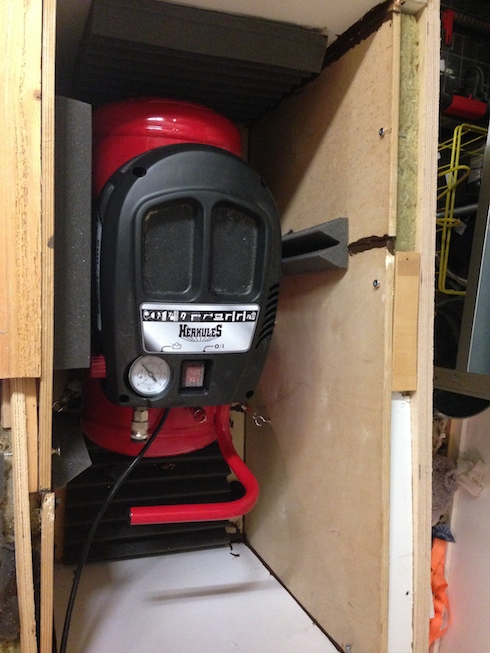
Then, place the compressor.

47. Try your compressor for size

EDIT: At the time of building, I couldn’t find strong springs but then I found some at a recycling centre strong enough to suspend the compressor in the box.  I’ll now replace the bungee cords with these springs.

Plug everything in and make sure the box is clean from dust, wood, fibres, etc.  The next job will be adding a layer of seal material to the box edges and placing the lid.

Seals, Placing Lid and Adjusting

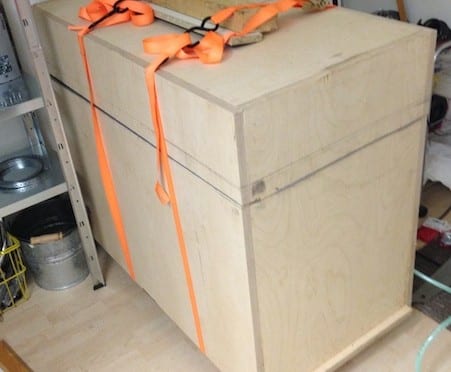
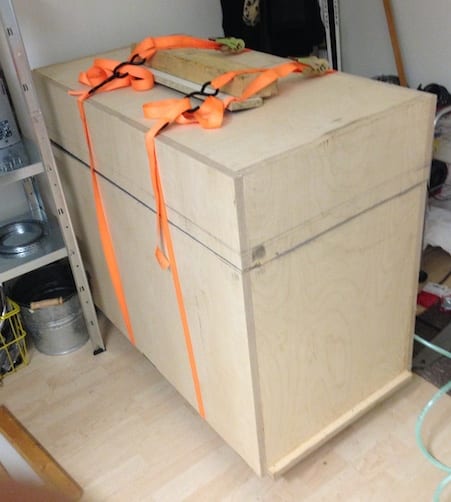
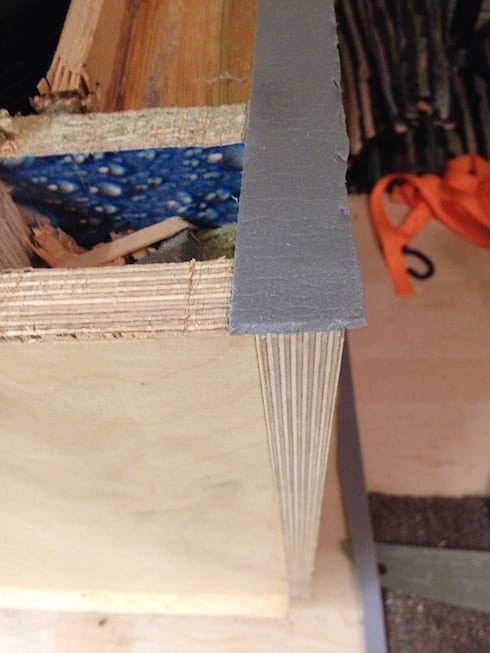
I hold the box together by using two ratchet straps and fasten them tightly.  The seal between the lid and base is a from a roll of plumbing heat insulation tap.  One side is super sticky.

Before applying the seal tape, run a router on the edges of the box, I still think this is worth doing. Keeping the outer box air tight is optimal.

48. Use this insulation tape to finish the edges


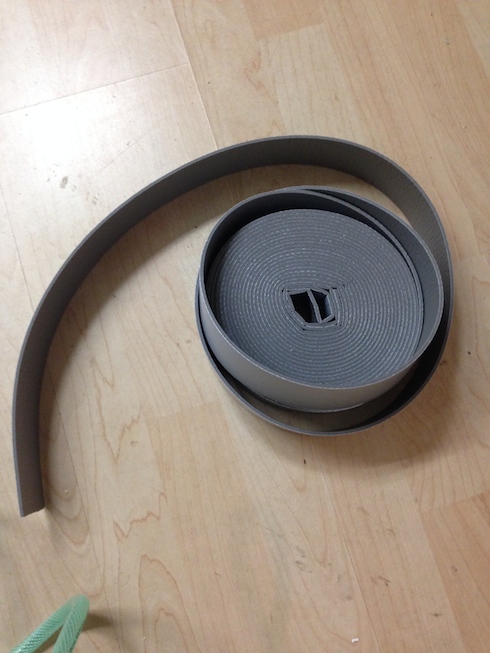
Cut up and apply some to the box.  Use a Stanley knife to get the correct cutting and finish.

49. like so and cut excess with a knife

Once this has been done, place the lid and lets hope it all fits together ;o).

The main problem that I had found was that I had to adjust the large panel (with several holes) in the lid to fit between the inner box and the soundproof tiles which were obstructing.  A little bit of chopping and adjusting here and there and I got a good fit.

50. Plug everything into compressor and place the lid on top, cut parts of wood away to get the lid to fit

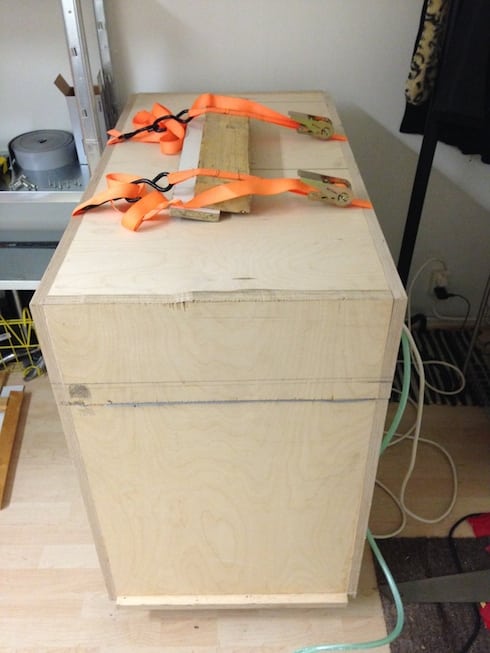
I placed the box onto some temporary wooden blocks but I’d to install some castors one day.

So, there you are! I hope you found the post useful!

Now I can get onto painting some bikes!

https://www.facebook.com/fillari.helsinki

34 responses to “DIY Soundproof box for noisy air compressors”

  1. I like this design. I made a sound box for my compressor 3 days ago using scrap wood as a tester. I never suspended my compressor like yours. I like the way you designed the lid. I have the same design where the air travels back and forth but I added a small separate box on top. When I remake mine using plywood, I’m gonna use that lid design. Not sure about my db levels, but it is working well.

    1. Thanks! The suspension idea is quite effective, recommend it – I managed to get my hands on some old bed springs the other day, I suspect these will support the compressor a little better and for longer since I am not sure how long the rubber will last on those bungie cables. Good to hear you are able to reduce the db levels already 🙂

      1. wouldn´t it be effective too to get some rubber grommets from the automobile industry to mount the compressor on? or else, make a solid plywood base for the compressor, with holes along the 4 sides, to tie the bungees to the side wall, like an acrobat´s mat? Just thinking… I built a soundproof box for my vaccum cleaner, also with serpentine air outlet, and it works very well. Sound went down from 91db to 59db measured right alongside. You hear the air entering but not the cleaner itself.

        1. Agree, that’s a very good idea Marcus!

  2. Love your design…but the amount of time and money spent building this thing you could have bought a quieter compressor.

    1. 🙂 True enough – I had time (not much money), some old bits lying around that I could recycle- so the mad professor in me wanted to build something 🙂

      1. Thanks for sharing you great ideas

  3. How does it stand overheating?

    1. It gets hot in the box after a 30 mins of running, but for me I use the compressor in short bursts which has been absolutely fine. I did think of modifying the box with a 100mm tube, inline fan and hot air outlet which would be very easy to do.

  4. Why everyone keeps thinking acoustic panels will reduce noise is beyond me. They split frequencies to prevent distortion and bounce back. You can buy sound proofing, and this is for acoustics, not stopping noise. The box is doing all the work, foam pants are making the tone more correct! – woodwork, and I may try but with sound proofing instead.

    1. Let me know how you get on John! I’d be interested to see what results you get! I agree with your points but actually this is one reason why I used these materials, to work with the (low,mid,high) frequencies instead of attempting to just simply block sound. p.s I don’t claim to be an acoustics expert, just going by experience of being a bass player 😀

  5. ** GOOD WORK (lol my bad)

  6. […] a DIY soundproof box, gave me some inspiration to do some more DIY recycling projects.  And now I present to you a DIY […]

  7. So John you think dynomat or some other sound deadening material would be a better alternative to foam tiles? My compressor is vertical, so I am thinking a box design that sits over my compressor and seals around the bottom on a high density PVC foam mat. Compressor is up top so vents can be at the lower extremes for further sound path baffling.

  8. Sorry, but there is one fault: The screws. They will get the Noise outside. Whitout them maybe you will have a silent box. That’ s a big Problem! Make a box like the outer, put it in without screws to the outer Box and it will work very fine.

    1. Good point! I agree, could be an improvement if I build another box or decide to modify. The inner box could definitely be made better (without screws and full length glued wooden plywood sheets) but on this occasion it was made using recycled plywood shelving. I’ll have to keep an eye out for some wood and give your suggestion a try and report back if it makes a improvement.

  9. Support the entire box on springs rather than casters or wood blocks. This should gain a few dB in sound suppression. currently the entire box is transferring vibration to your shop floor. If you reduce by 3 dB you cut the energy in half.

    1. That’s a good point, it does make a difference. Something as simple as rubber type sponge feet (similar to a gym mat material) underneath. Works well.

  10. Hi Nick Thanks for the great demo . I am a dentist and have one hell of a noisy industrial compressor in my office .and need to reduce the racket a little bit as I suffer from Tinitus .Your construction of a box with a multitude of materials I have never even heard of here in Africa seems only PhD folk would be able to assemble .I have some 1.5 cm. shutterboard and a brick wall on the one side . What simple sound reducing material can I glue over the surfaces to cut down on the volume . Hope to hear ( unless I am deaf by the time you answer) from you . Regards from Cape Town Reinhard

    1. You could probably make a simple cuboid with the shutterboard or even use garden fencing to make a cuboid. https://www.amazon.co.uk/Marko-Fencing-Coated-Panels-Square/dp/B01H5AKJ12/ref=sr_1_14?ie=UTF8&qid=1529049294&sr=8-14&keywords=square+mesh+garden Use something like cable ties or hinges to attach them together: Then line the cuboid with rubber matting: https://www.amazon.co.uk/etm%C2%AE-High-Density-Rubber-Vibration/dp/B01B51TZF8/ref=sr_1_9?ie=UTF8&qid=1529048991&sr=8-9&keywords=washing+machine+rubber+mat You can buy rubber matting like this on rolls too if you need bigger sizes. This material is easy to cut with a stanley blade for example. The garden mesh can also be purchased in squares typically. The fundamentals are that, you need to block the frequencies. The higher/mid range frequencies travel through air gaps very easily. So I’d roll the rubber mat around, secured by the fencing (Shutterboard) and add a base and lid. Neighbour of mine made this and was very effective.

  11. Can I purchase this? Do you know of anyone who can come to my office in Dana Point CA to soundproof the cabinet we have our compressor in?

    1. I could easily build one for you but logistics is a problem, I’m based in Finland!

  12. I will have to give this a shot. I have a 3 gallon pancake compressor, so my box will be a little more square, but a little taller. Another thought about your outer box is using pocket holes and screws that keep the screws inside the box, but really help with sealing. It is a little cold here in my garage so it will be a couple of months, but I will try it and let you know how it works, also I am going to use sound proofing to try and get to a 30db range. I never would have thought of suspending the compressor, also I think I will add a 80 to 100mm exhaust fan and a hole to add a tube to let the air/moisture from the drain valve.

    1. Sounds great Ben! Good luck with your invention 🙂 And equally interested to see the creation. I agree, ventilation / exhaust is a great idea to avoid overheating too.

  13. A DIYer like me always finds this type of project very exciting. I have never thought a noisy compressor can be soundproofed by putting it into a box. However proper alignment and tightened parts can also made the compressor noise-free. If I finish this project with my own then I will comment again with proper steps. Wish me luck.

    1. Good luck with your project Perez! Drop me a line with some pics 🙂

  14. That is a really nice job Nick. Thanks very much for posting it. I’ve been thinking about sound isolation on a similar project from a long time already, although with a different machine inside the box, but it seams to me that you easily became light years in front of me. I am reading and learning from you. From the critic side, I have some observations, that I’m not sure if it’s relevant. I guess you used glue instead of screws to hold the wooden plates of the outer box, because the rigid steel of the screws can theoretically conduct sound inside the wood. But I guess that, it would not be so relevant in that project, because the screws would be isolated inside the wood, and the wave sound mechanically conducing inside it is already strong for it to make much difference. As a matter of fact I guess MDF (medium fiber density) wood would have better acoustic isolation – in case you could use those instead. Also, suspending the compressor was just brilliant, but depending on the material of the tires, I guess it would be only necessary to suspend the front part of the compressor. If the tires are made of a very soft rubber and with air inside, than it can already be considered a suspension medium. So maybe only the front part would have to be suspended. That is in order to avoid metal from the compressor of directly touching the wood box. (It could be suspended with a spring or even rubber bellow it, but perhaps it wouldn’t be as effective as suspension from above it) I also question the effectiveness of the brown sealant, I know it prevents air from passing through the openings and also from penetrating the fibers in the wood but, in this project, would that make any difference? It is not hermetic, since it has air passing through the many filter chambers on the lid and, probably a lot more sound is passing through mechanical conduction between the boxes, and even passing through the rock wool, specially since the inner box seams to be connected to the outer box by using metal screws. Generally speaking, noise has to have 3 times more sound pressure for the human ear to notice. So in this kind of project I think there is a big relation of diminishing marginal returns. Meaning that a lot of work and energy we put into the details doesn’t end up making any difference at all in perceived sound suppression. In my project, I am considering using many of your ideas, but I am also thinking about spending some more to make the inside box out of ceramics (porcelanato, used on the floor don’t know how to say it in English). It has the same density as glass, so I guess it would be very effective to isolate sound, or at least if I can prevent it from directly touching the machine. By preventing it to touch the machine, I am talking about suspension, and about this suspension, I am thinking of simply using silicon rubber bellow it, but I don’t know if it is a good idea. I also have 6 relatively strong mini fans, which I am thinking of making some big chambers. Half conducing air inside, and half taking it to the outside. In case of the chambers with fans, I am thinking of making the lid very volumous, because since I would have fewer chambers (each needing a fan), I guess making them huge would help with sound dissipation. And since the lid would be huge, I am thinking about using lighter and cheaper materials in it. i also haven’t decided yet what to use bellow the ceramic floor, in the middle between the two boxes. I can put rock wool between the walls of the inner and outer box, but that would be on the sides, not in the floor. I just don’t know if i can put rock wool on the bottom, since I guess the weight of the machine, with the weight of the ceramic inner box, might compress the rock wool, diminishing its effectiveness… Anyway, thanks for posting your work Nick, it is making me think about many possibilities on my own project, and any suggestion about it would also be appreciated.

    1. Hey Paulo, Glad you found the post useful and inspriring! You have very good ideas.. screws You have a good point on that, could have built a better a floating inner sheel actually. MDF is probably better for stopping the frequencies the compressor produces. The answer is probably more scientific,i.e. different wood board types have better stopping qualities for different frequency ranges. Compressor was suspended using bugie cords, so the compressor was effectively suspended in mid air. Tyres removed. Brown sealant was to prevent higher frequencies leaking through air gaps and admittidly I went overboard and used it to seal other fixings (air vents, etc). The ceramic or harder material sounds like a fab idea, definitely worth figuring out a way to suspend the box with the extra weight. First thought is to use something like bed springs .. those could also be mounted with bolted rubber mounts to prevent passing of vibration. Good luck with your project and keep me posted!

  15. I wonder if you had done what I have done in making my compressor under 98 dBs by parting it from the Air tank and just making the compressor itself quieter. On it’s own it was reduced to about 30 dBs and now it is suspended on straps within old rubber tyres and these are stuffed with shredded rubber and rubber sheeting between the tyres, thereby making it a really quieter compressor, to let me blow my Air Horns. Even these small compressors that cost peanuts are REALLY LOUD. Why does the compressor have to be attached to the Air Tank. Surely a material could be found which is rigid enough to secure it safely but still allow it to operate quietly. You are all using rubber sheeting in some form or other to quieten it. Because it’s attached to a empty metal tank, you’re always going to get noise. My compressor is in my van and being metal the dB level was horrendous, I couldn’t drive with the noise and it made simple movements undriveable. Now the Air Tank is above the compressor, separate but still connected in every way necessary to complete it’s job.

    1. Now that’s a very good point. I know at the time, I was not confident enough to start separating or changing the pipes fittings etc .. but indeed, this a good idea totally! You could save the build costs by building a smaller box for the compressor piston assembly. High pressure hoses could even be used with couplings / fittings, etc..

  16. Amazing job definitely above and beyond on this one. Just one question. How do you drain your tank?

    1. Thanks! There’s a thumbscrew on the bottom of the tank, so the only thing I can do really is lift out the tank to drain.

Leave a Reply

Your email address will not be published. Required fields are marked *