
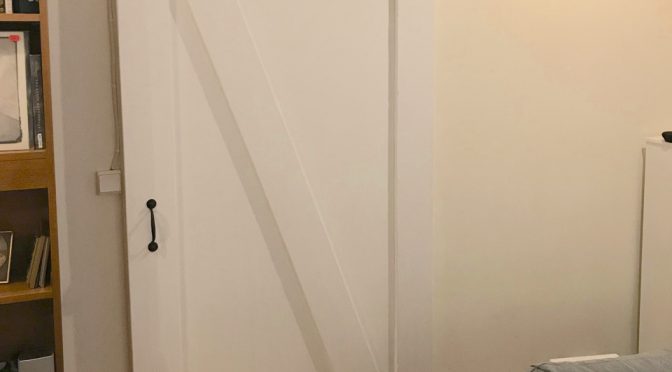
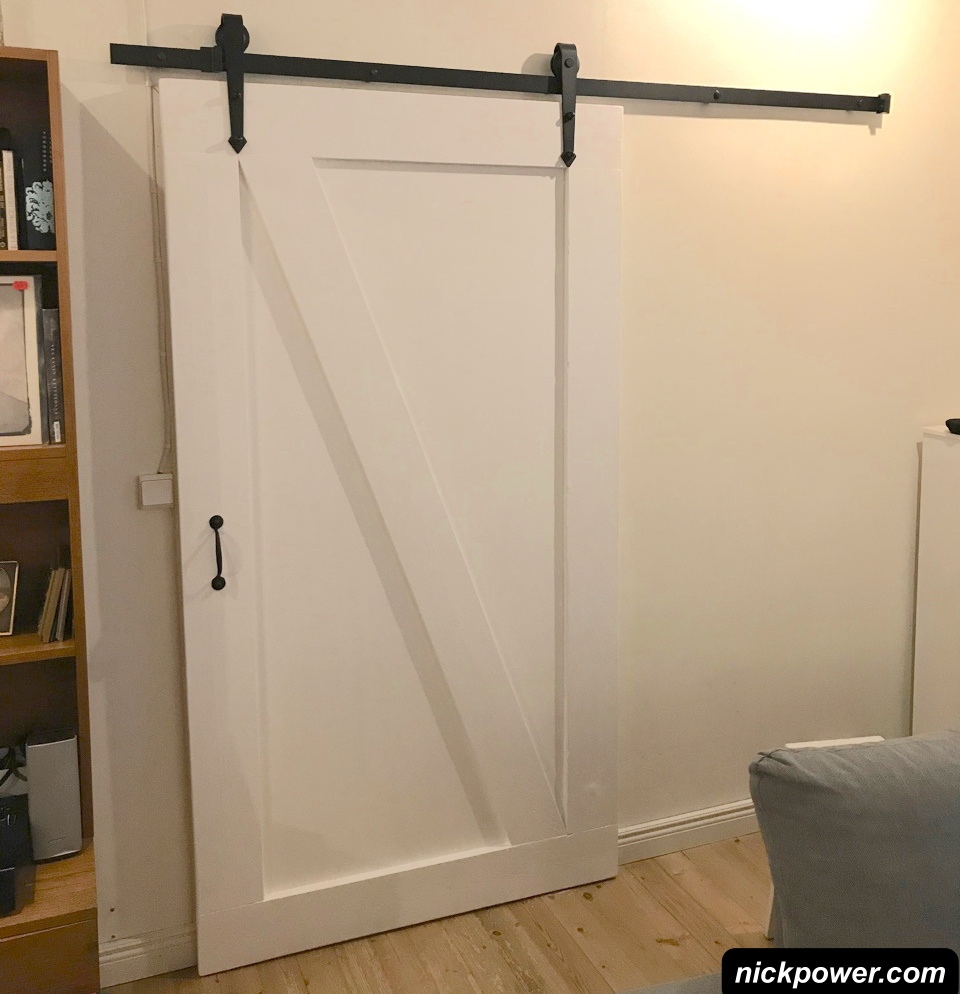
I wanted to add a sliding door to hide a hallway in my living room
As well as a decorative item adding character to the living room the sliding door will also act as a stair gate and add sound proofing properties. I wrote this guide to help you understand how your DIY sliding door project can be a success!

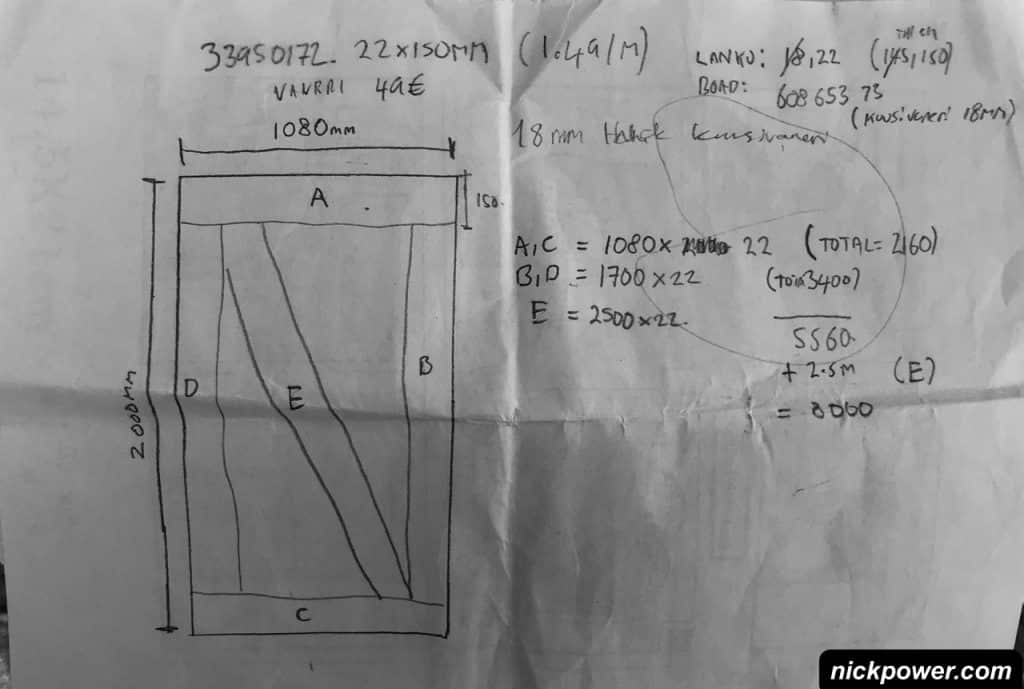
Before I jumped into building the door, I drew up some plans so I could understand the cost and materials needed. Feel free to steel my plan with pride! I went for a barn style door and tried to figure out how to achieve the design, by considering the ease of construction, the cost and quality of materials and additional benefits such as sound and fire proofing properties.
You can build a sliding door easily, cheaply and safely.
I realise there are a ton of designs on the internet and probably tons of ways to build sliding doors but I used DIY techniques that I knew I was relatively good at. I purchased materials that were cost effective and researched the sound absorption properties of those materials.
My main aims for the project were:
- Have a great looking design, clean simple and characteristic.
- 10-20db Sound absorption
- Easy to slide the door, especially for children
- Handles easy to grab onto and reachable by adults and children
- Door is safe to use and has limited possibility to demount
- Low cost, sustainable and durable materials
- Has basic fire protection capabilities
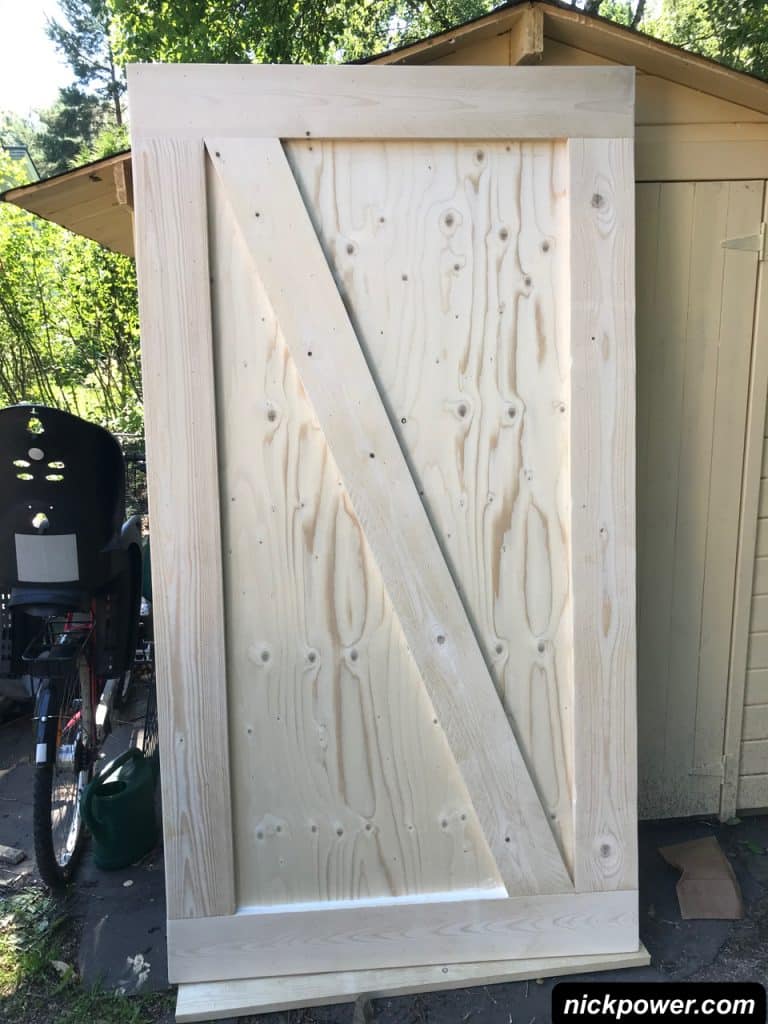
So, to summarise, I felt it would be a good idea to use wooden boards (planks) for the decorative effect and then one single piece of plywood to hold it all together. Looking around online for ideas I found a kit for hanging a barn style door.
I purchased the Kit through Wish but Amazon also offers some design variations of the kit, that you might like to consider.
What thickness should a sliding door be?
Cost was not the only thing, the brackets I chose to use to hang the door allow for no more than approx 45mm thickness. I figured this out by playing with the door kit and measuring it with a tape. Having a door too thick will mean the door bolts won’t fit the door and if you decide to use longer bolts, they might rub along the wall. So I suggest carefully choosing the thickness of the door in your plan and stick with it. The kit I purchased (link below), has bolts that could support 40-43mm quite comfortably. My door ended up being just shy of 40mm.
This kit can be found on: Amazon UK | Amazon US | Amazon DE | Amazon AU
Deciding the height and width of your sliding door
The height and width of the door was simply the height and width of the opening I wanted to cover + 40mm each side and 40mm on the height to block light and sound coming through the side of the door. Hence 1080mm by 2000mm for an opening of 1000mm x 1960mm.
Sliding door with soundproofing
You have a few options when it comes to choosing the right materials for soundproofing and my decision to use Spruce Plywood as the main component for soundproofing the sliding door was based on the thickness, cost and durability (door being long lasting with minimal maintenance).
| Material | Cost | Pros | Cons |
| MDF | Cheap | – Very dence – Very thick | – Very heavy – I was not confident that the nails and glue would hold |
| Birch Plywood | Expensive (100€ at 18mm) | – Exceptional sound proofing | – Expensive, double the cost of spruce plywood – Still quite heavy but not too bad at 18mm. |
| Spruce Plywood | Reasonable cost (approx 50€ at 18mm) | – Excellent sound absorption (albeit not the best) | – The local sawmill didn’t offer 21mm which I would have preferred. – Not as good as birch |
| OSB | Cheap | – Great sound absorption (albeit not the best) | – The wooden pattern was not what I desired |
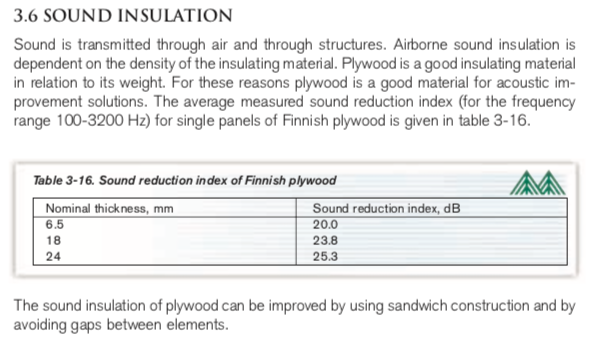
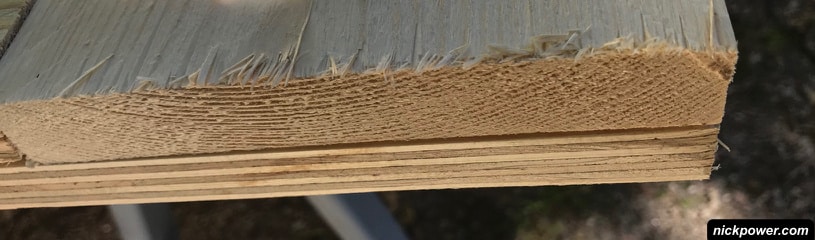
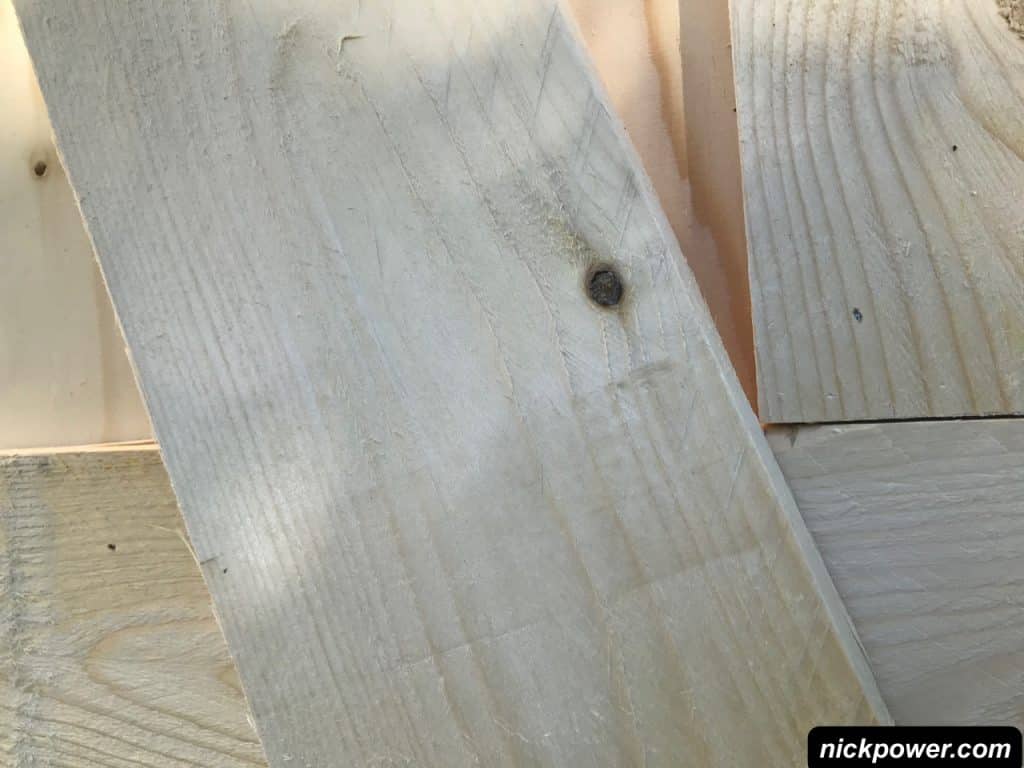
So at 18mm, spruce plywood, I can expect to meet my goal of achieving 10-20db soundproofing. Grade 3 has knots in the wood, holes and dents are still minimal. If you intend to paint your door, grade 3 will suffice.
Sliding door material cost breakdown:
Prices are retail from a local DIY store
- Grade 3 Plywood (Spruce, not birch) including sawmill fee for cutting: 47€
- Water-based white paint (half gloss/Satin): 20€
- 4 x stainless steel bolts for door handles: 2€
- Packet of black bolt caps M8 size: 4€
- 22 x 150mm Wooden boarding (approx 2€ /m), about 20€
- Door handles: 29€
- Sliding Door Hanging kit: 60€
- Wood filer (optional) and sanding paper: 2-10€
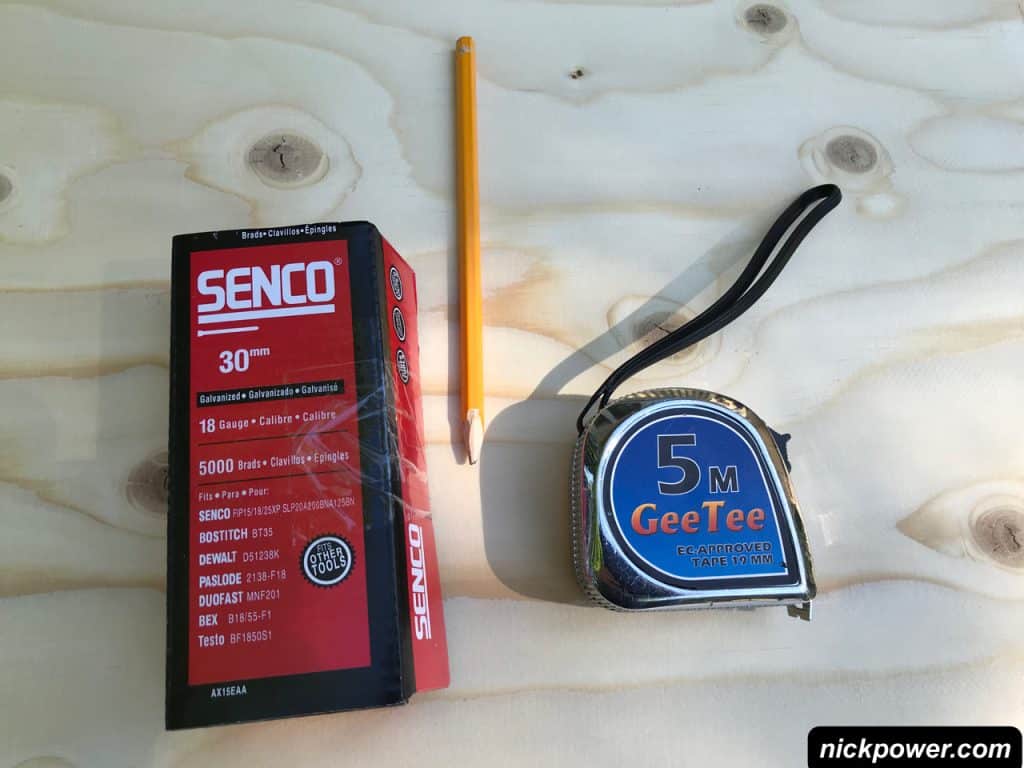
Tools used in this project:
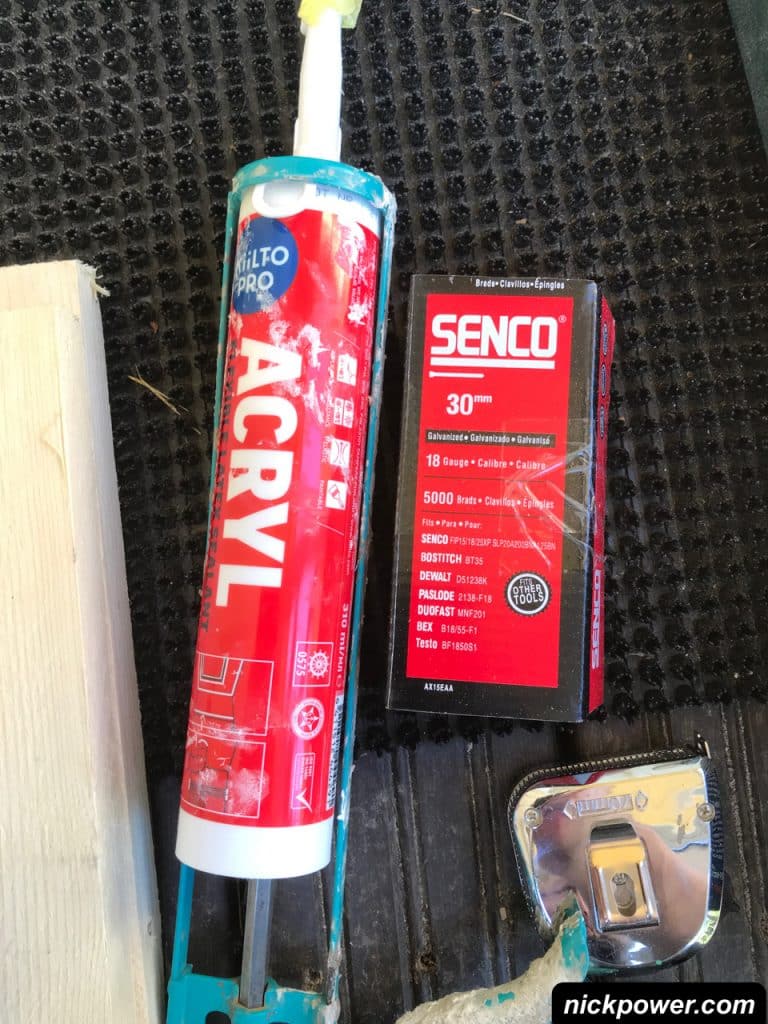
- Air powered nail gun + compressor (Can be hired if you don’t have one).
- 30mm length nails for nail gun (ensure the length is 2mm less than your door thickness).
- Socket set, screw drivers.
- Door hanging kits comes with wall plugs, bolts, washers.
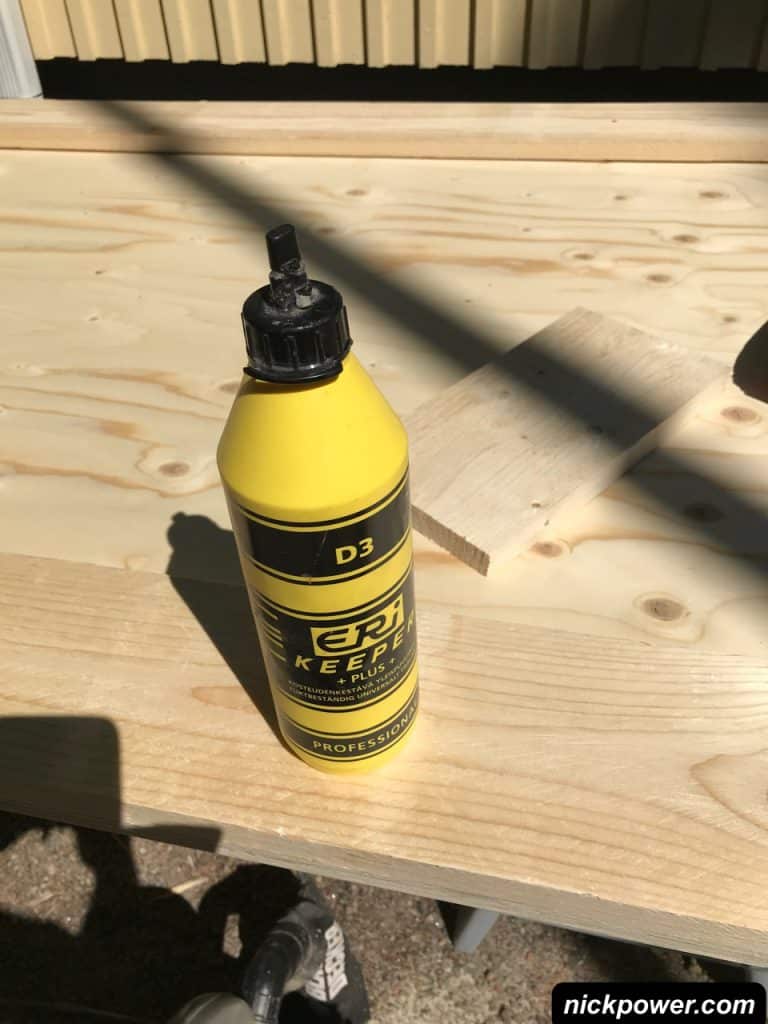
- Strong PVA / Wood Glue
- Clamps
Some practicalities and safety advice
- Wear safety goggles to protect your eyes
- Wear ear defenders when using loud machines
- Gloves to protect your hands
- Help from somebody for lifting the materials
Consult a professional if you are unsure about anything, or feel free to drop me a line (I’m not a professional myself but I am happy to provide clarifications and offer assistance). Ensure that your installation location is free of electrical cables, plumbing gas pipes and or other obstacles that could put you or your loved ones at risk.
With this in mind, here’s how it’s done..
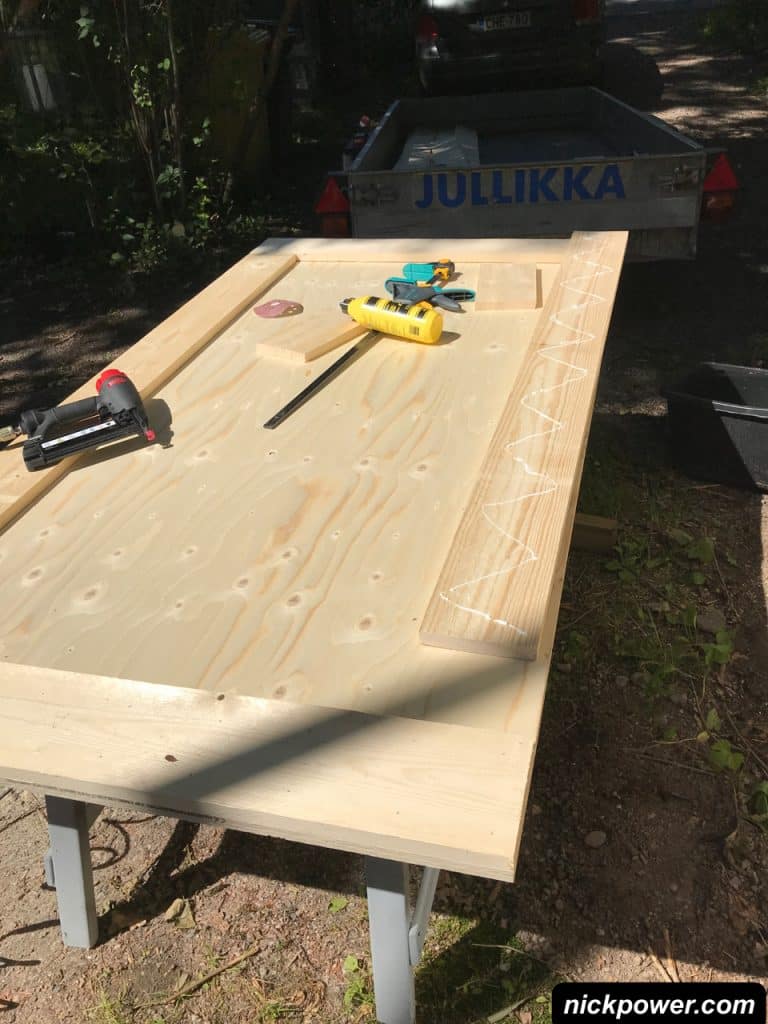
Cut a piece of plywood to size
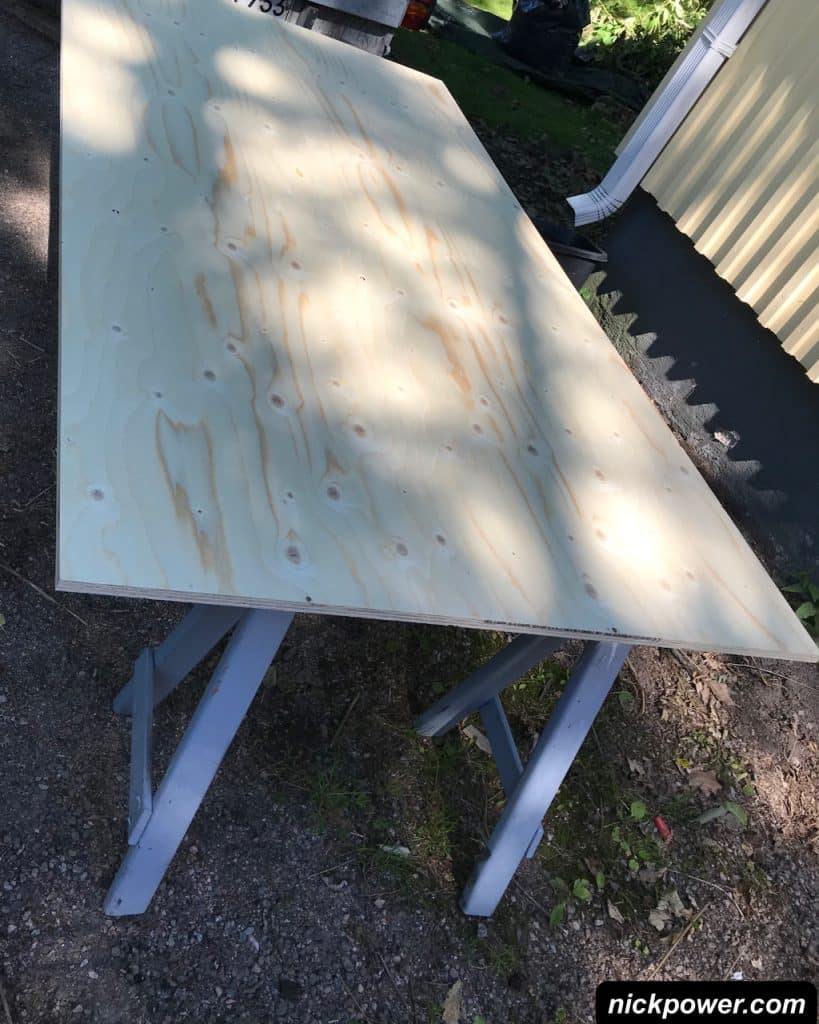
To save time, I visited a local home improvement shop that was equipped with a sawmill and had the plywood cut to 1080 x 2000. In addition to this, I loaded up some 22x150mm boards onto the trailer.

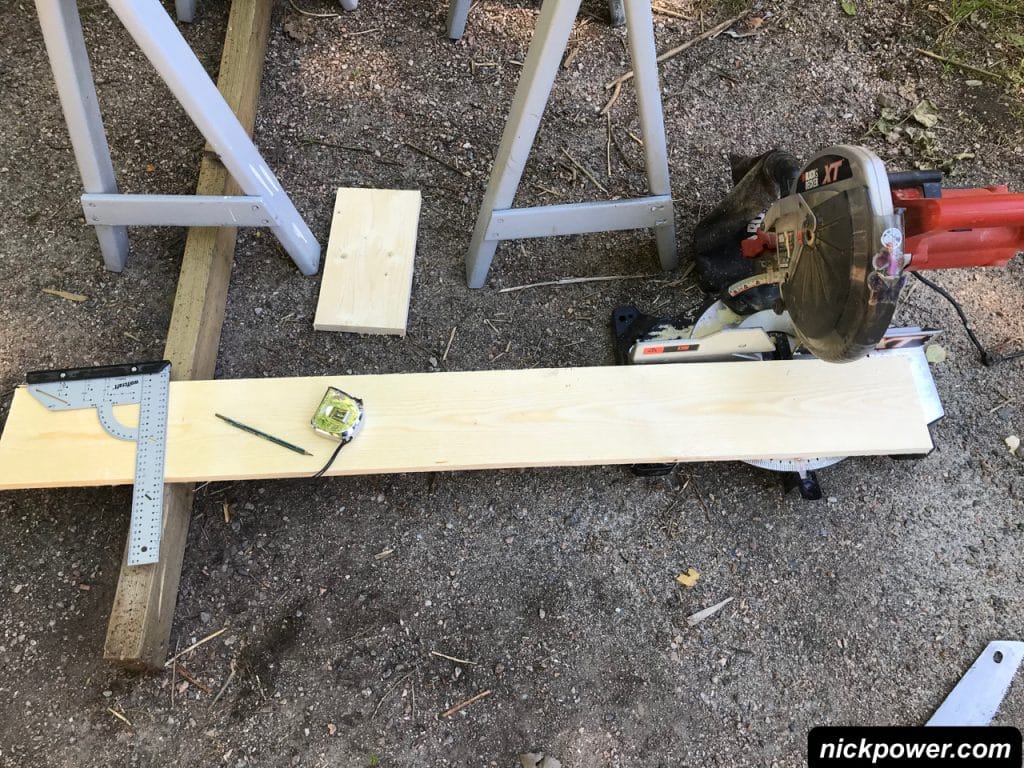
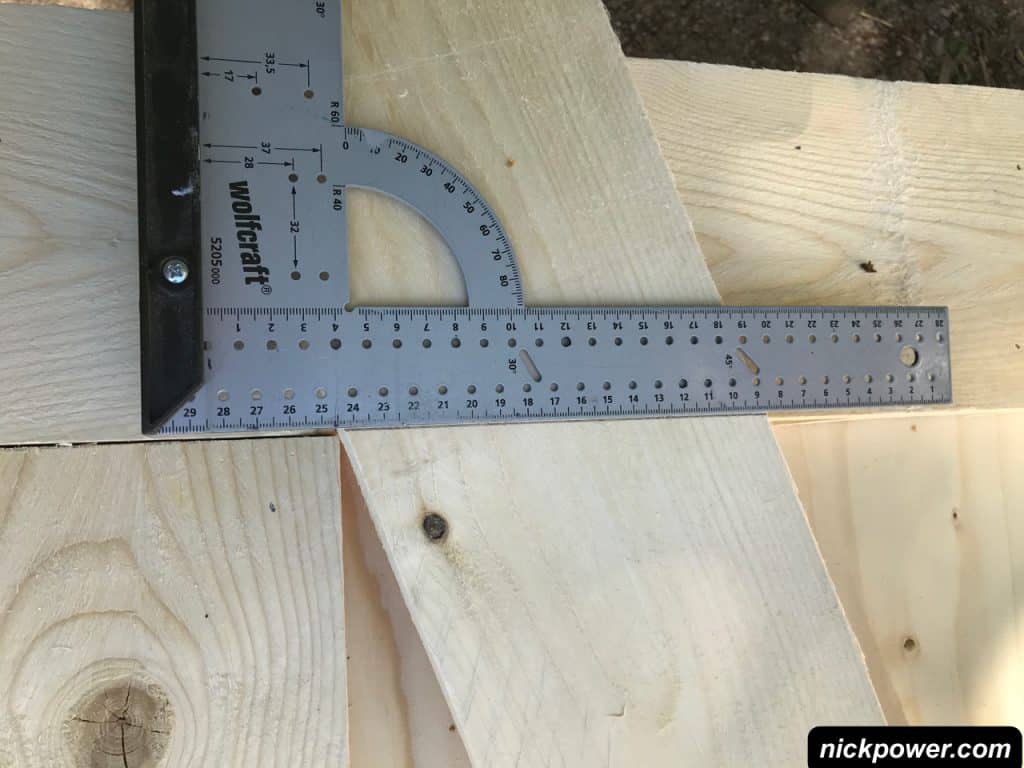
Measure and cut the boards to size
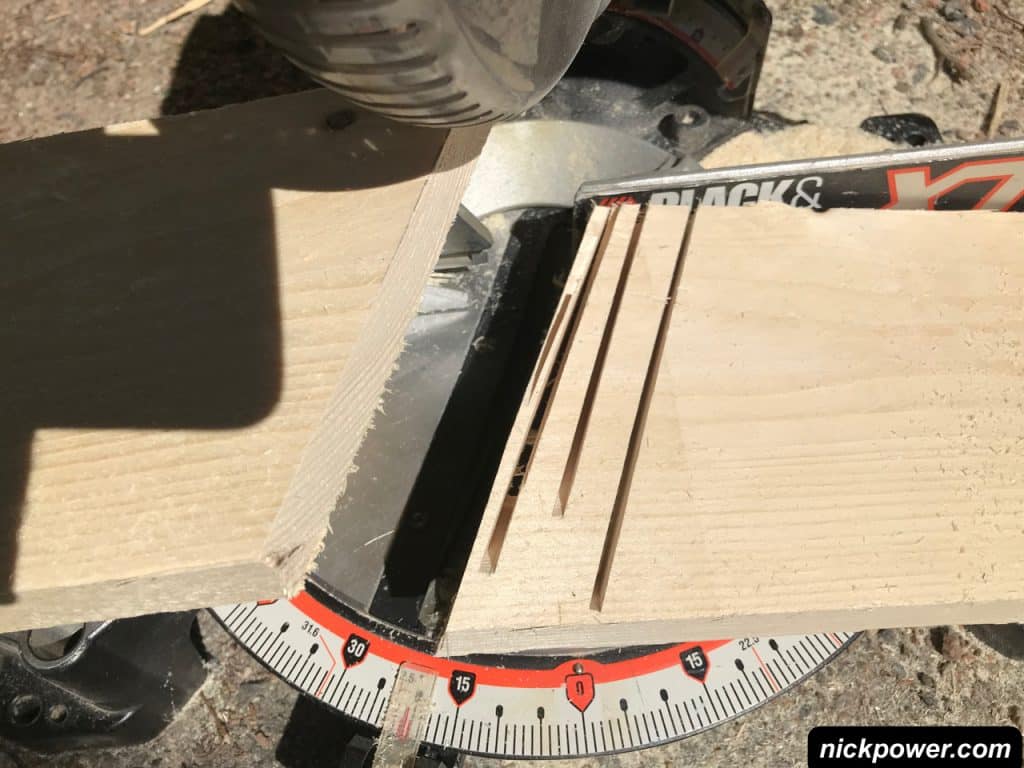
Measure the length with a tape measure. Mark and then rule across with a set square. Line up the mitre saw blade with the line, ensuring the the blade is cutting on the scrap piece edge. This way you’ll get a more accurate cut.
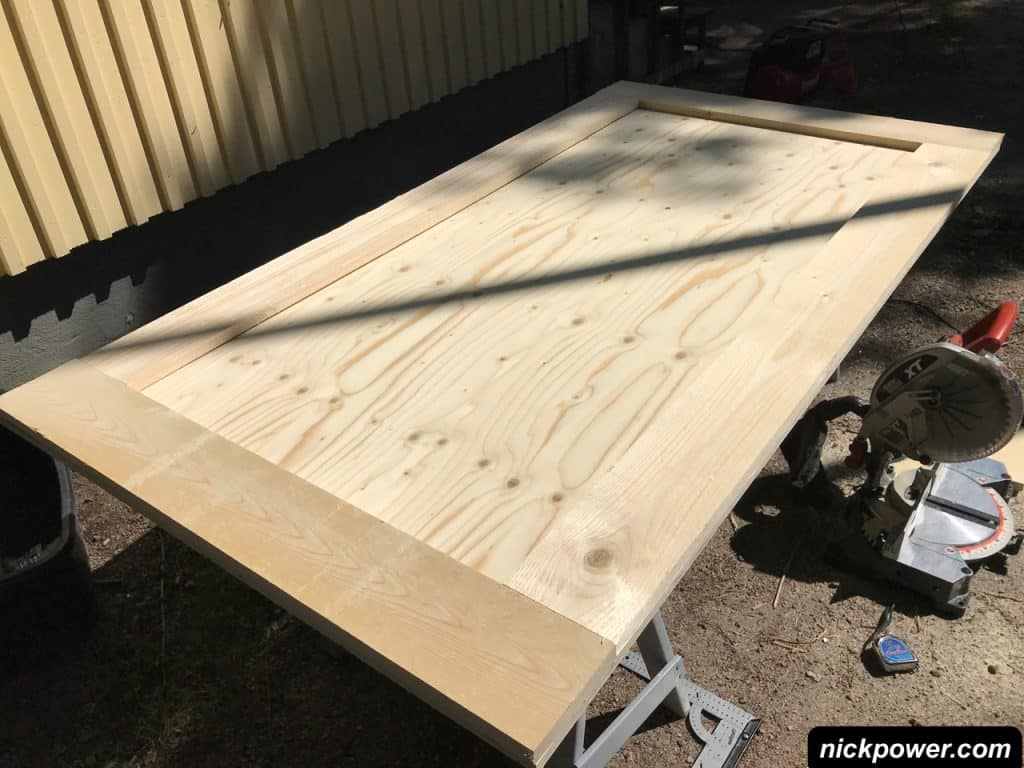
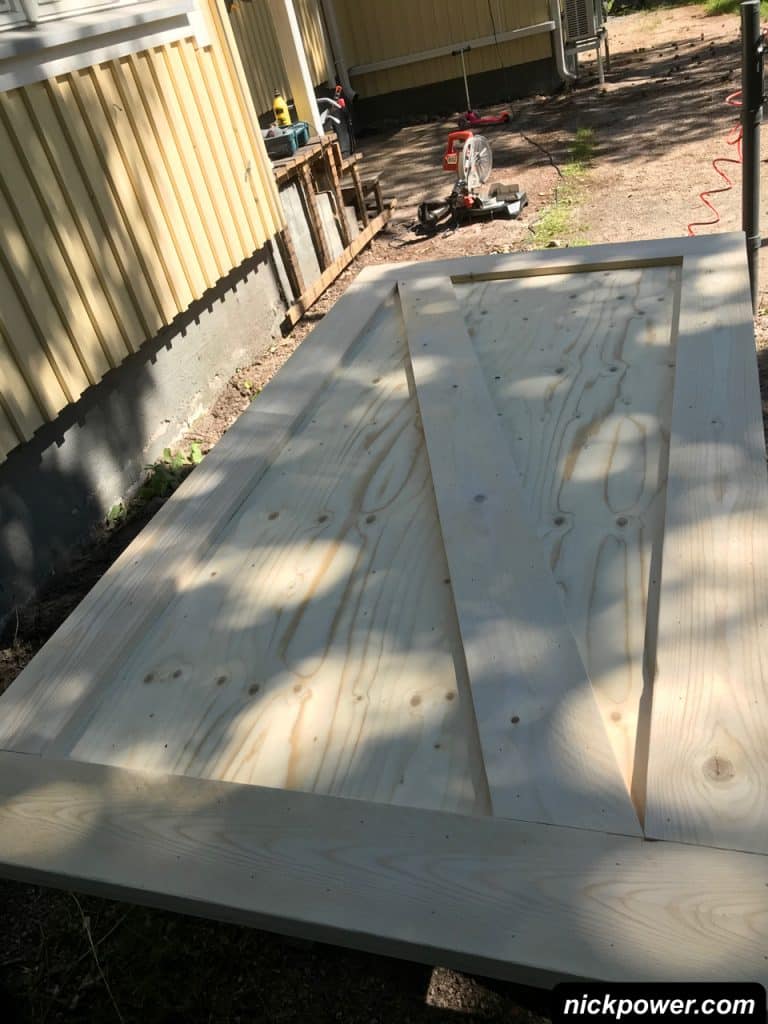
Place the planks
When you’ve cut all four lengths, place them on the plywood and line them up. If you find that something is too long or short. Trim down or sand the plank/board until it fits. What you are looking for here is a perfect fit on all four sides.
Time to glue and nail the planks
For a longer lasting finish, you’ll need the help of some glue to bond the planks and some nails to hold everything in place.
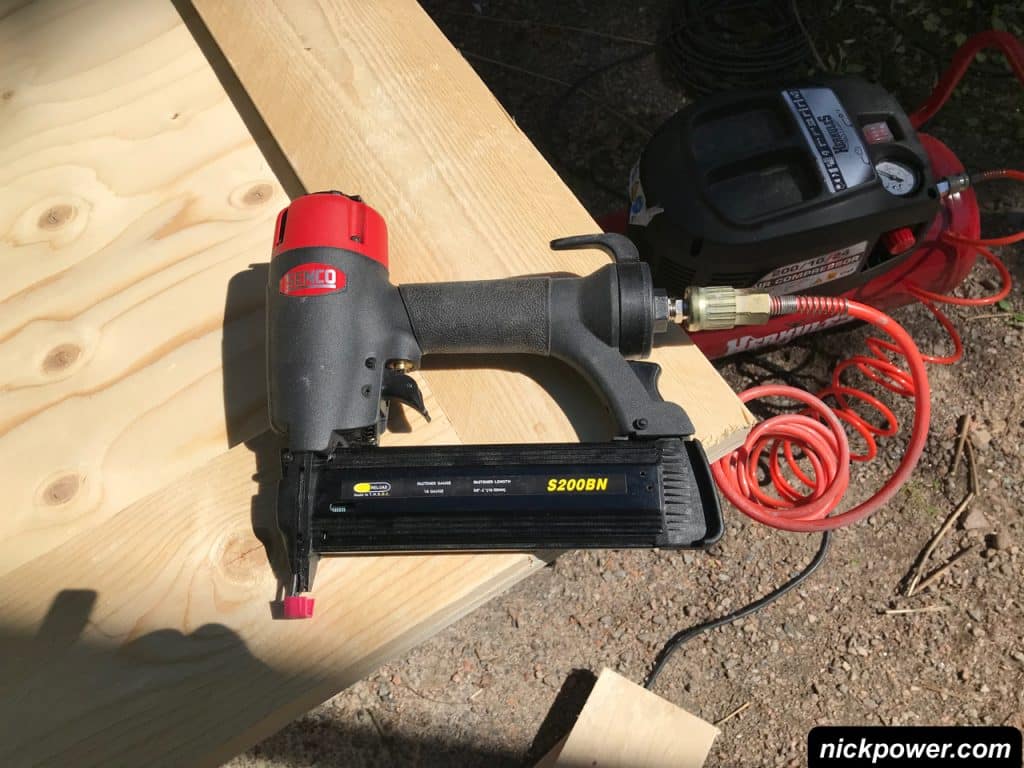
I would highly recommend renting, buying or borrowing a air powered nail gun (brad nailer). Brad nailer fires really small nails (typically 15mm – 50mm in length). It’s the perfect tool for precision projects like this, where using a hammer to hit nails would make it really difficult for you to keep everything in place. Additionally you’ll need an air compressor capable of 6-8 bar.
Tiny nails become hidden
If you’re worried about seeing nails, they are so small you can paint over them quite easily – no filler needed. Set the nail gun to indent the nail by 1-1.5mm.
Alternative to nailing?
If you don’t have a brad nailer or air compressor, then you could probably get away with just using a really strong adhesive such as a polymer based adhesive.
Note: Make sure that the length of your nails does not exceed the thickness of your door! The thickness of my door was 38mm approx. 30mm in this case, meant absolutely no risk of nailing through to the other side of the door.
Tidy up the loose ends
Give the ends of planks a quick sand, to remove splinters that might prevent your planks sitting flush with the plywood.
Here’s the process for installing the planks using nails
- Pick side of blank that has the better appearance and place face down.
- Glue the back of plank with a wave pattern of glue or polymer adhesive if you are not using nails.
- Carefully place the plank down onto the plywood and clamp.
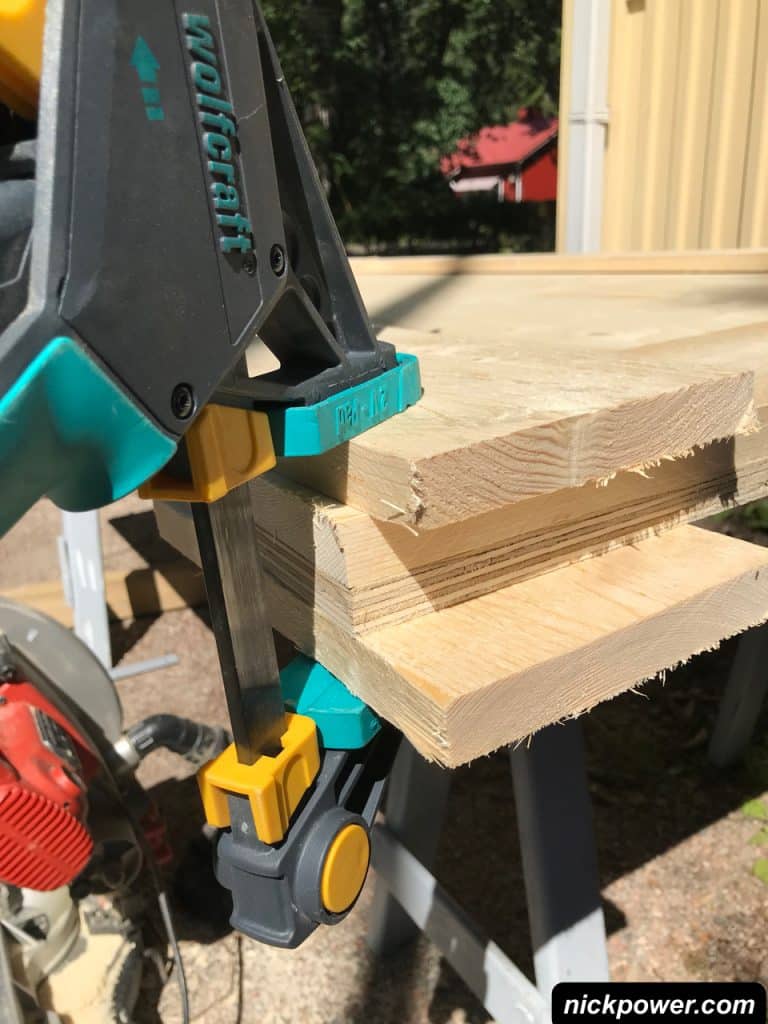
- With the plank clamped, Nail with the square gun. Nail away from the edges of the plank in a formation like this:

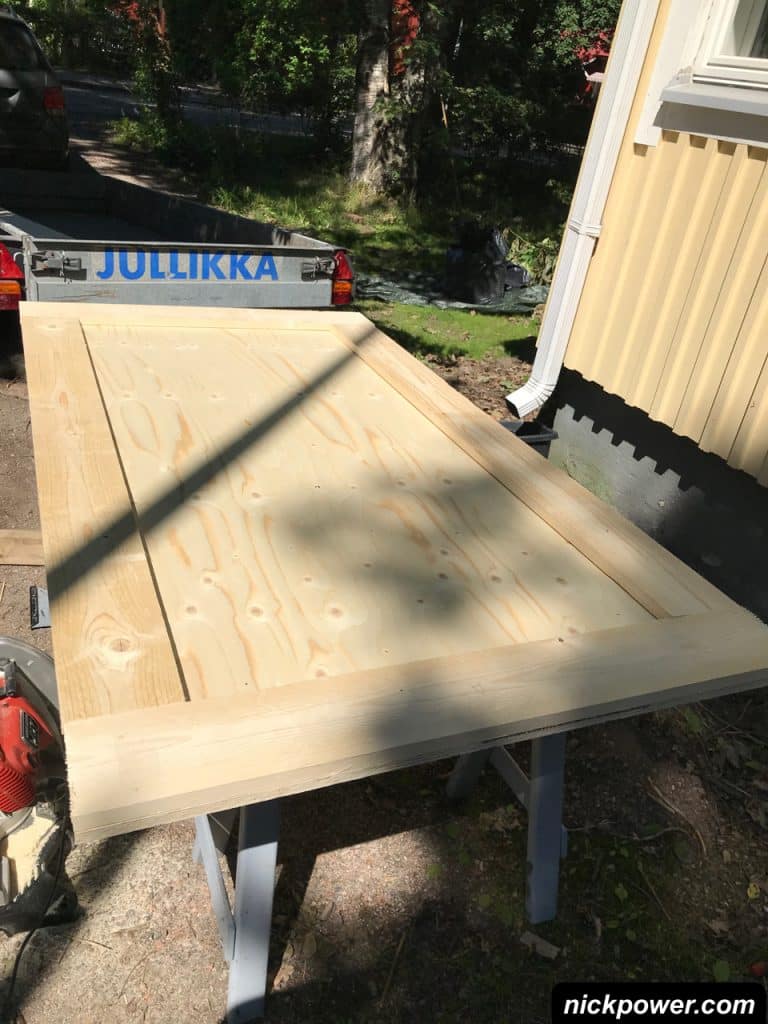
With all the planks in place, nailed and glued, you can begin work on the diagonal plank. Place a length of wood across the door so that it extends past both corners.
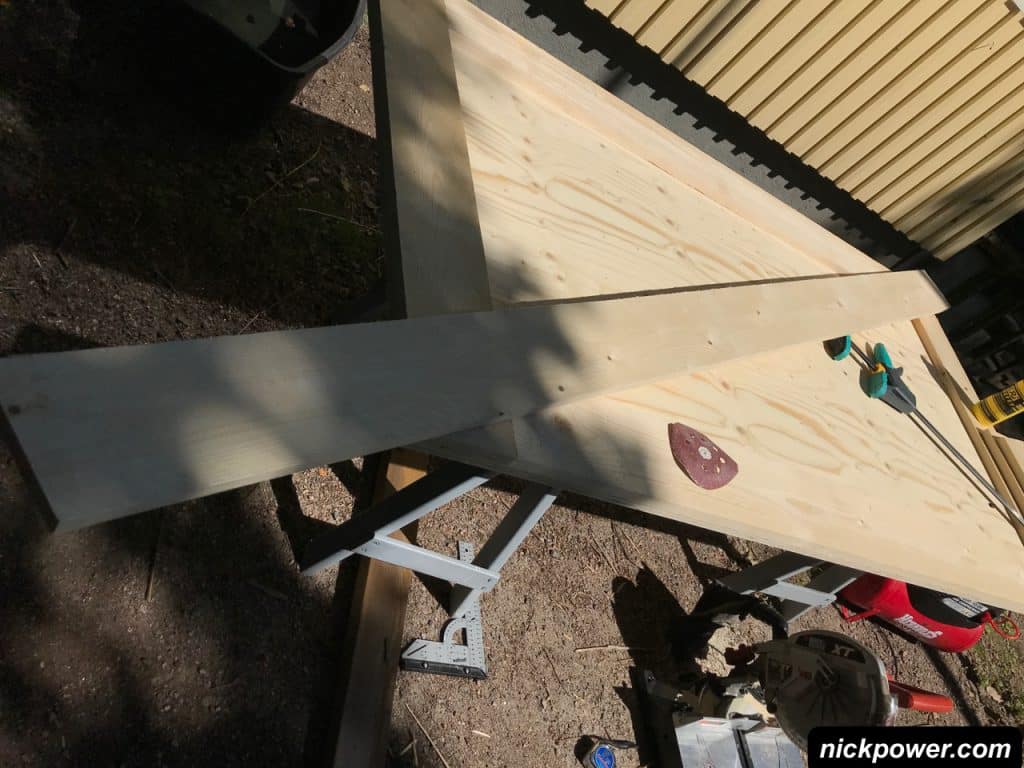
Line up each end of the plank, so that it meets the corner of the other planks. Like this:
Check each side twice, make sure you are happy with the alignment on each side. When you are happy, use a straight ruler or a set square to draw a line across the plank. This will be the line that you cut.
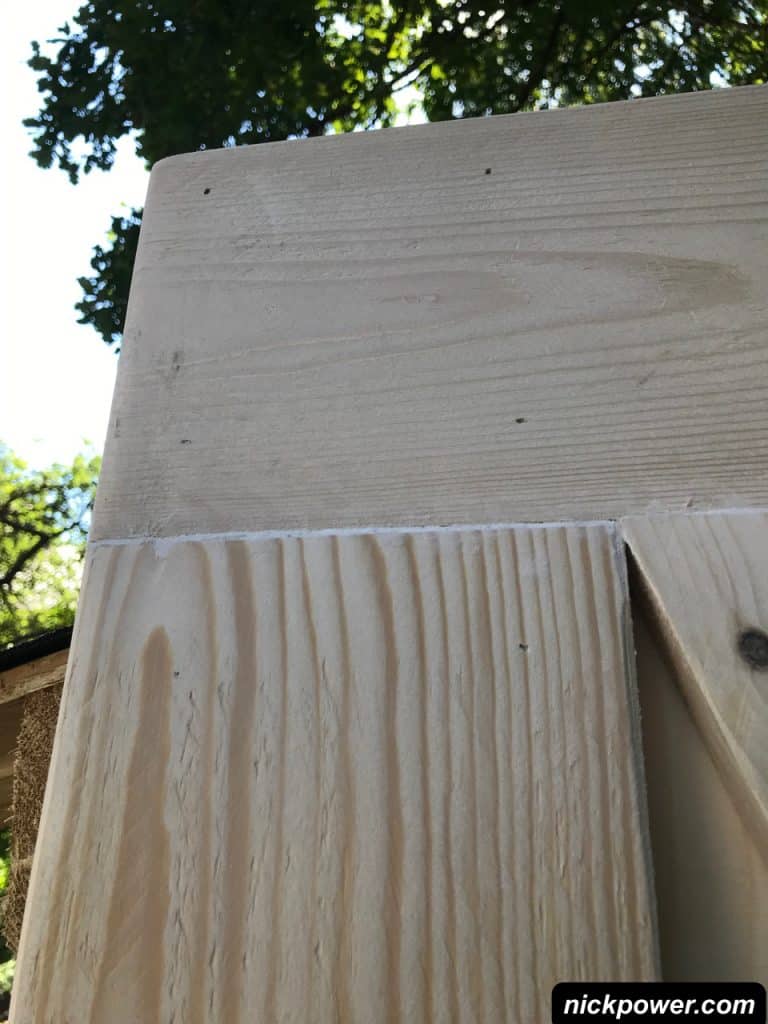
Before you make the cut, have a few practices with the scrap end of the plank and change the angle of your mitre saw accordingly. Try to get it as close are you can, better if it’s slightly larger, because we can sand down 1-2mm as a next step.
Sand back until you get a good fit.
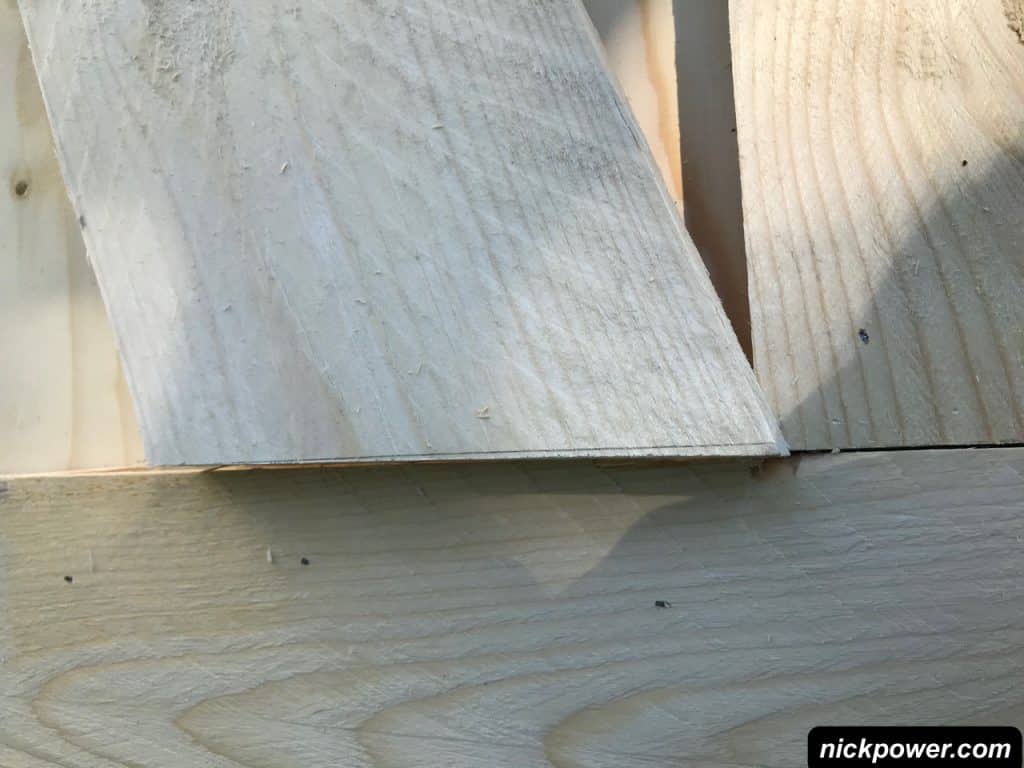
Keep sanding until you get a great fit.

Glue, and nail into place. If you can’t clamp, hold down with weight as you nail the board into place.
The next step will be to give the door a sand down with 240 then 400 grit sandpaper.
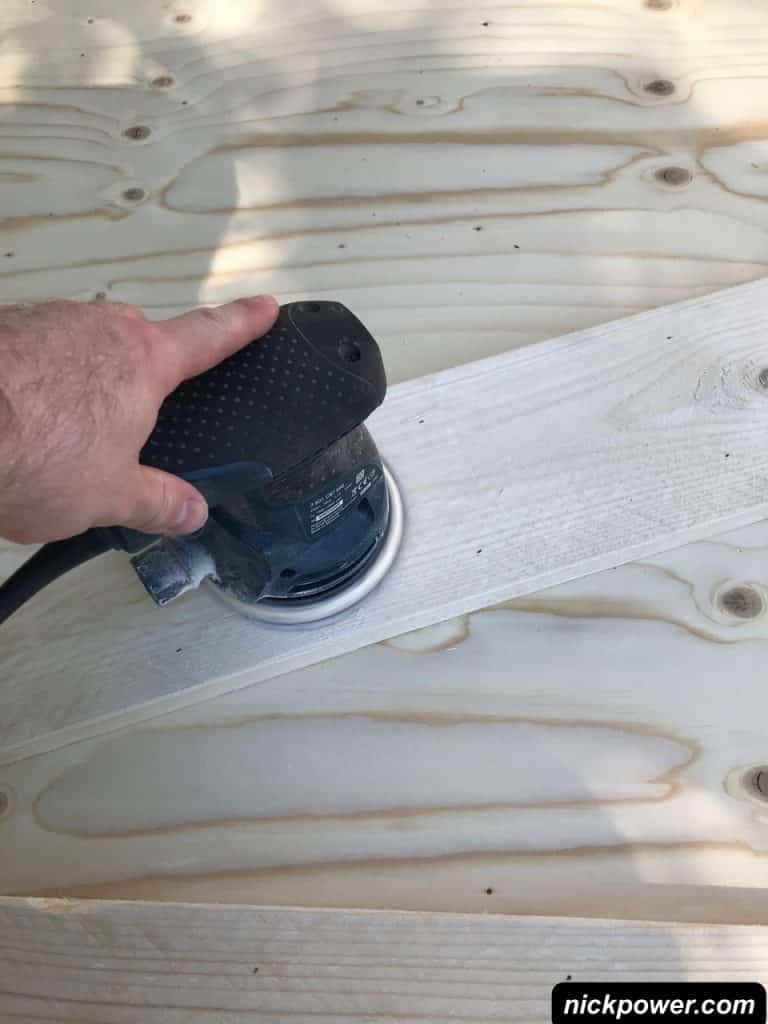
If you have an air blower attachment for your compressor or a brush, give the door a once over to clean away dirt, dust and wood particles.
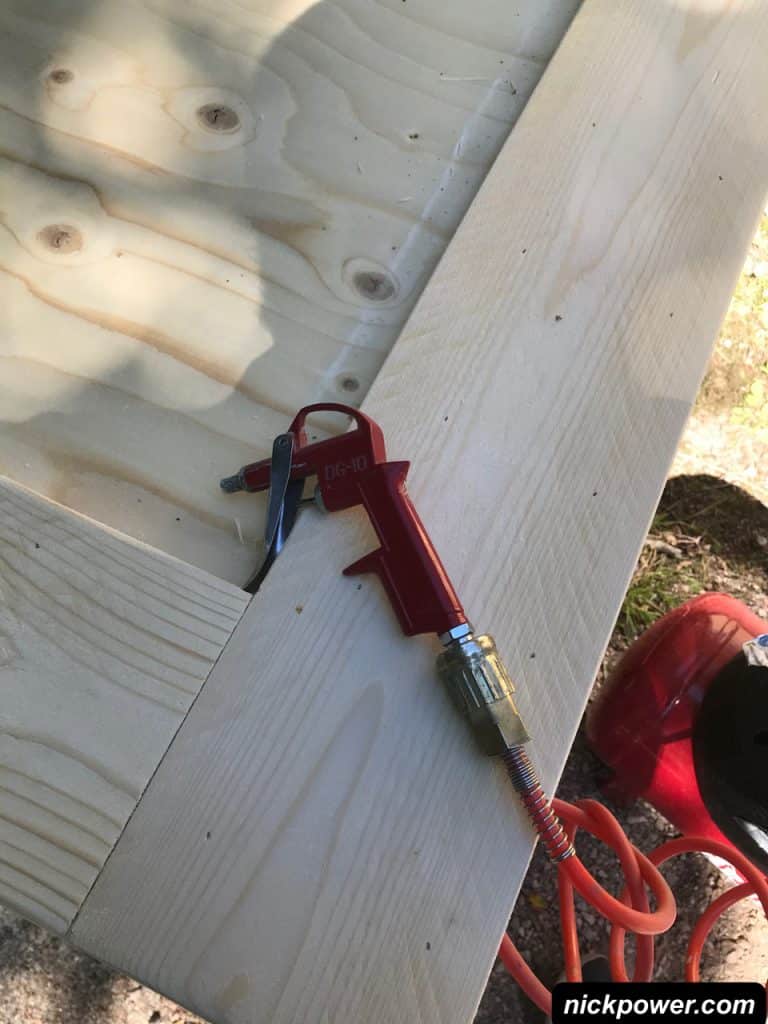
Now its a good time for a coffee and snack. The wood work is mostly complete!
Preparing the sliding door for painting.
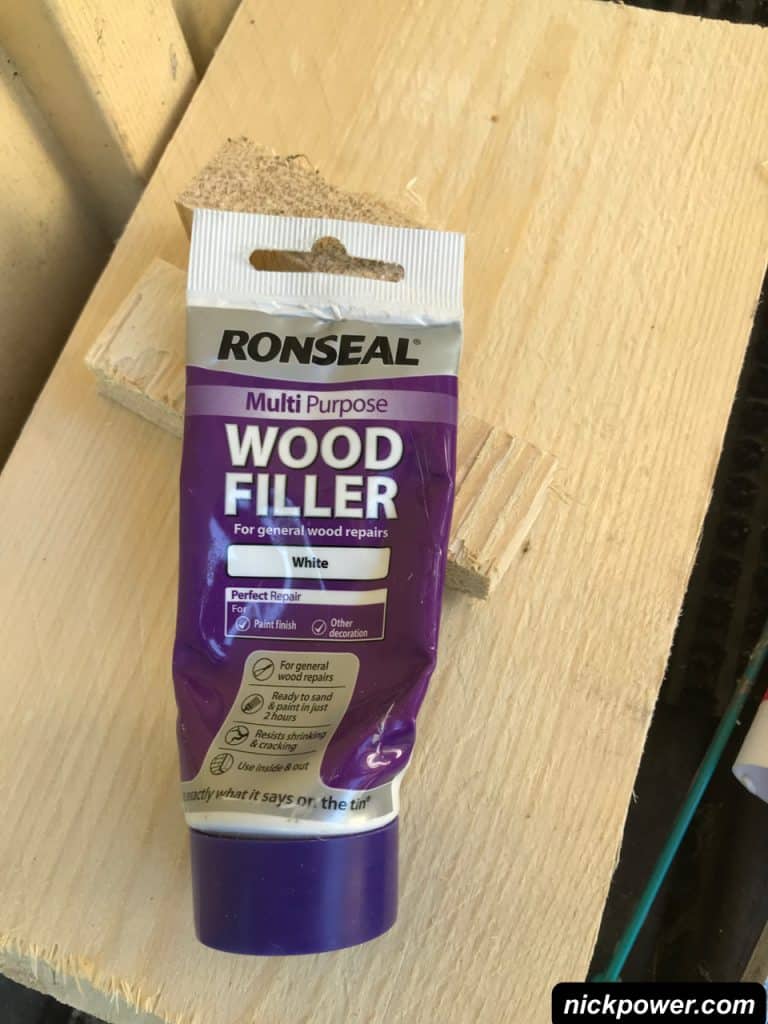
Prop up the door and take a good look at it. Identify any parts of the door you wish to sand or use a filler to close gaps or imperfections. On my door, I closed a few gaps with wood filler and acrylic. If you use a water based floor paint, half gloss, it will seal gaps 1mm by itself easily, so you’re really looking for larger gaps.
Painting a sliding door
If you’ve used any filler, let it dry out for some time before adding paint.
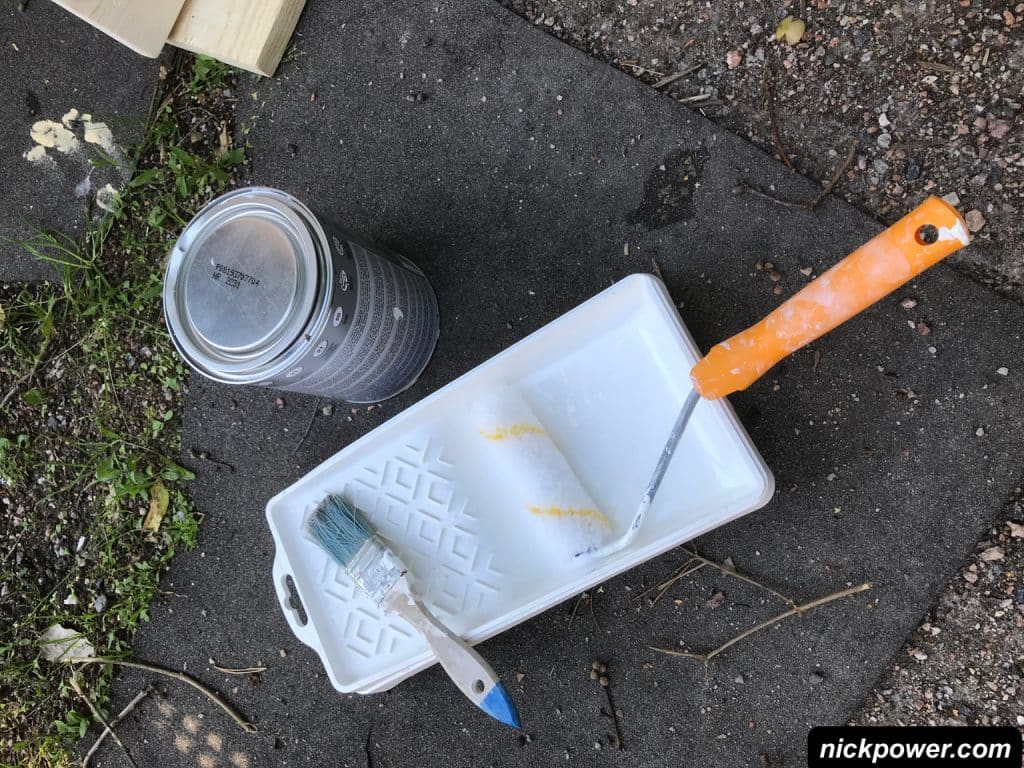
For the painting of the door, you will need paint, a stiff brush, a roller brush and tray. Pour some paint in and make a start!
Nails should be paintable with very little effort. If the paint is thick enough, no filler is needed.
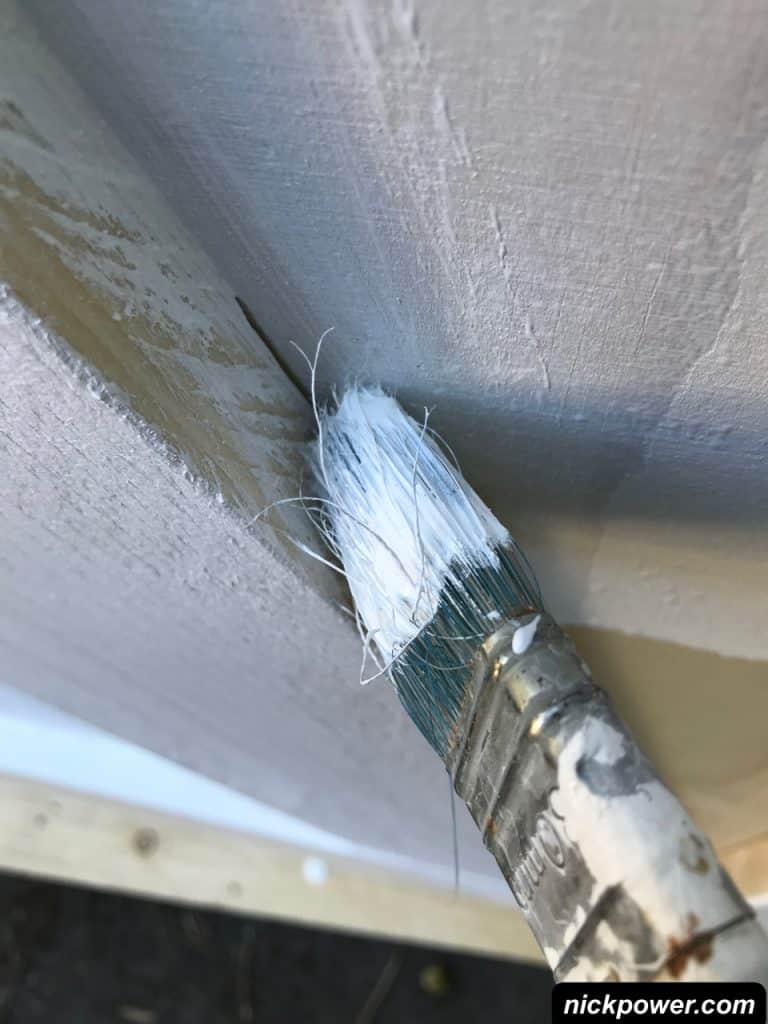
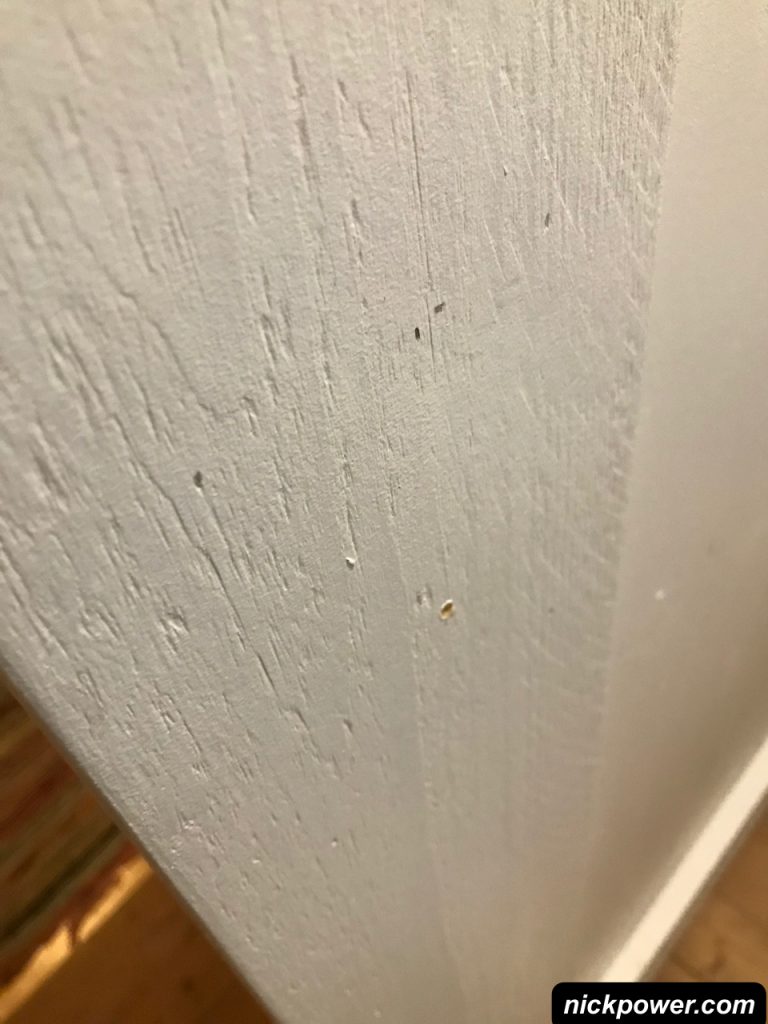
Before>
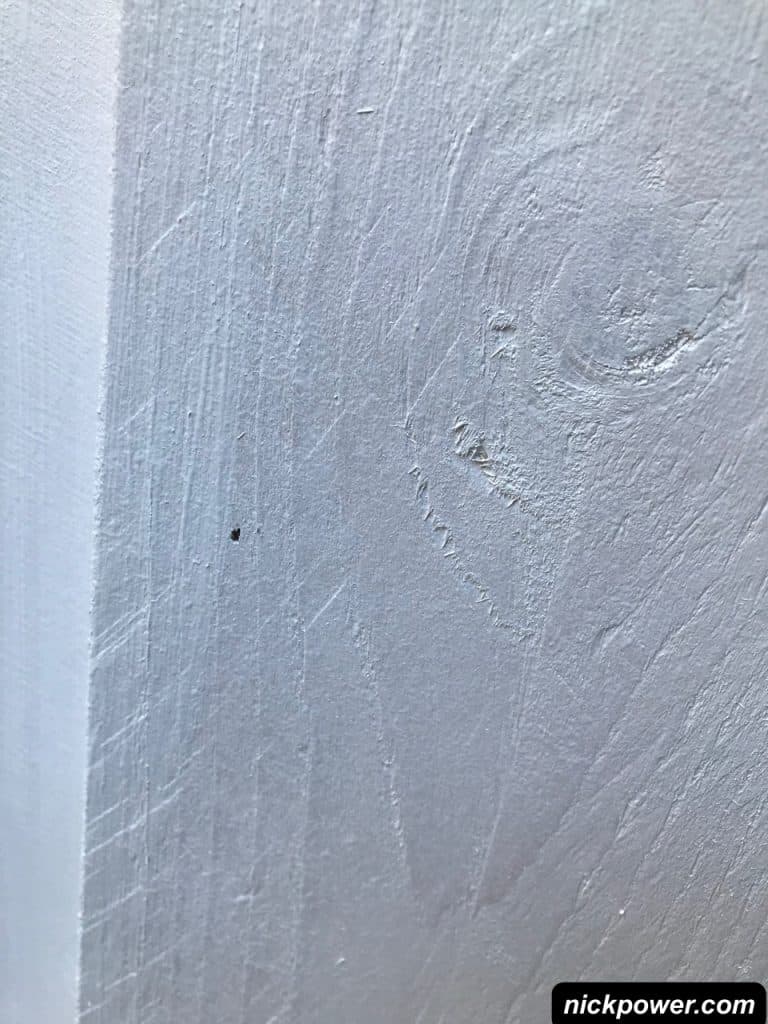
After:
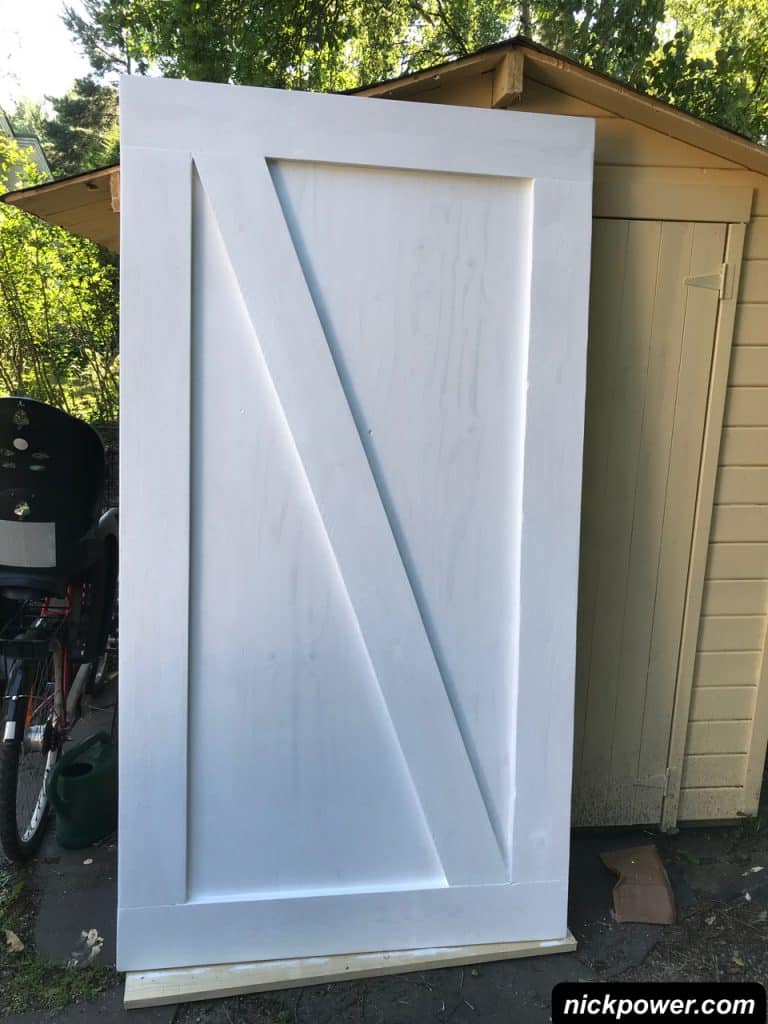
Paint the back of the door next.

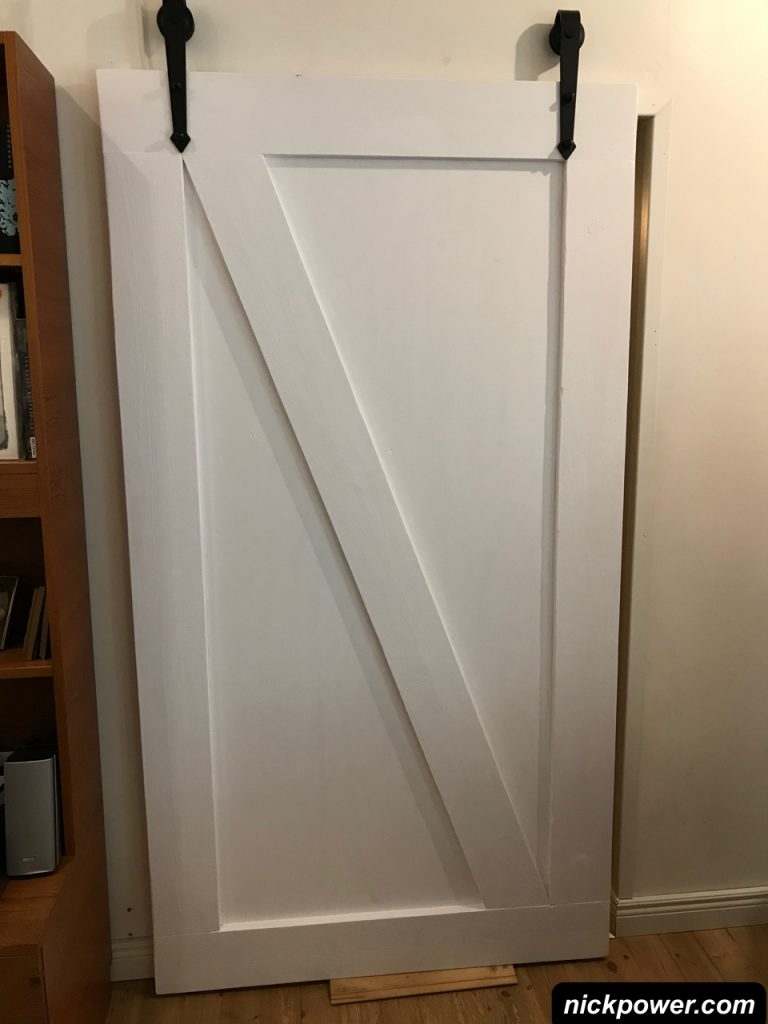
Hanging / installing a sliding door
I ordered a sliding door kit which contained everything I needed to hang the door onto the wall. The basic components of the kit are two hanging arms with wheels, a rail and wall bolts.
This kit can be found on: Amazon UK | Amazon US | Amazon DE | Amazon AU
Installation of the sliding door arms
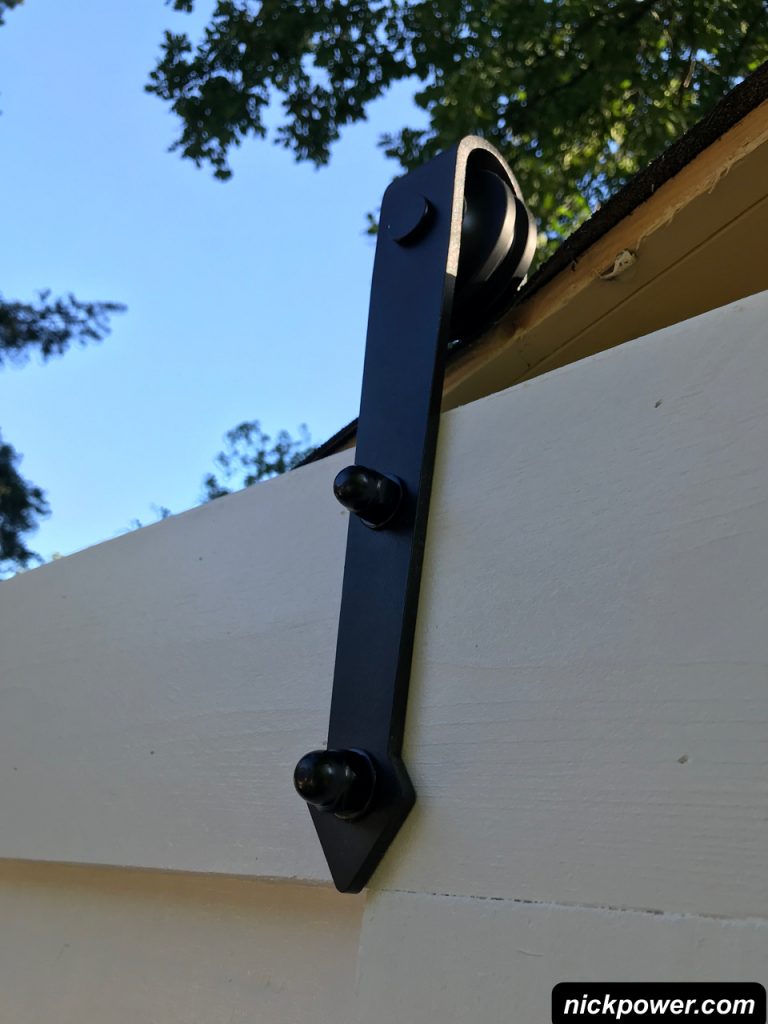
My suggestion is to place the arms where they look the best whilst ensuring the holes for the bolts are not too close to the edge of the door, otherwise you will risk the bolt eventually splitting the wood and your door will fall off! We want the door installation to be as strong and safe as possible.
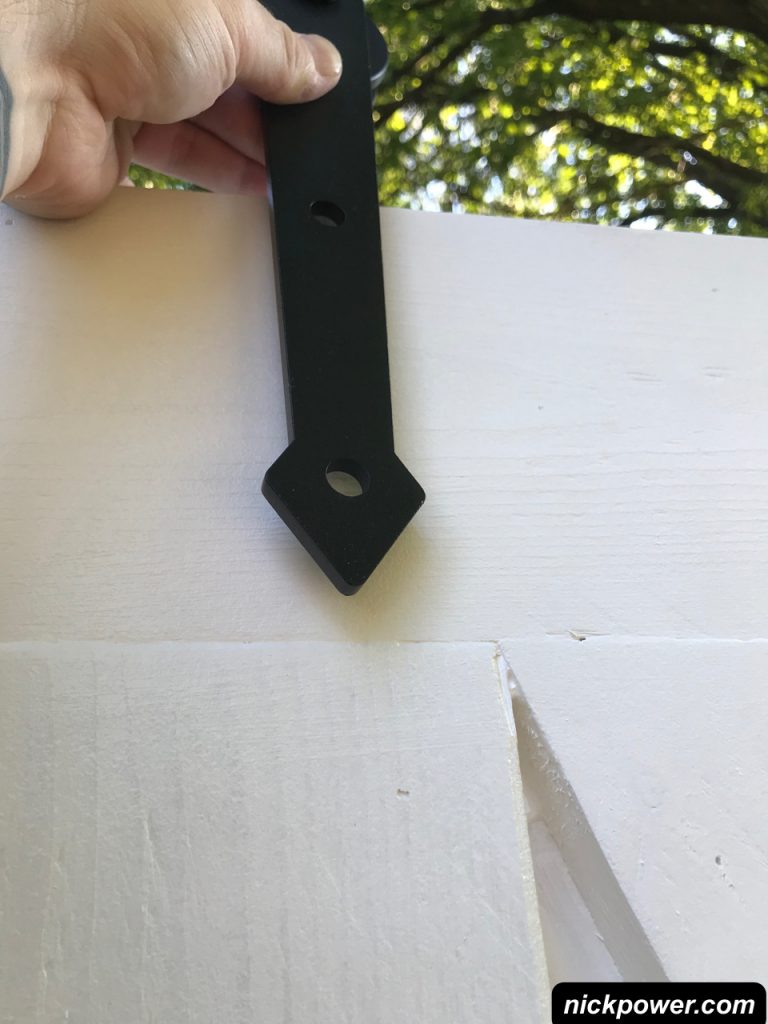
I played with the idea of mounting them away from the joints of wood but decided in the end to mount them where the angles joined.
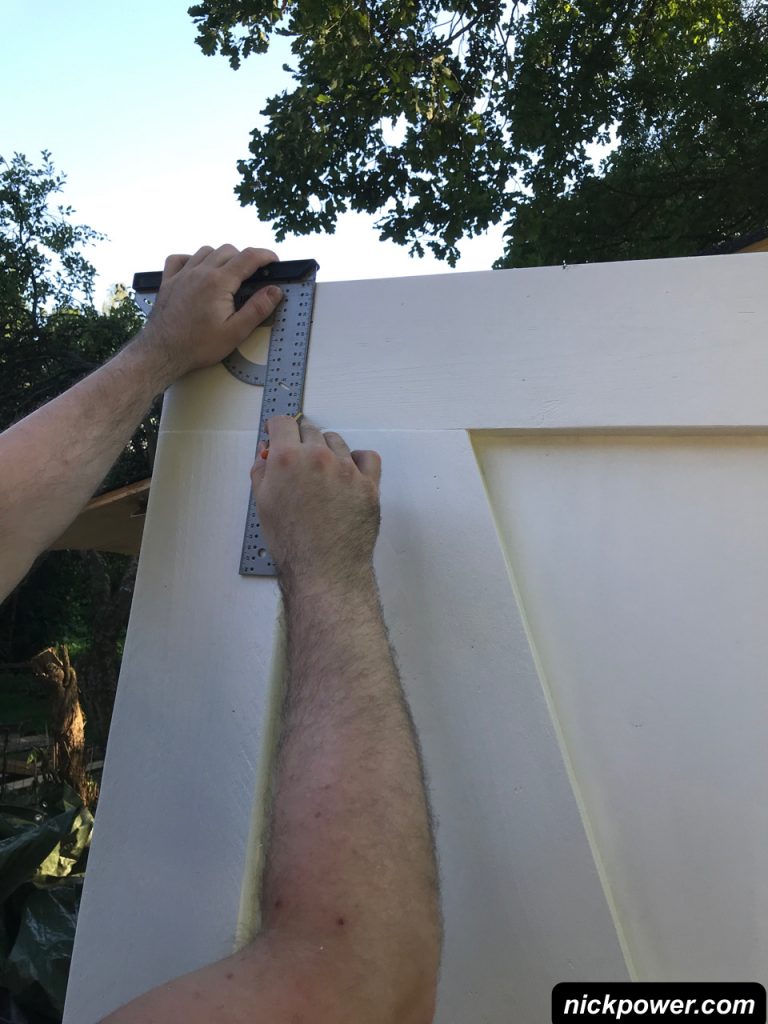
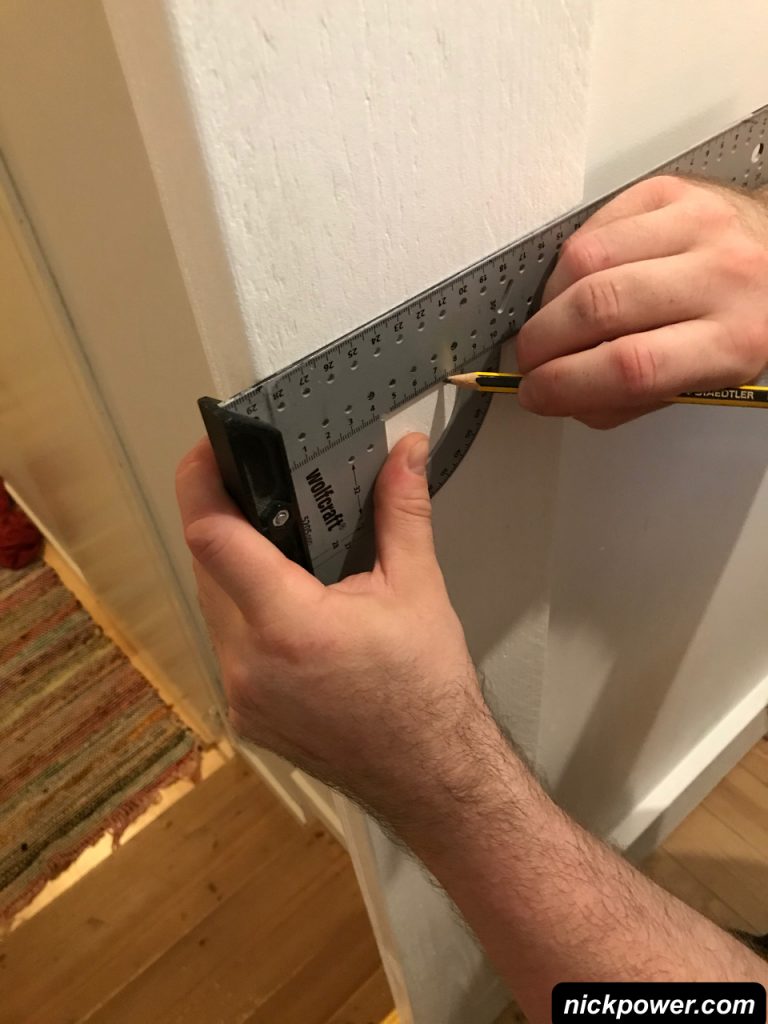
When you have decided on the location, mark the centre of one hole with a pencil (or use a set square to if you want to quantise the measurement). You’ll need to use a set square to find where the hole is positioned horizontally in any case. In my case it was 150mm. I drew one mark at 150mm.
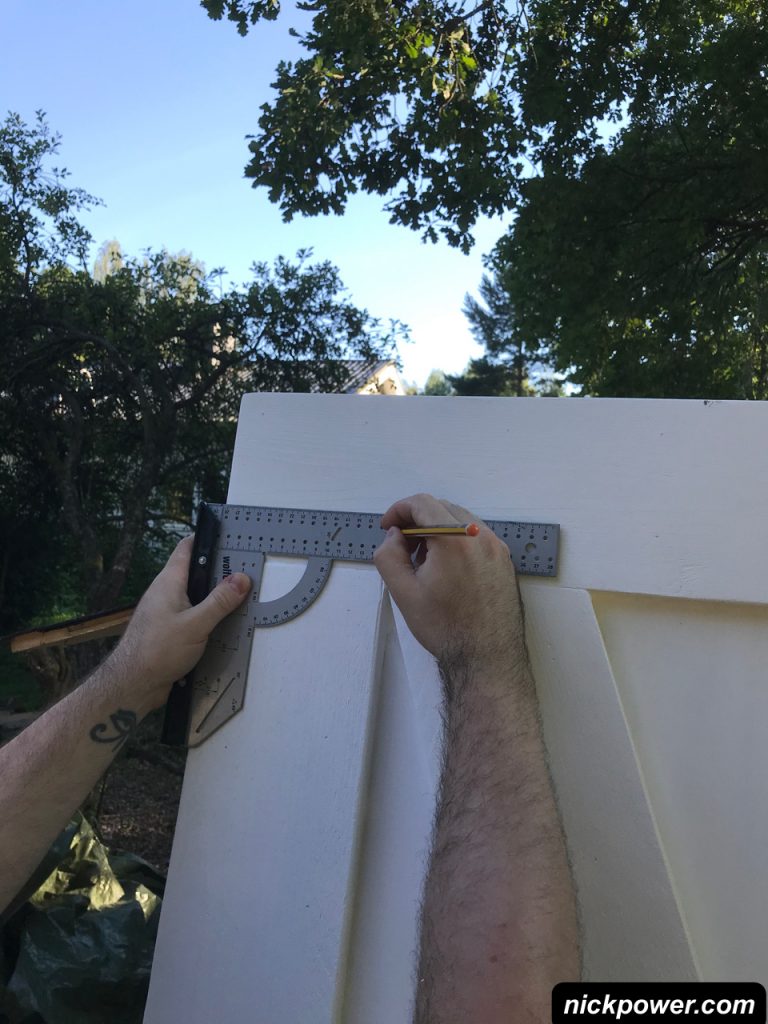
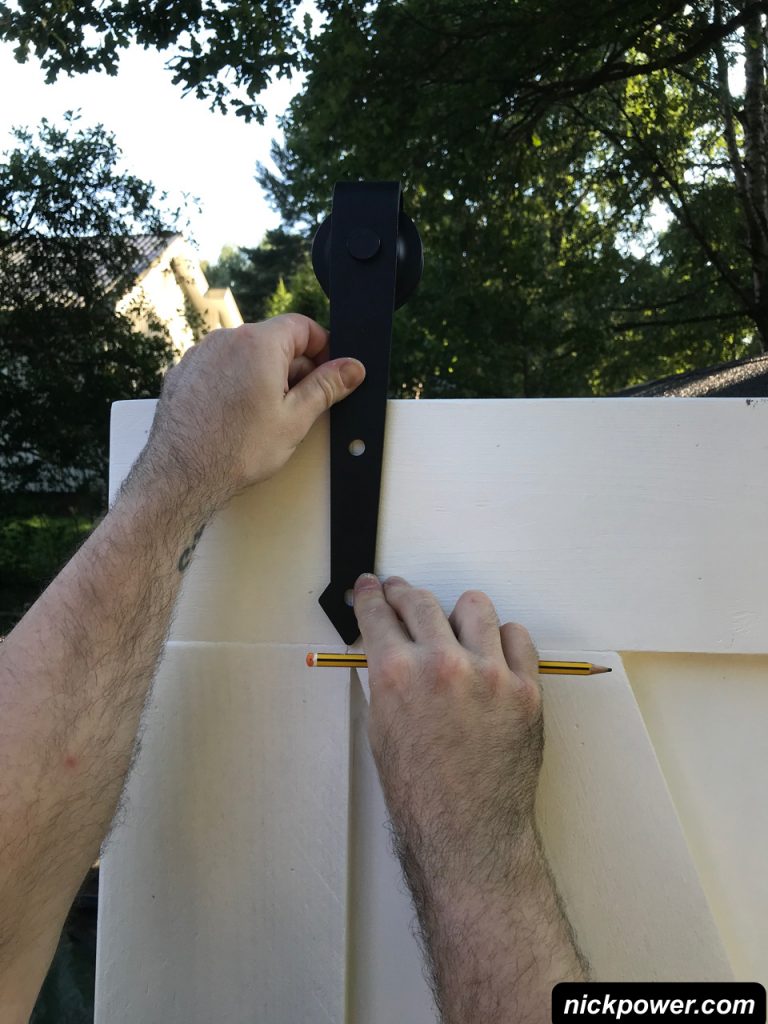
Then a second mark higher up.
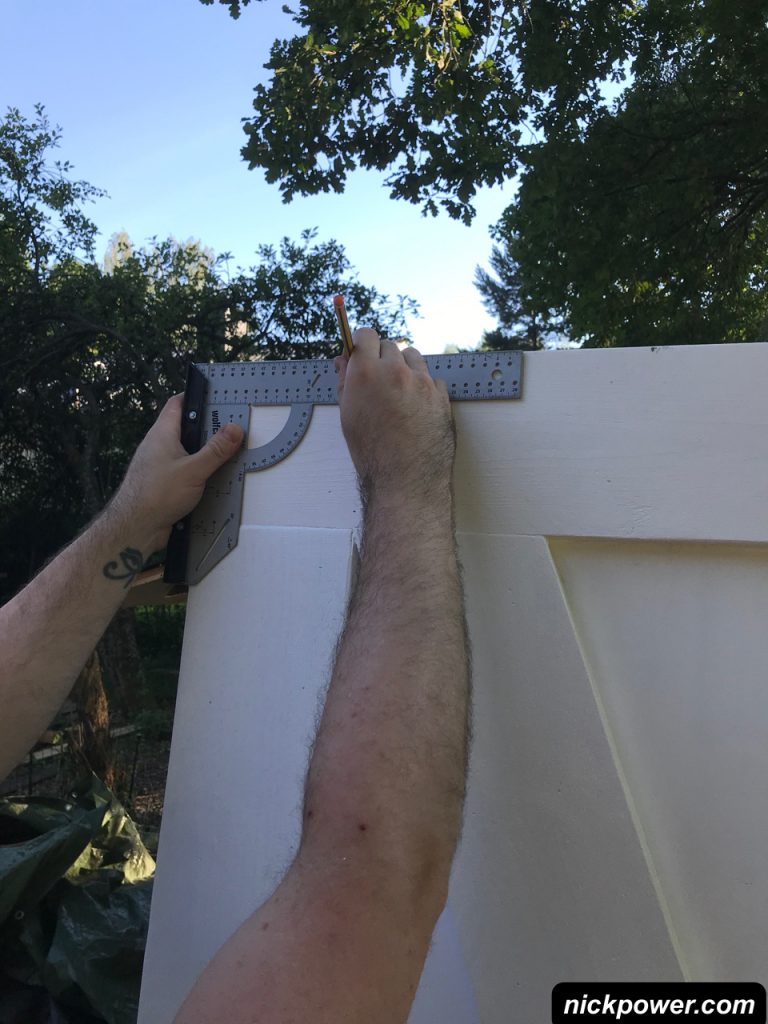
Now, I am able to draw a line vertically over the holes.
You can now place the arm over the line and ensure the bracket is in the position you want it to be. We are only going to start with drilling one hole, so you only need to ensure that the bottom hole (of the two) has the line centred within. We can come back to the second hole later on. Draw a circle or + shape when you are ready.
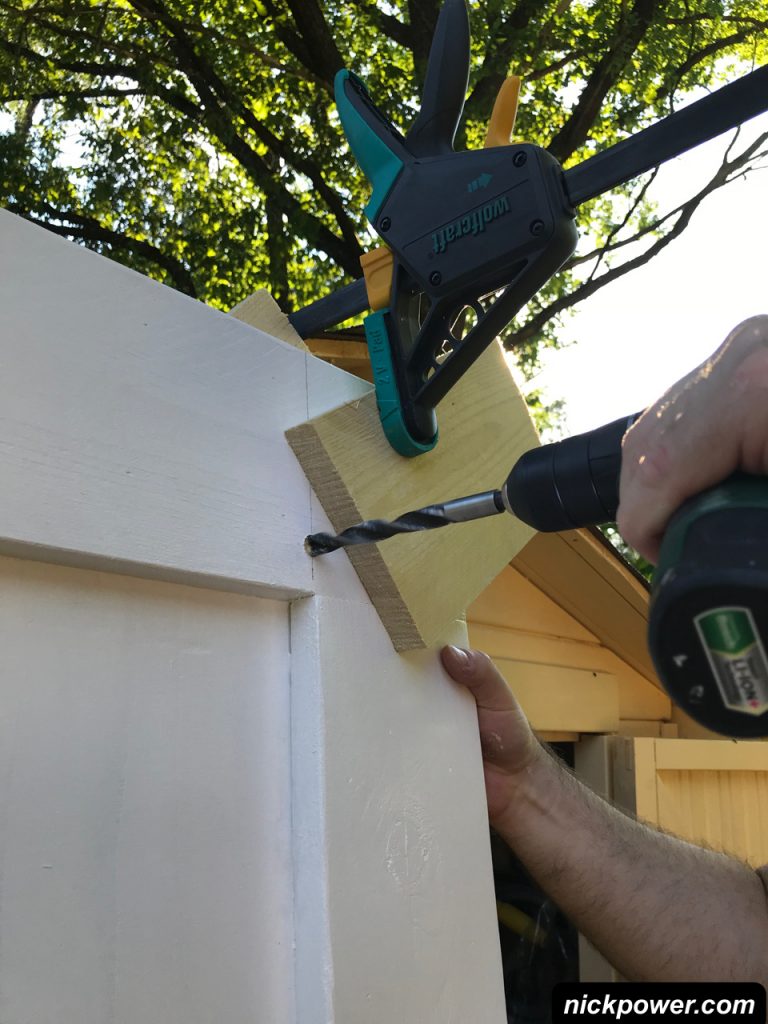
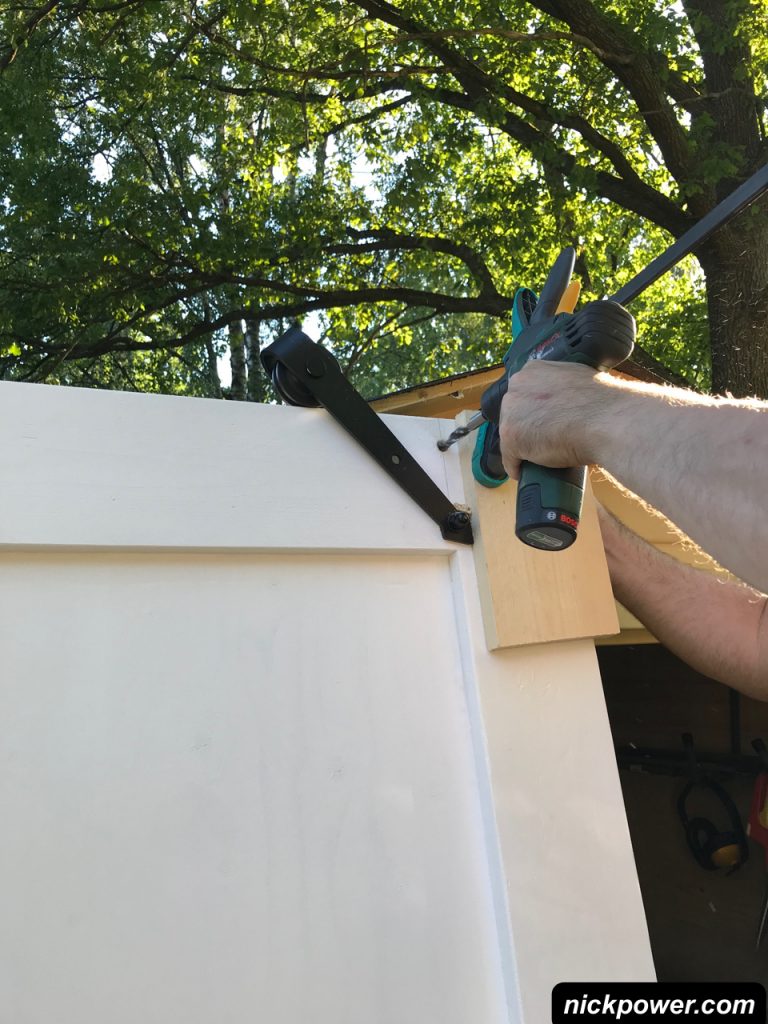
Drilling holes for sliding door arms
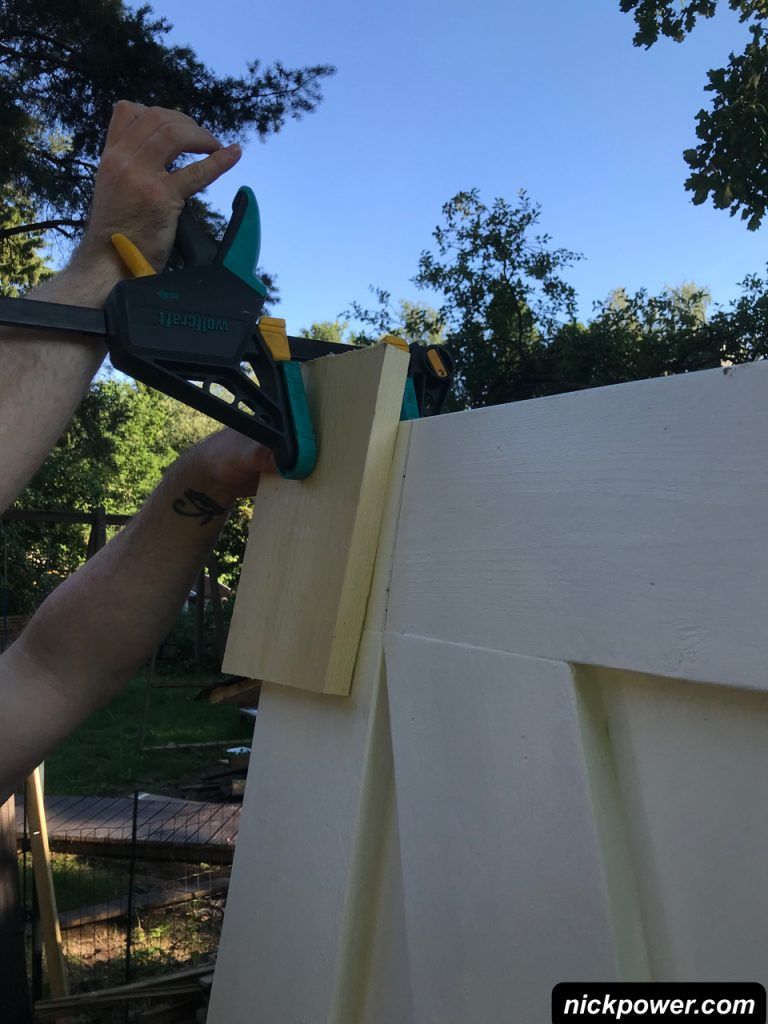
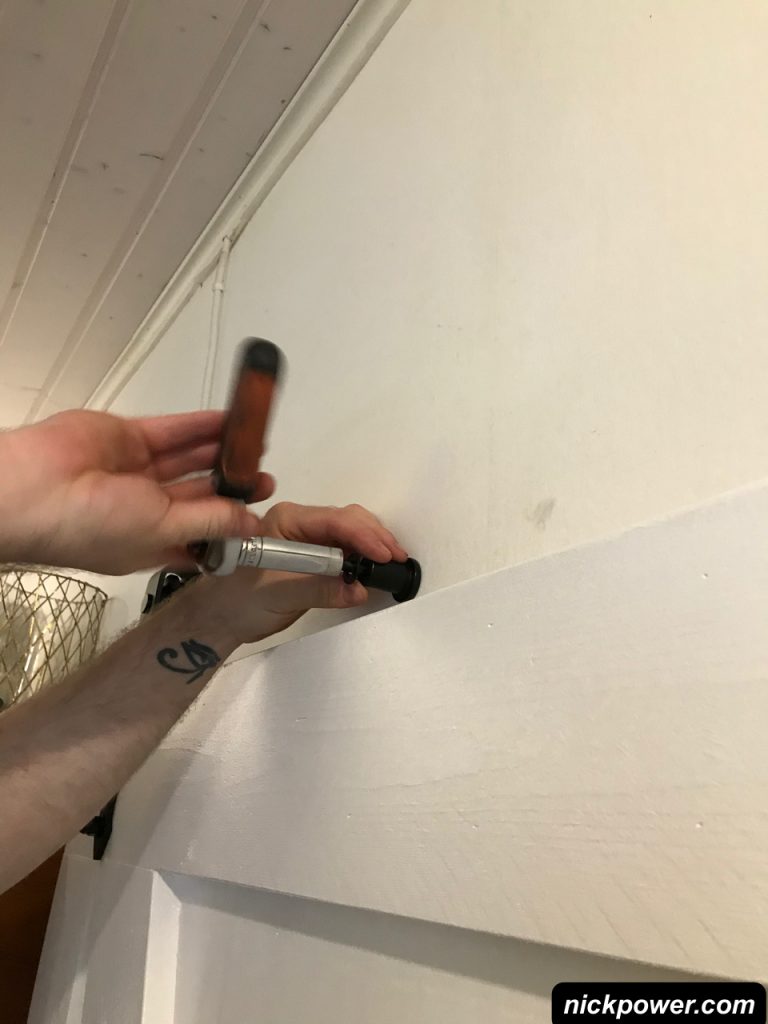
Now we are ready to drill our first hole. Clamp up two pieces of wood both sides of the door. The first piece that you see in the picture below, is only needed to act as a barrier between the clamp itself and the door. The second piece of wood needs to be positioned over where the hole is to be drilled. Using this technique will prevent the wood splitting as the drill bit exits out the other side of the door. And it’s really important that we have an excellent finish, so take your time with this.

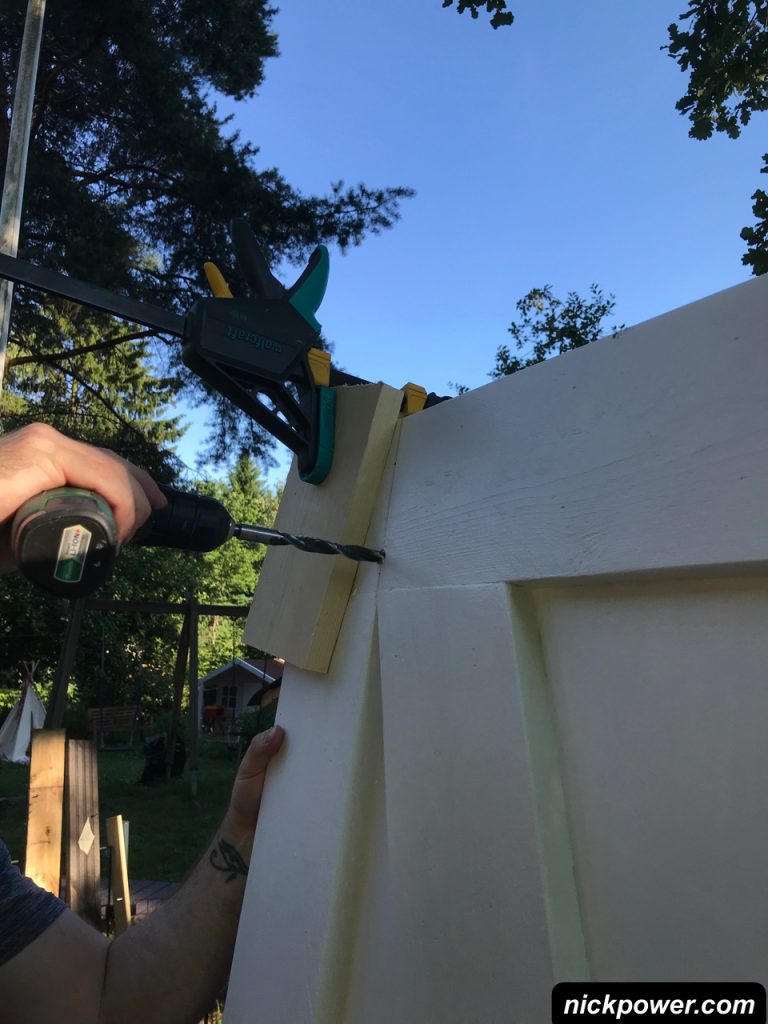
Drill the hole, completely through the door. Ensure that the drill bit is slightly bigger than the bolt thread thickness. It doesn’t need to be tight but should not be much larger than the thickness of the bolt. For example 8mm bolt, 10mm drill bit is fine.
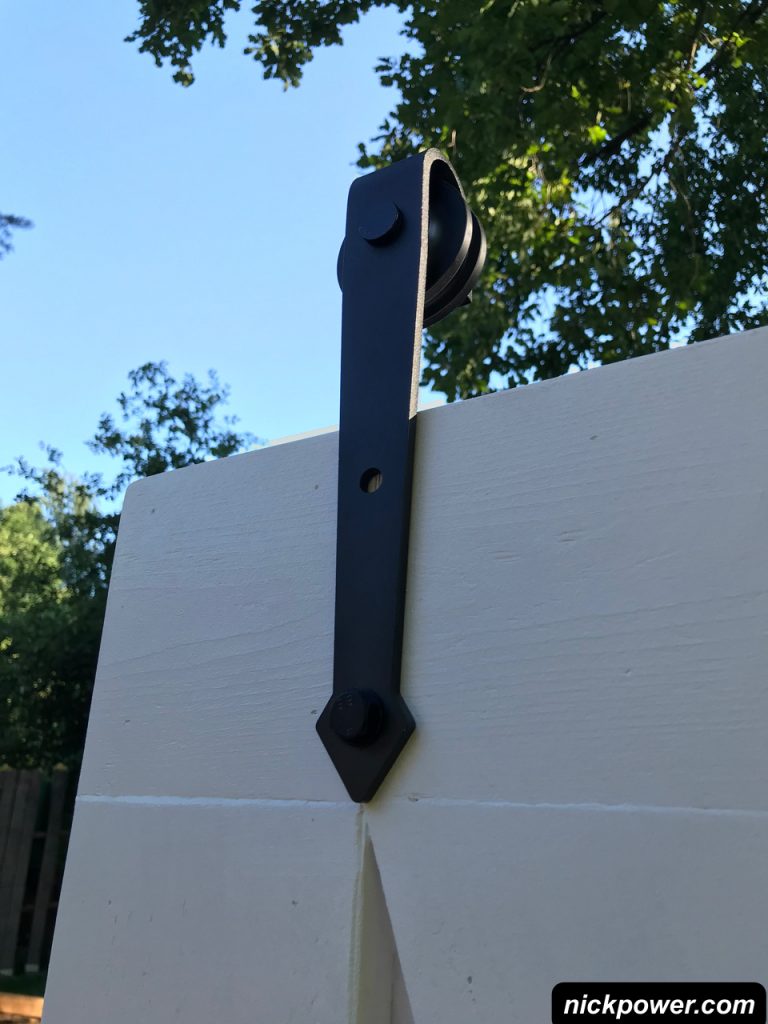
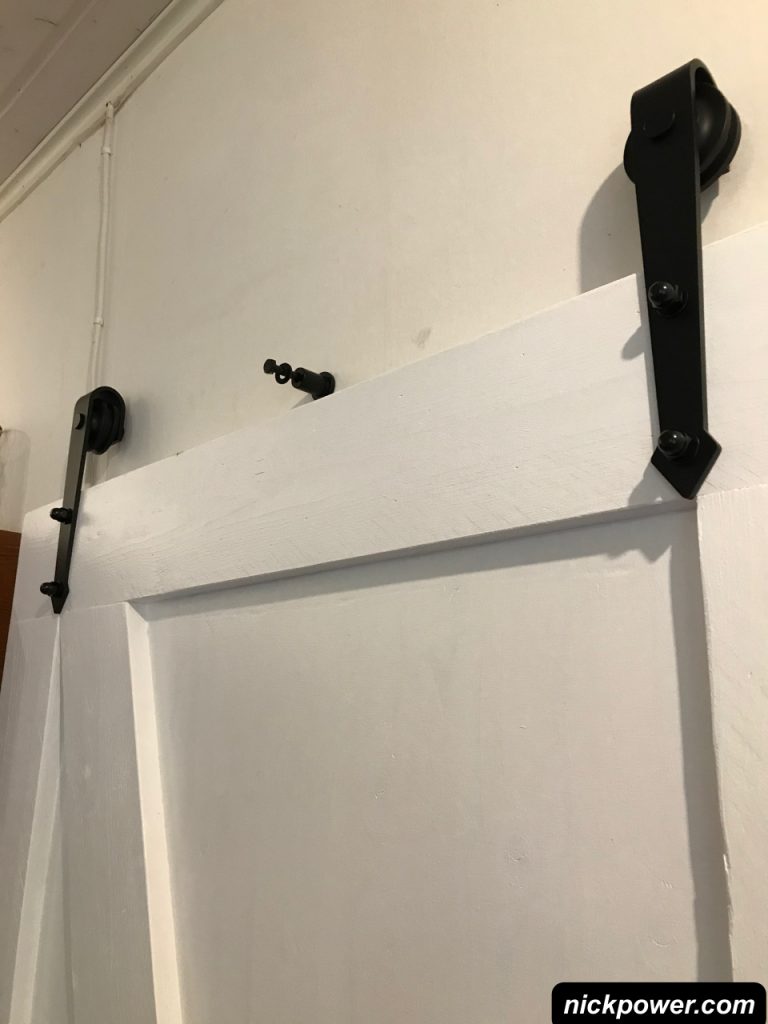
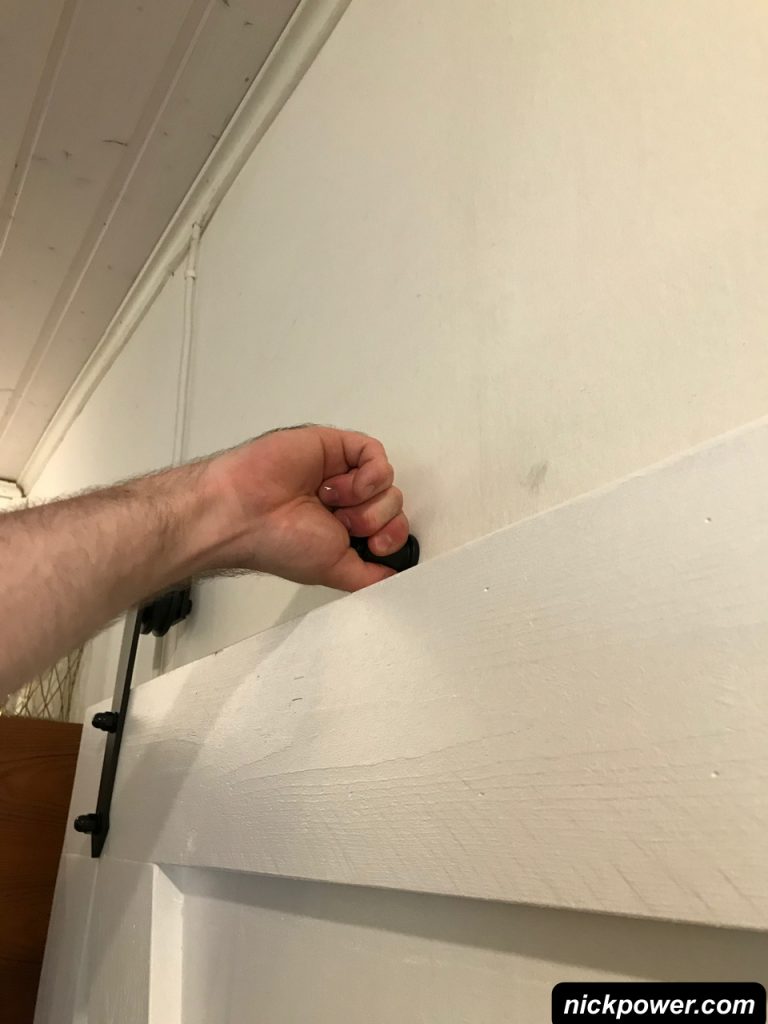
Install the arm with the bolts. Not too tight, tight enough that it stays upright and is movable.
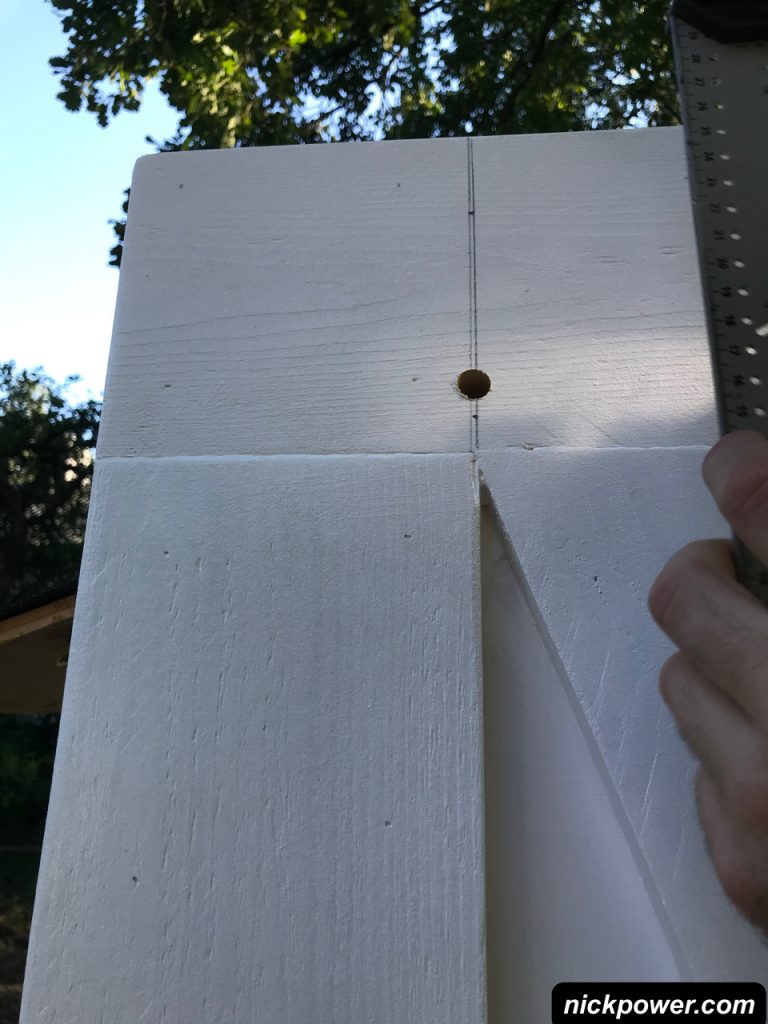
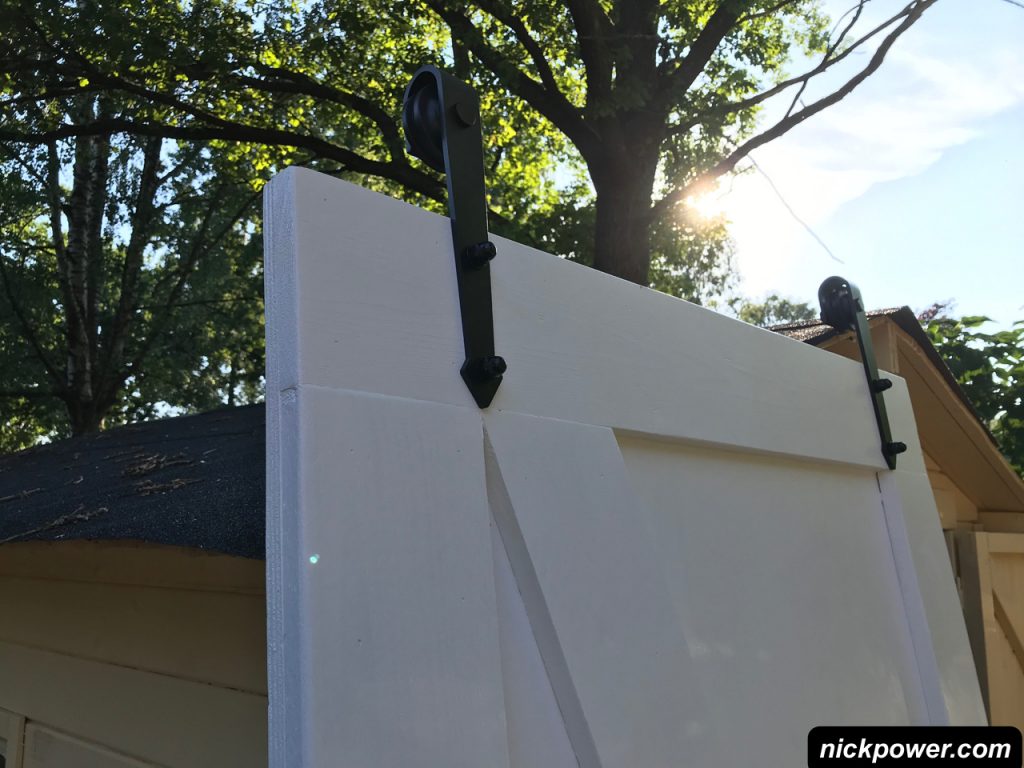
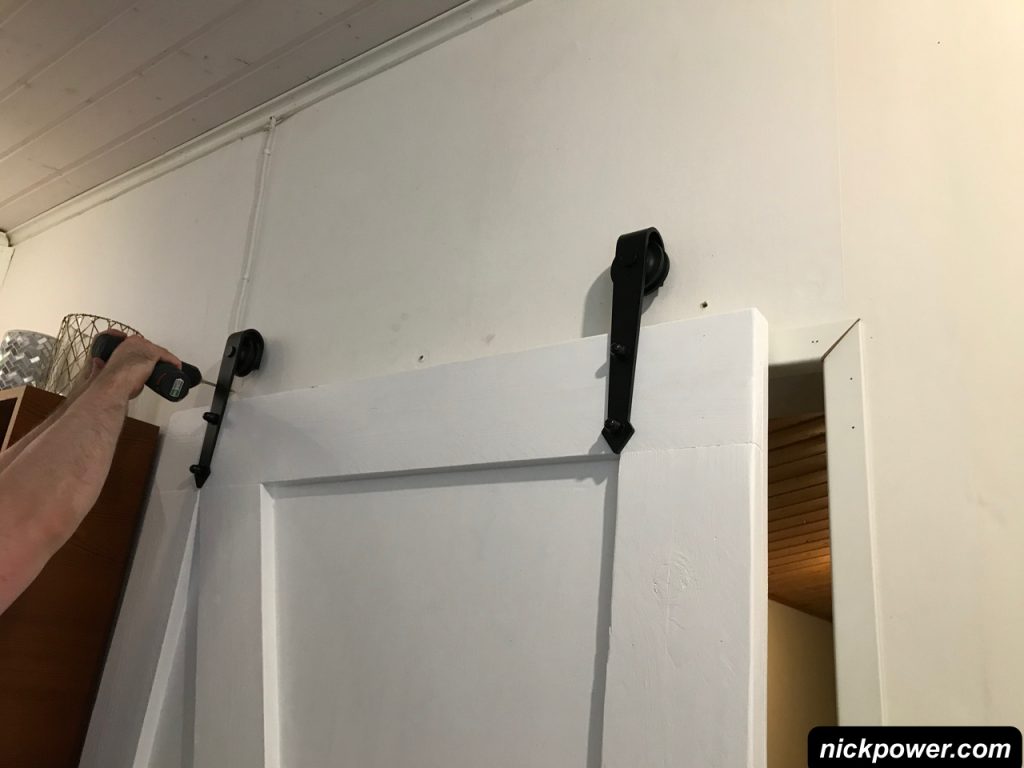
Straighten up the arm take a step back and see if it’s straight. In the picture below, you’ll see that my vertical line is well aligned. When you are happy with the position, mark a + in the hole.
Do the same for the other side.
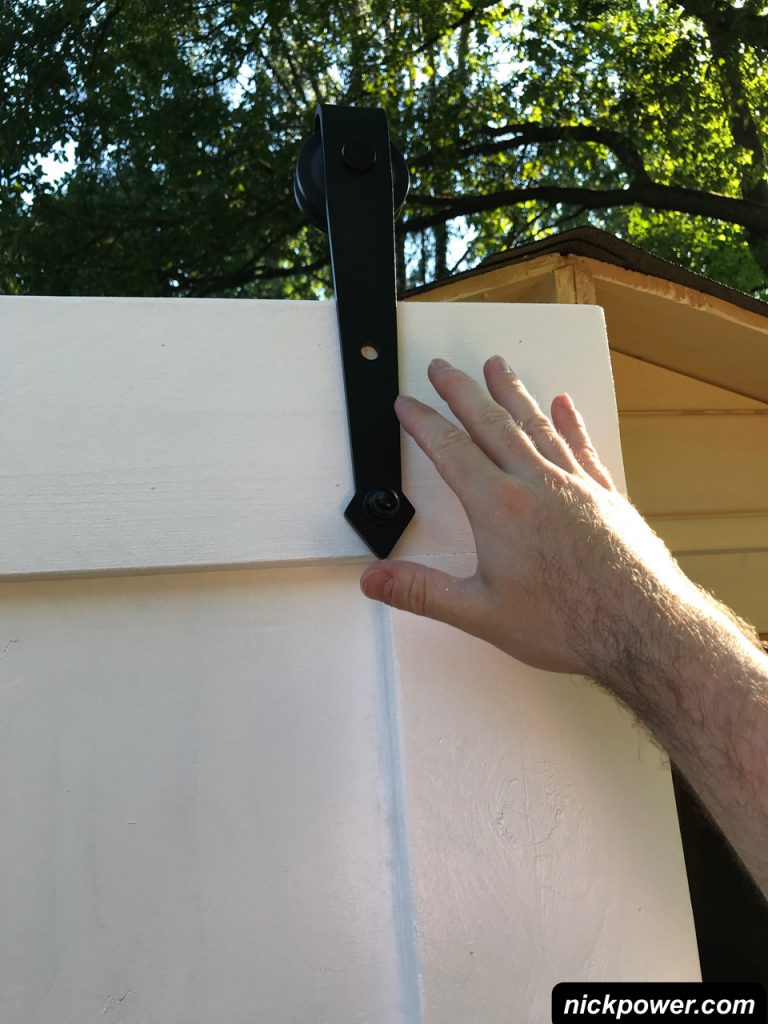
When you have checked the arms and you’re happy with them, mark the holes with + centred and you are ready to drill.
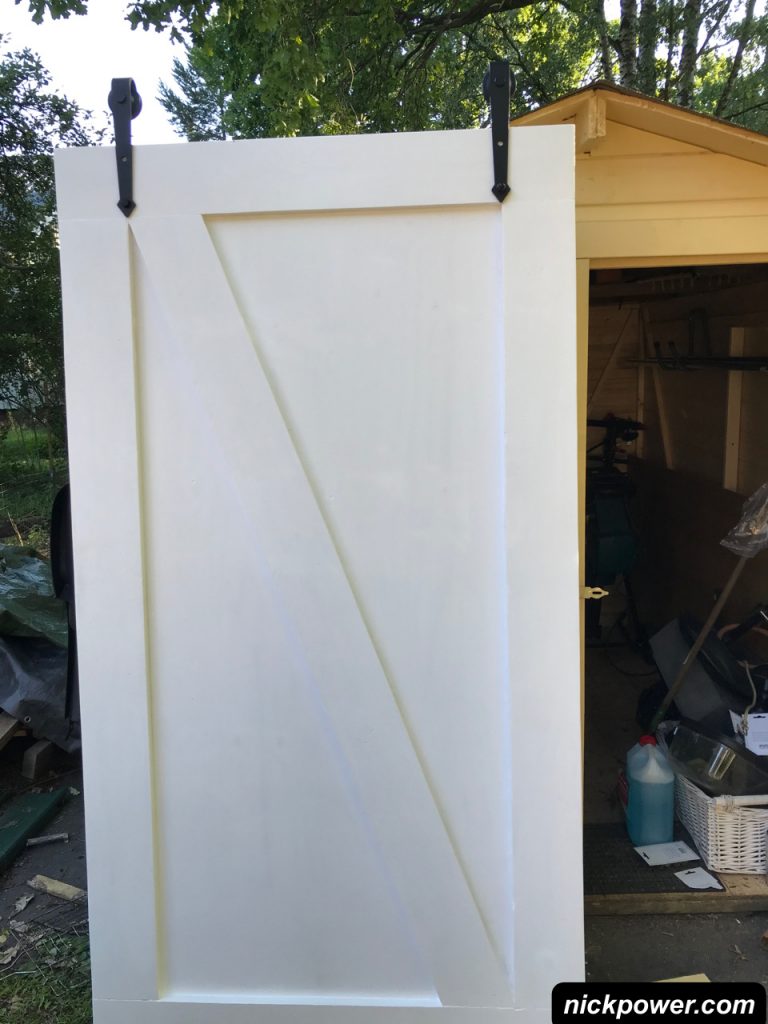
Once you have drilled both holes, add the bolts and now tighten.You don’t need to tighten too much, the bolt itself is taking the weight of the door, not the nuts. If you over-tighten, you will compress the door and it will be visible to the eye.
If you’ve made it this far, congratulations. Give yourself a pat on the back,. Now we are ready to start with the door installation.
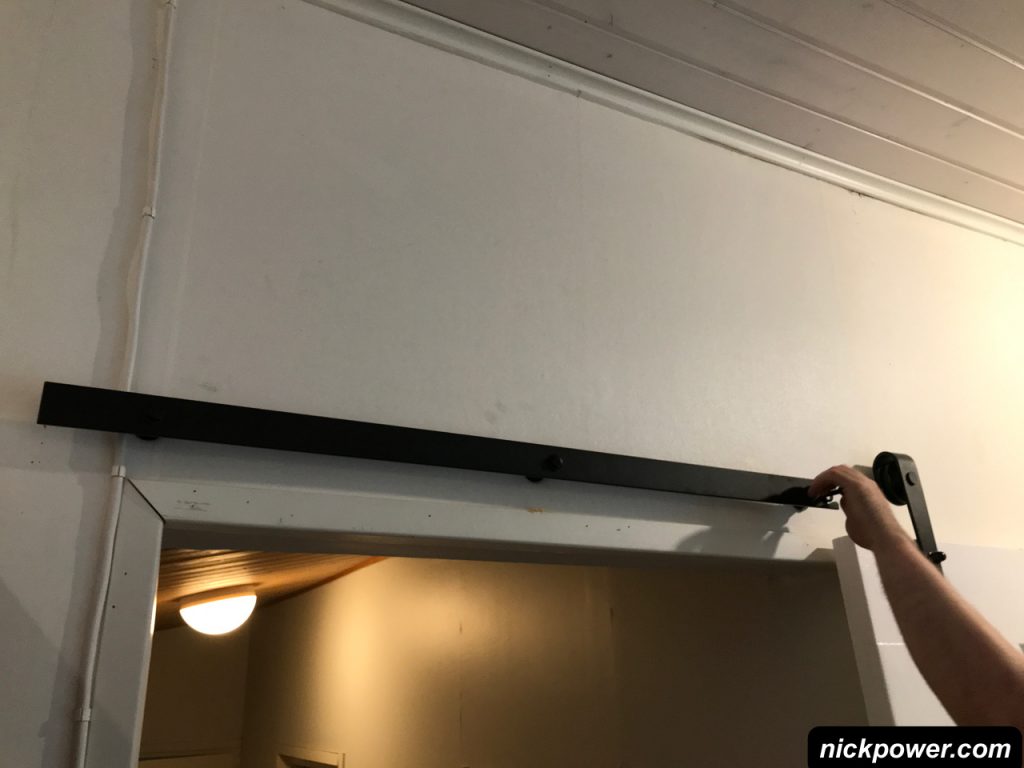
Installing the sliding door.
Now that the sliding door has it’s arms ready, it’s time to install the rail. Before we do that, there’s some practical things to consider.
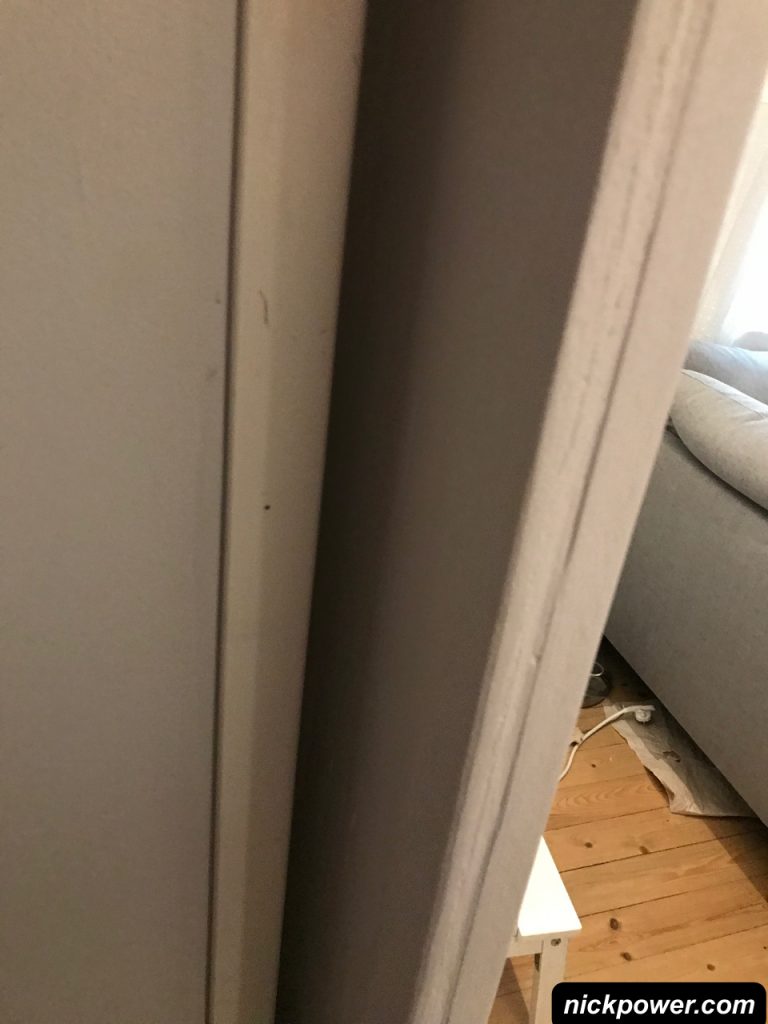
- The door must be easy to open both sides, so ensure the door opens and closes with no obstructions. If you have obstructions, move them (plug sockets, beading, skirting, etc) so that the door can travel freely.
- Door handles should be installed on both sides, so that the door can be operated easily.
- Mount the door handles so that they are reachable by little ones, or guests. I chose to mount at 100cm.
- I considered adding a lock to the door but I was too concerned about fire safety and chose not to make the door lockable.
- Bolts that hold the rail, need to be screwed into pre-drilled holes and into a material that is strong (such as concrete, stone, brick or wood). In my case, I had a wooden struts behind the walls. Gypsum / plasterboard would be OK if you’re using a strong wall anchor.
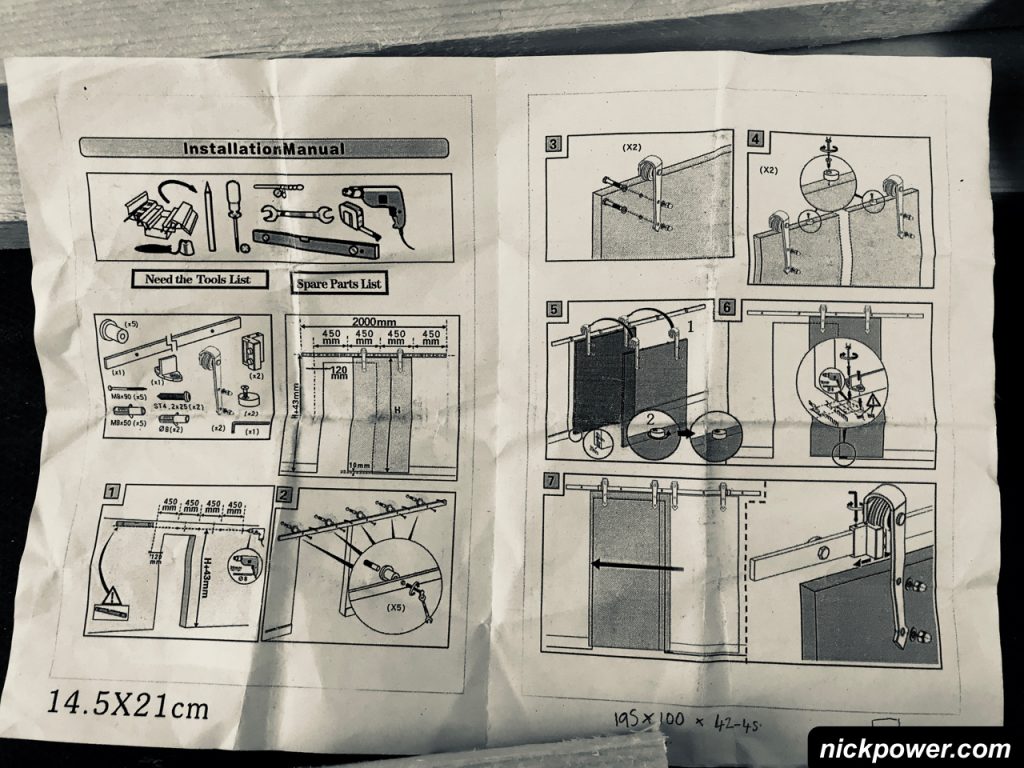
Wall Plugs Amazon UK | Wall Plugs Amazon USA | Wall Plugs Amazon DE | Wall Plugs Amazon AU - The installation instructions that come with the door install kit are not bad but I found it was confusing in some areas and it didn’t bring me confidence. You’ll see that in the following steps, I have worked around the instructions.
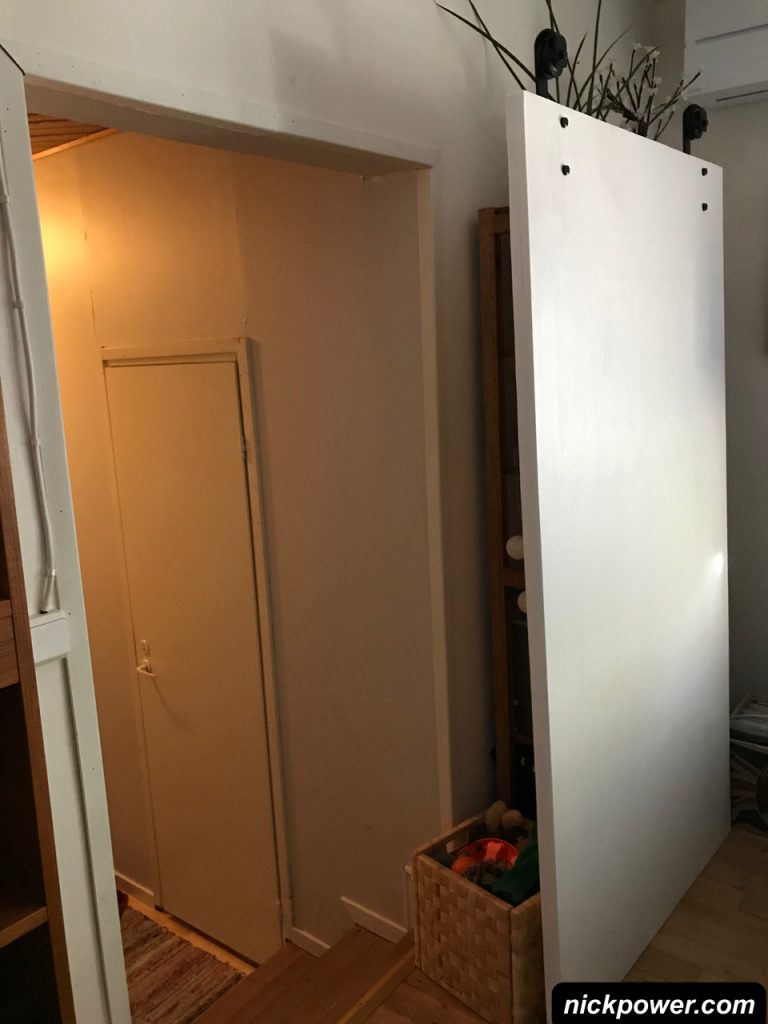
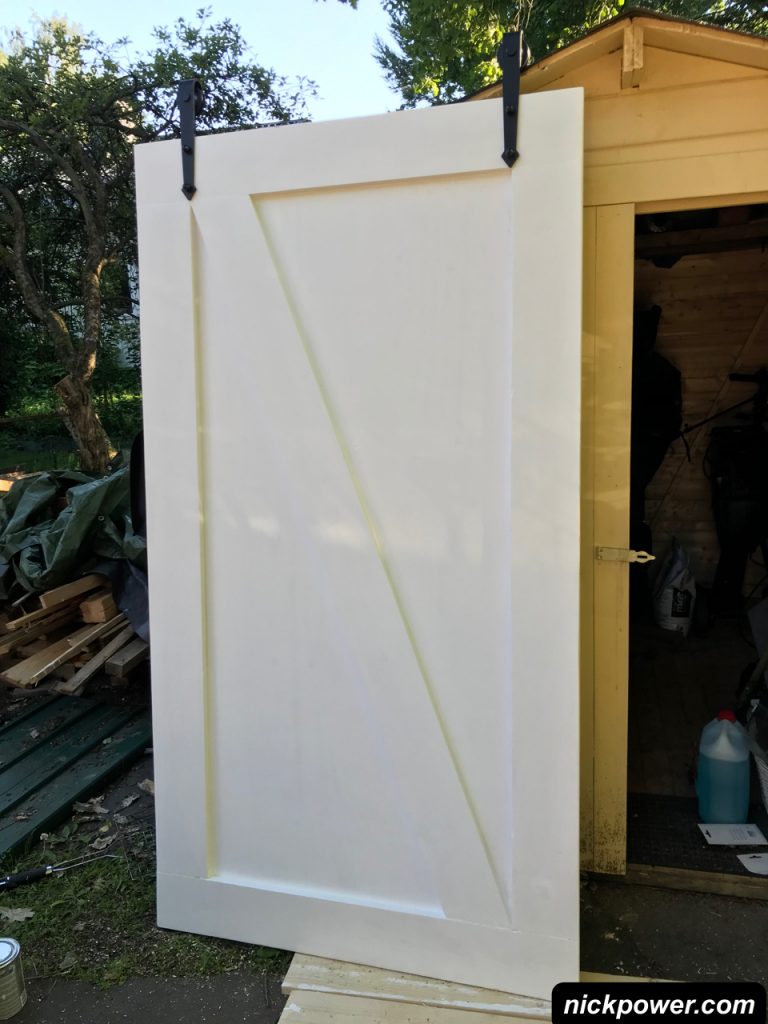
Test out your door. If you got your measurements correct, the door should cover the space as you expected it!
The installation kit suggests a space of 10mm under the door. I found a scrap piece of wood which measured about 14mm.
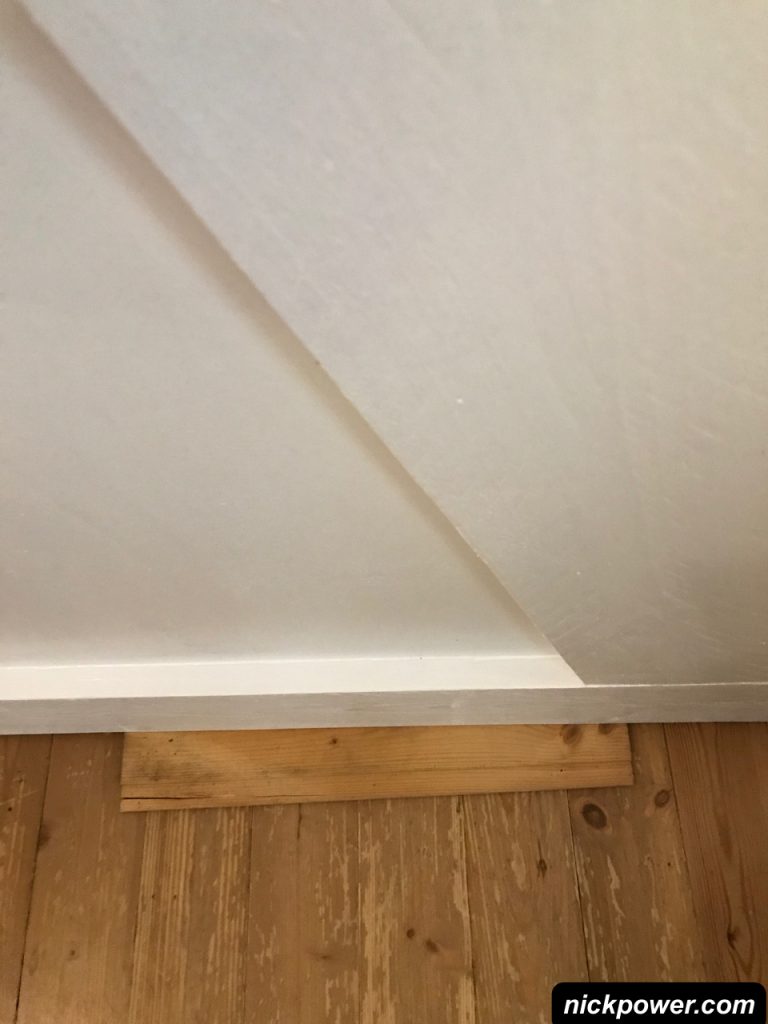
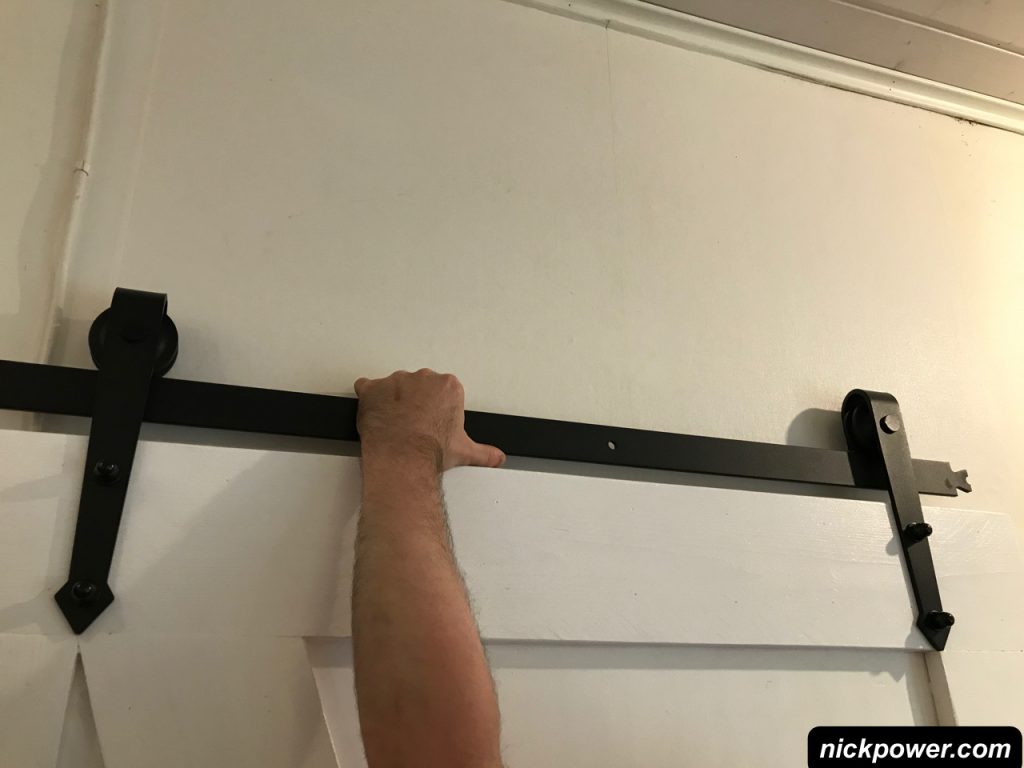
By placing the door into it’s place, you’ll be able to place the bar above it under the wheels. A couple things you need to think about here, is the left position of the rail. Where it will start and where it will end. In the kit instructions is says 120mm from the left border of the opening. My door is 2000mm wide, so if the rail is offset by 120mm, the door is most likely just able to full clear the space when I open it. I’m actually OK with this as I think it is safer to make the door always visible in the space (see below).
So with this in mind, carefully think of the sliding door rail position. My door was 1080mm wide. The sliding door rail is 2000m wide. Starting the rail at -120mm meant I lost some of the rail length (in terms of how far I could move the door along to the end of the rail). By having the arms 150mm inset from the door sides, this gave me some extra run distance. Another factor that effects the final door position.
If you can’t figure it out, don’t worry… you really can’t go wrong by positioning the start of the rail adjacent to the opening.
Have a play around with the positioning, ask somebody to help out but when you have something you are happy with, mark the holes with a pencil.
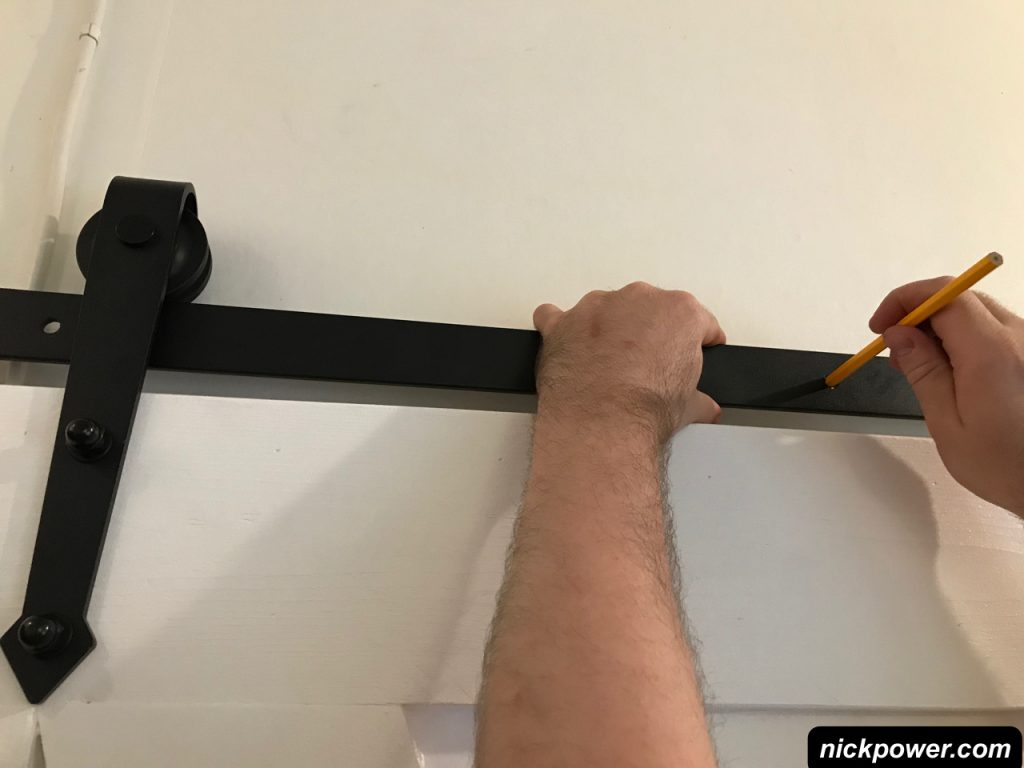
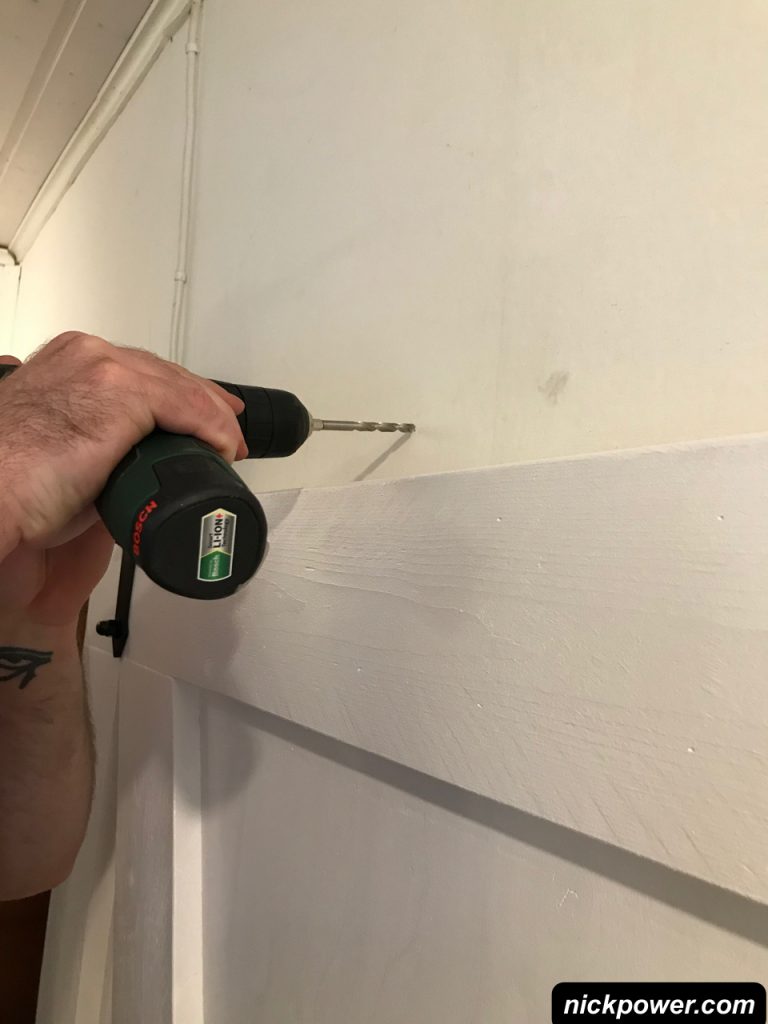
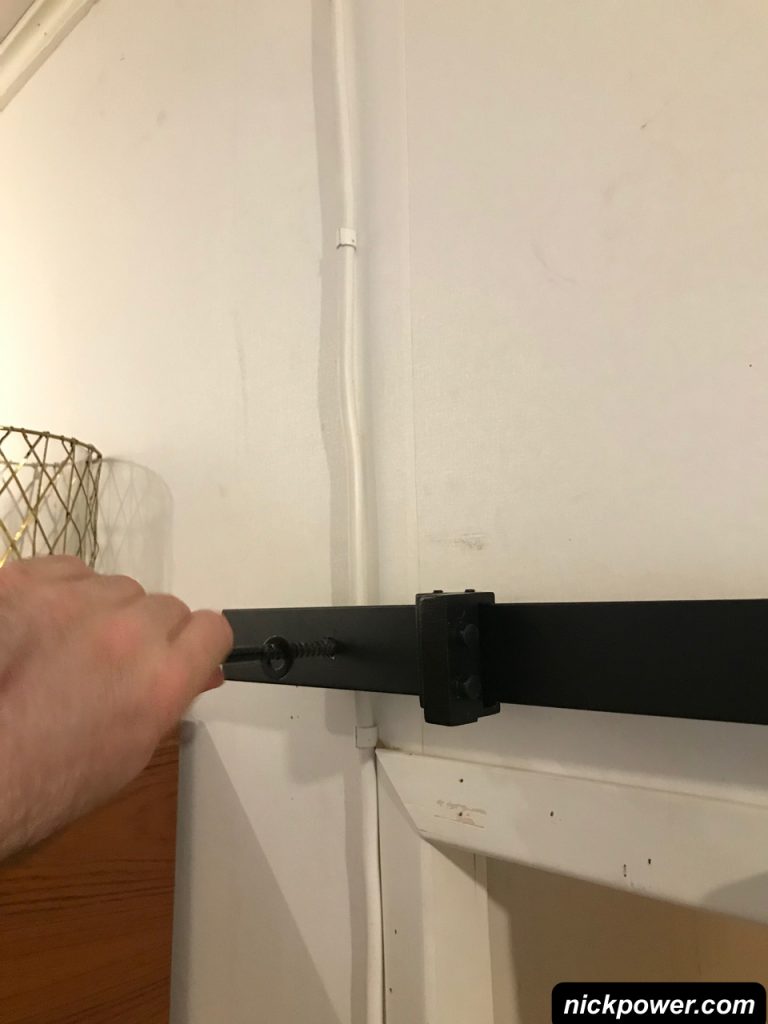
Pop a pencil in the hole and mark the wall. Drill one hole to begin with, and install a bolt. Test the strength of the wall and it’s ability to hold the bolt. The wall I am drilling into (below) is made up chipboard, wooden panelling, struts and beams. Luckily, there was a beam behind the chipboard that was strong enough to take the bolts. Use a drill bit slightly smaller than the bolt size.
If you’re drilling into concrete, brick, rock or plasterboard, use a masonry drill bit and good quality wall-plugs suited for the wall material type. Plasterboard doesn’t necessary need a masonry bit and/or hammer drill but I recommend a high strength wall plug or anchor.
Links below to get you started:
Wall Plugs Amazon UK | Wall Plugs Amazon USA![]() | Wall Plugs Amazon DE
| Wall Plugs Amazon DE![]() | Wall Plugs Amazon AU
| Wall Plugs Amazon AU![]()
If the bolts feel solid, you’re in a good place. If the bolts fall out or feel loose, you might need to think of other options. Longer bolts, larger wall plugs, expanding wall bolts, etc.
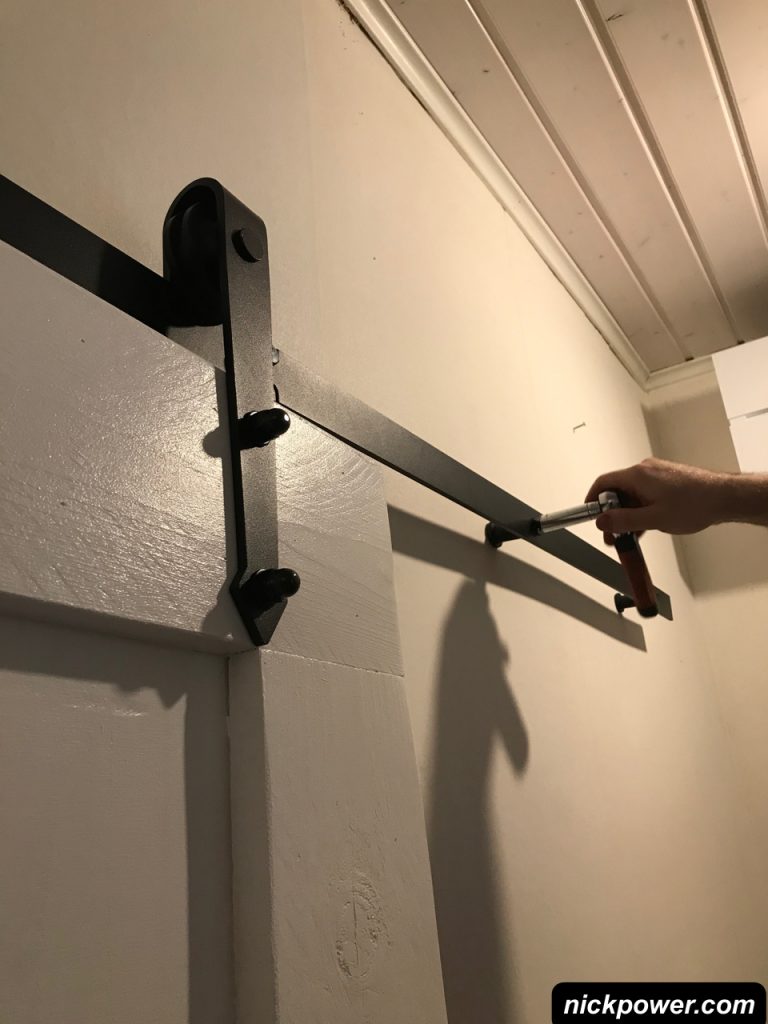
If your first bolt was strong enough, carry on drilling the other holes. There are three holes needed for the first half of the rail kit and a further two holes needed for installing the second half.

Since my wall had a soft layer, I found as I was tightening the bolts, the bar was getting closer to the wall. This is a problem as it would mean the wheel assemblies would scrap along the wall. To solve this problem, I needed to use spacers and washers to compensate the 2-3mm. I don’t see this problem happening with harder surfaces.
Lift up the door onto the rails and give it a test. Be prepared to lift the door back off if you find the rail cannot support the weight of your door!
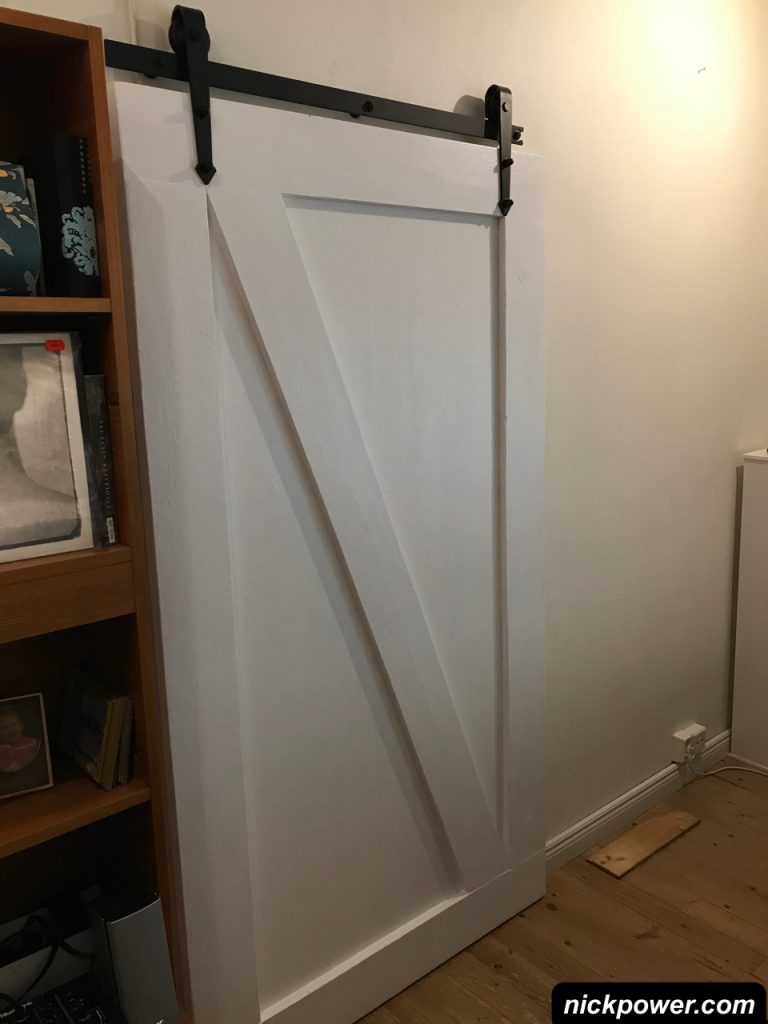
You won’t be able to slide the door just yet, but you can check that you have the clearance at the bottom of the door and that the wheel assemblies do not rub along the wall. Good job! Now for the second part of the rail ..
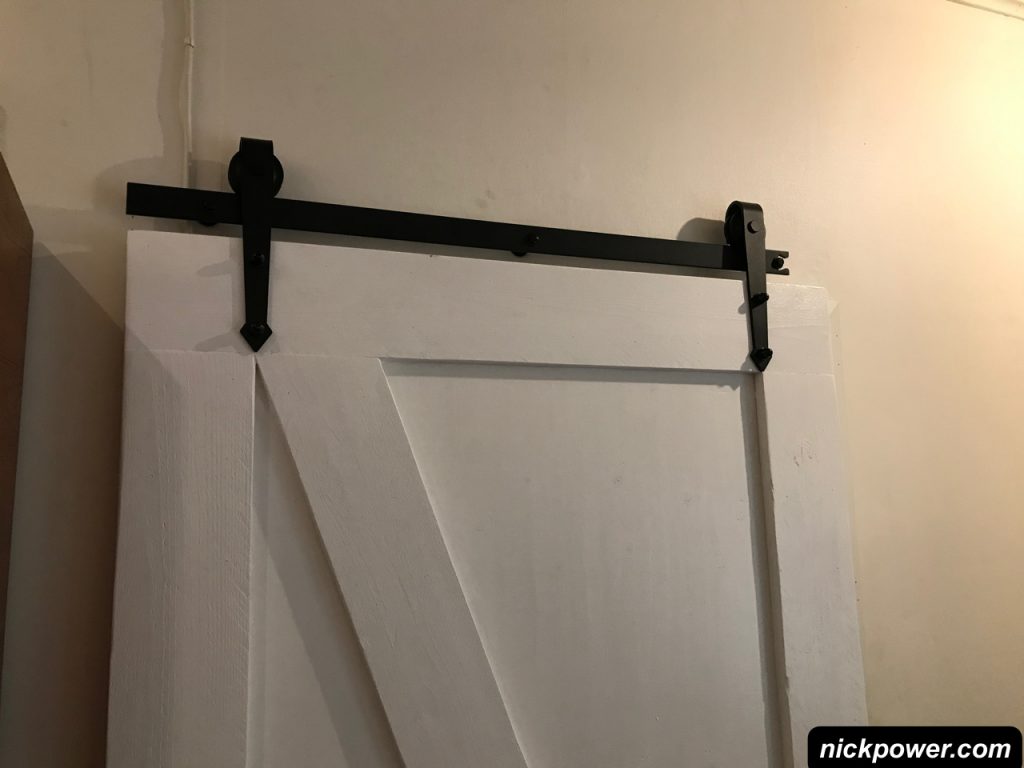
Installing the second part of the rail is a little easier, follow the same process as before. Lift off the door, add your scrap wood underneath the door to give you the 10-14mm clearance and place the bar underneath the wheels. You should find that the bar lines up quite nicely. Move the door out of your way, Mark the holes, drill and install the bar with bolts and you should find yourself with something like the below:
The door kit comes with stoppers, they slide onto the rail and you can tighten two small bolts on top of them. I placed them on the rail where I wanted the door to stop.
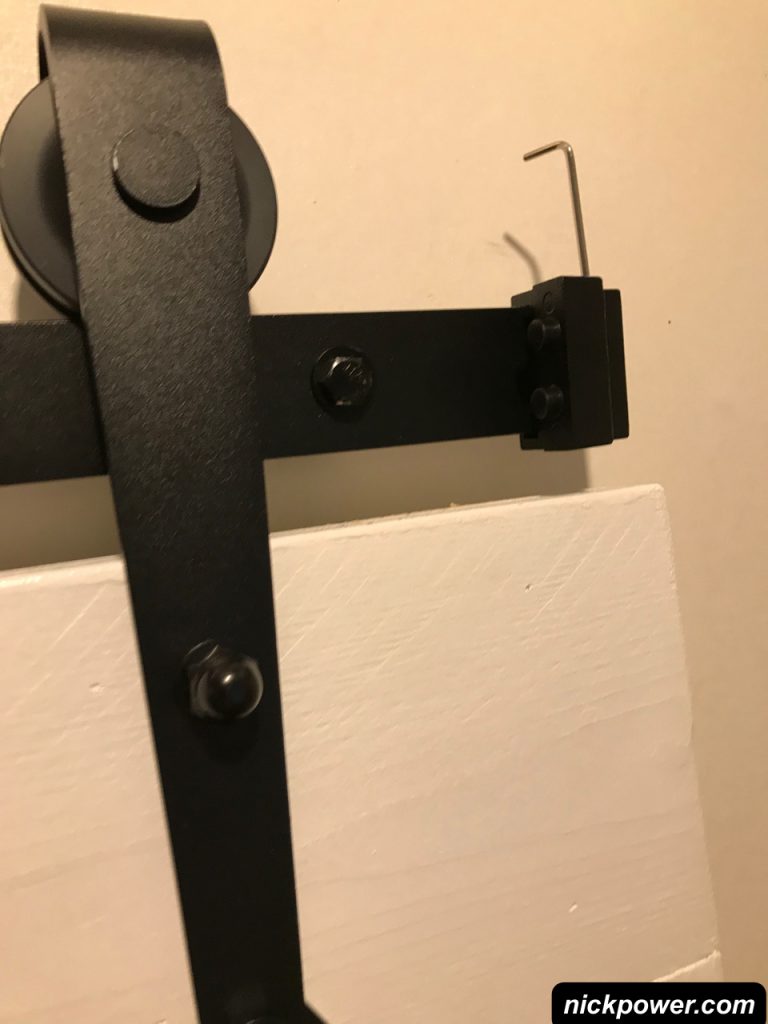
To install the left hand stopper, you might need to remove the wall bolt, slide on the stopper and then add the wall bolt back. Ensure the door is hanging from the second part of the rail whilst you do this, or better still lift off the door.
Open and close the door, test the door stoppers work and adjust as necessary! As I mentioned earlier, this is the amount of space I wanted to have when the door was opened.
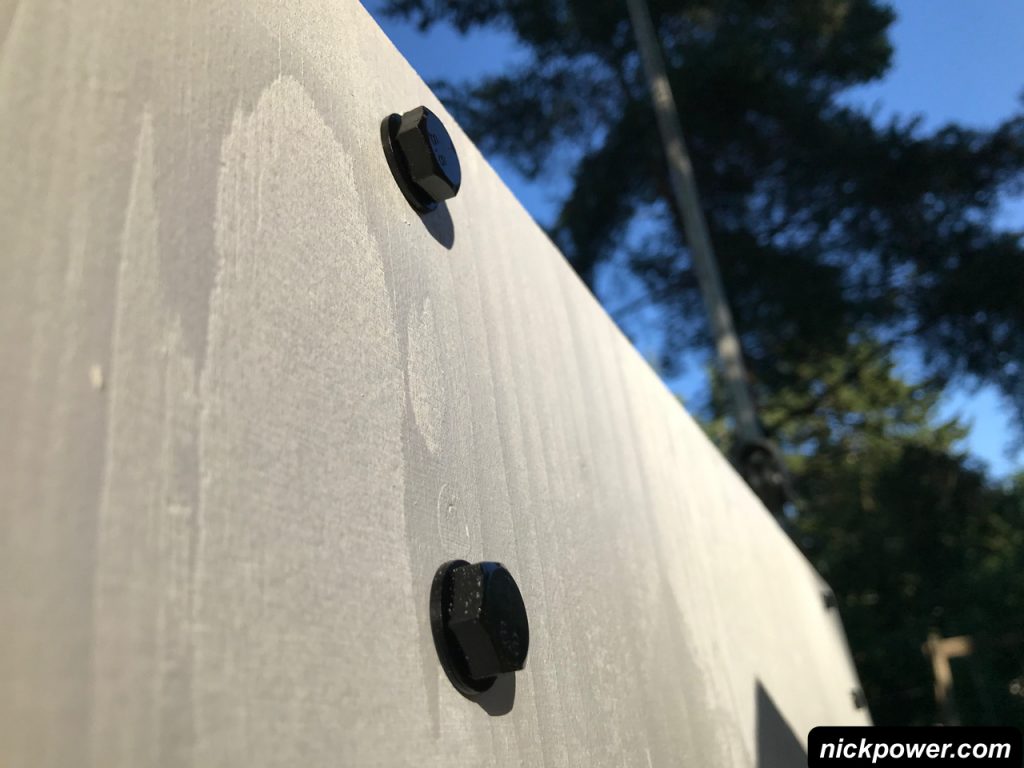
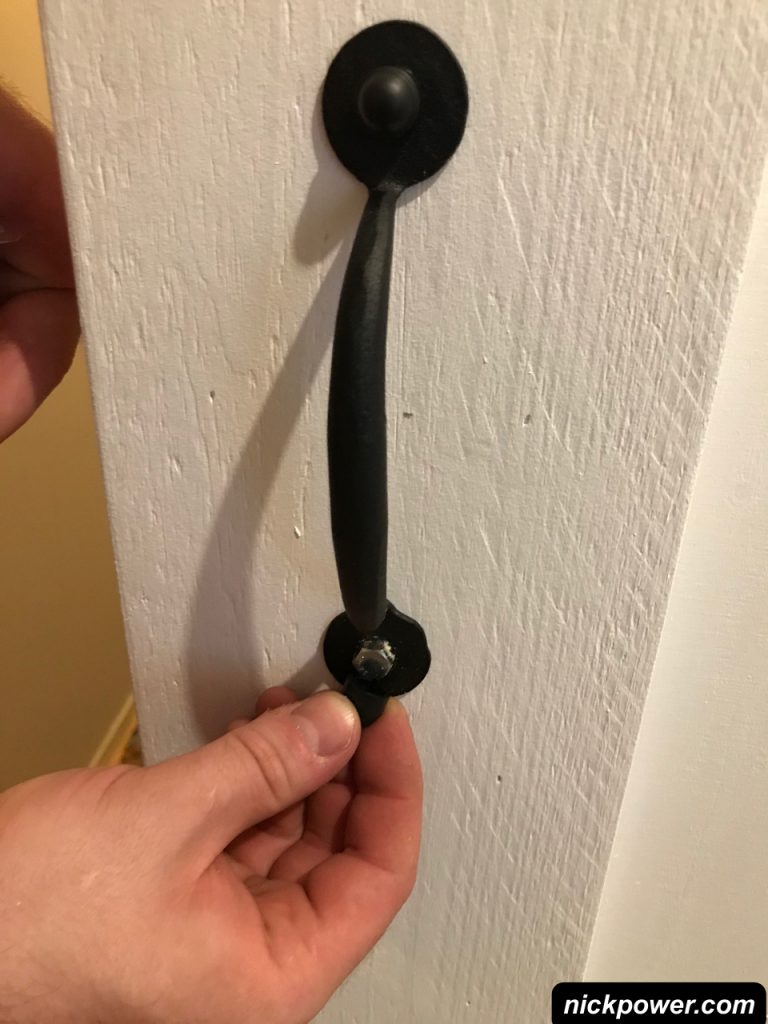
Installing door handles on a sliding door.
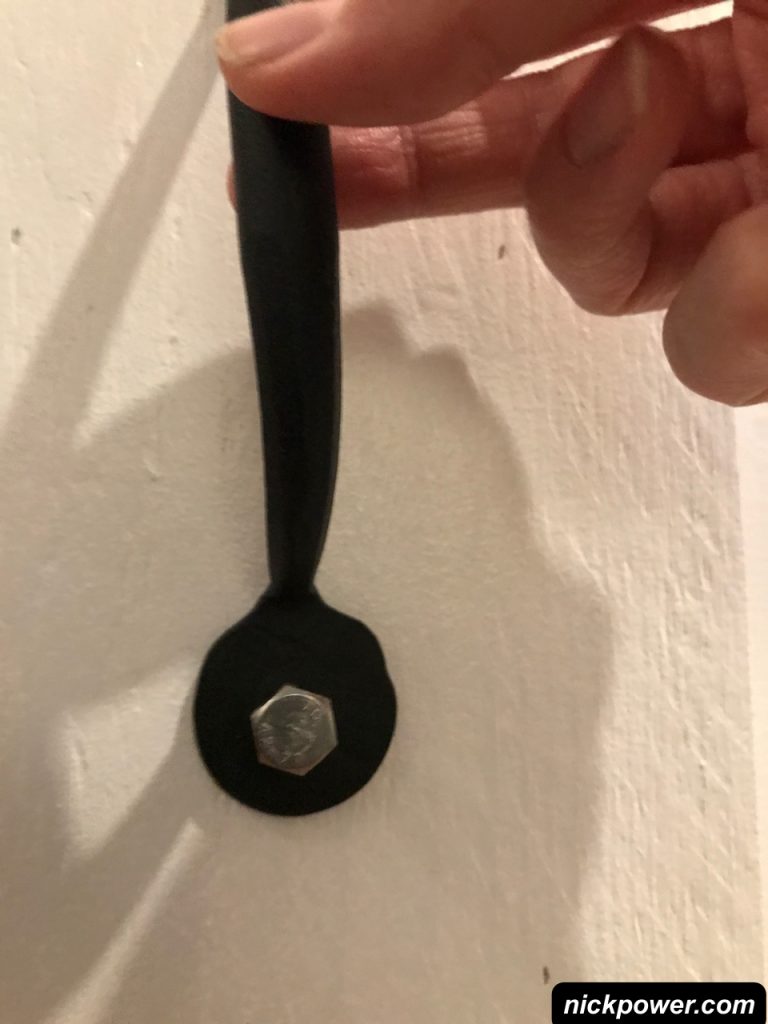
I picked up a couple of metal handles that I thought would suit the style of the door. One important feature that these handles have is that they are secured with screws. Not bolts that go through the whole door. This is important because I wanted to mount the handles at different heights on each side of the door.
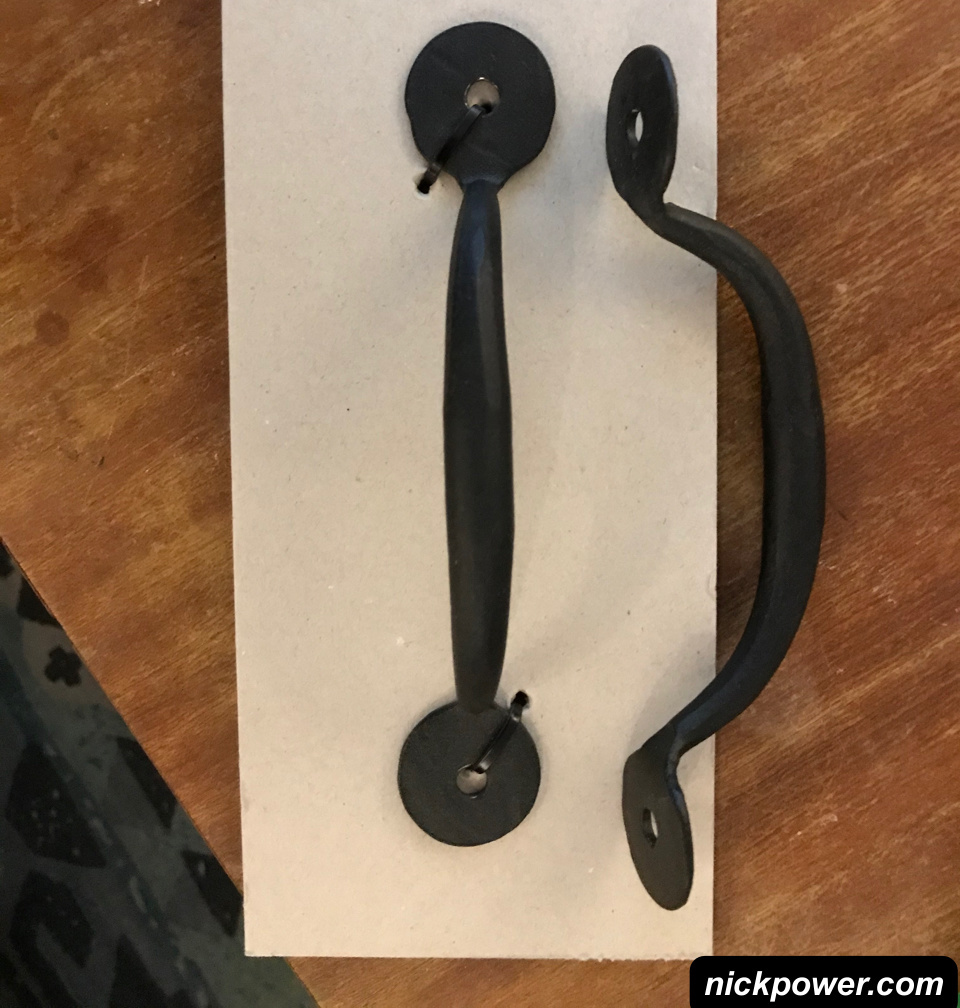
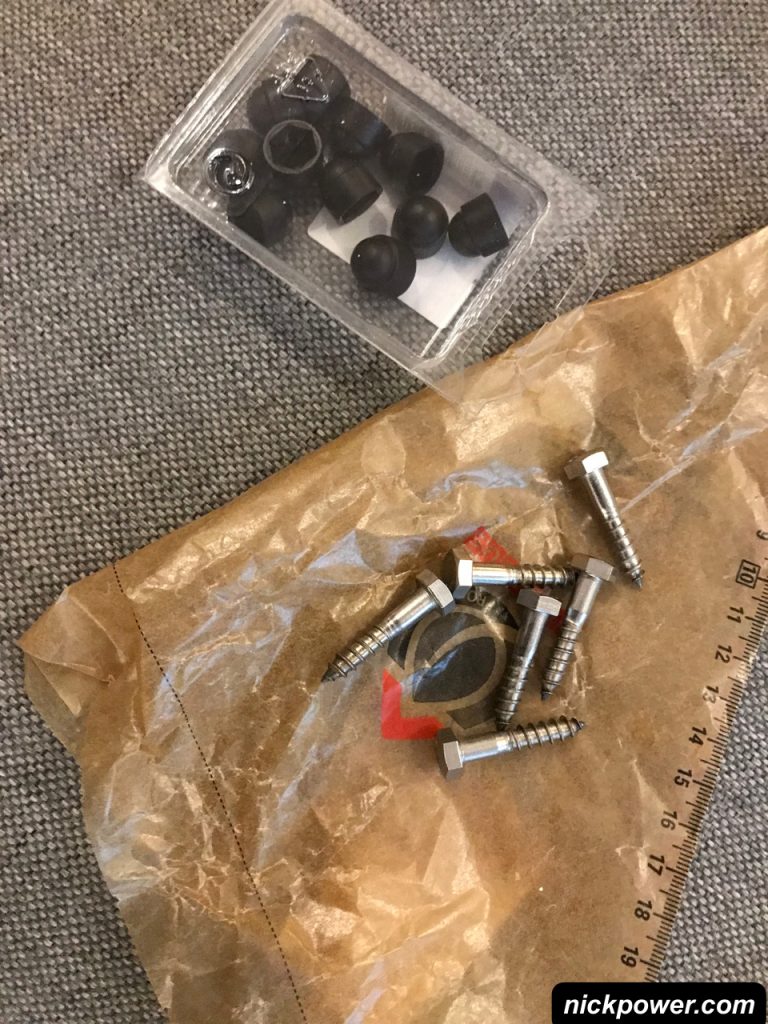
I grabbed some M8 6 x 30mm stainless steel screws and a packet of black bolt caps. The width of my door was at least 38mm. Stainless steel at 6mm is very strong and durable. The door handles will stay in place for years to come. I chose not to use washers, I don’t think it necessary and felt the handles look better without washers.
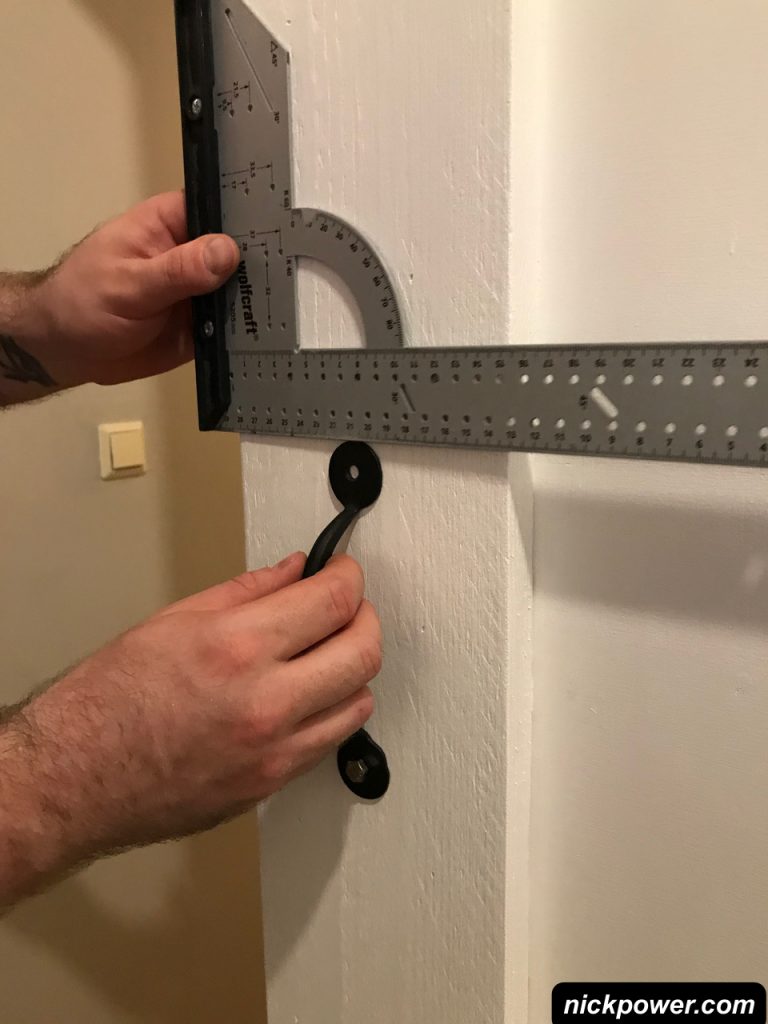
I planned to install the handles onto the door 100cm from the floor. So I measured and marked with a small pencil mark.

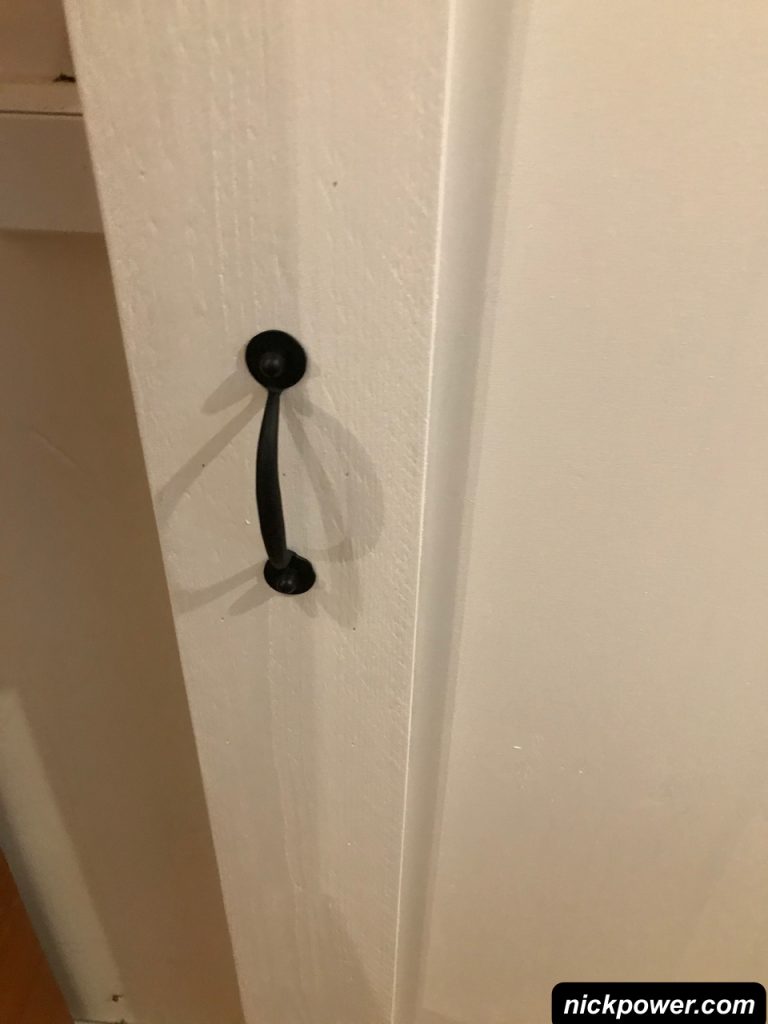
Take a set square and bring it to the 100cm mark. I wanted to install the door handle so that it would be centred on the plank horizontally. In my case the plank width was 150mm, so the position of the pencil mark would be 75mm. On the back side of the door, I wanted the door handle to be lower than that of the front because I have some stairs on the other side of the door. Hence I didn’t use bolts that went through the whole door. This of course is an option for you and up for to you to decide.
This would form the centre point of my door handle. The screw holes would be both approx. 7cm north and south of this pencil mark.
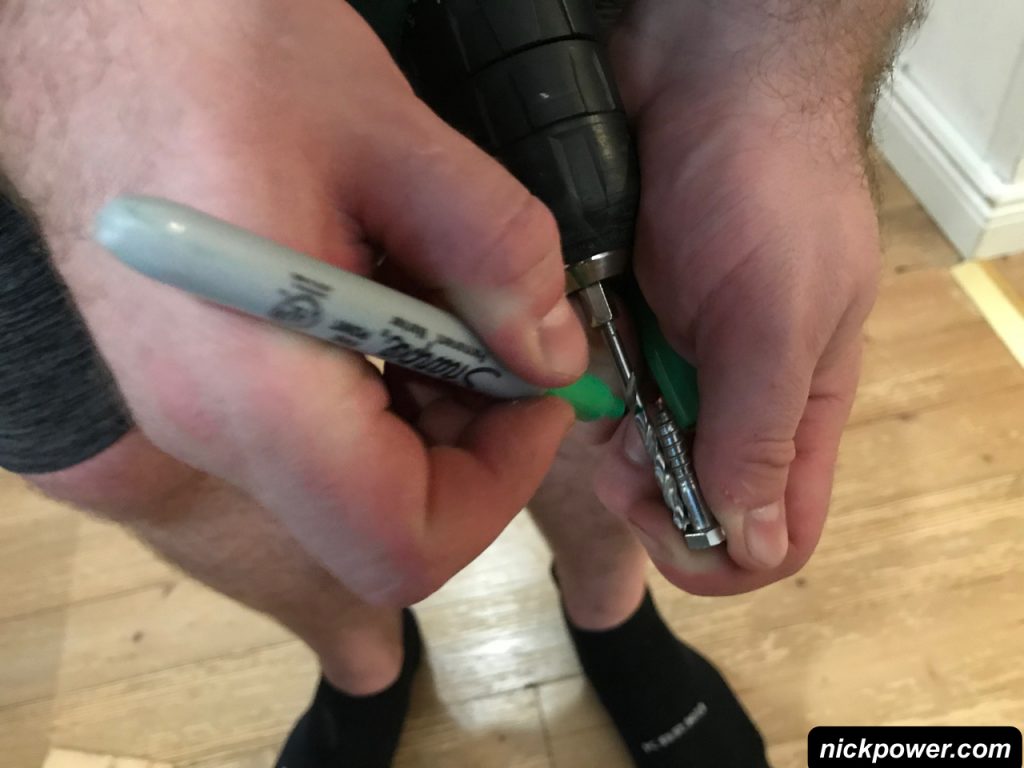
Hold up the door handle to the door, centre it and mark the holes of your desired location. When you drill the holes, use a wooden drill slightly smaller than your bolt size. In my case I was using 6×30 M8 screws. This meant I drilled in approx 24mm. I used a marker pen to draw on the drill bit. So as I was drilling I knew when to stop. Note, if you go straight into the wood with these screws, you’ll risk splitting the wood. Always worth a pilot hole, it also guides the position of the screw.
Screw in the first screw, not too tightly. Just enough so that it supports the position of the door handle.
Grab the set square again, and rotate the door handle until you find the correct position. Mark the hole with a +. Drill the hole.
With two bolts in place, you can add the caps.
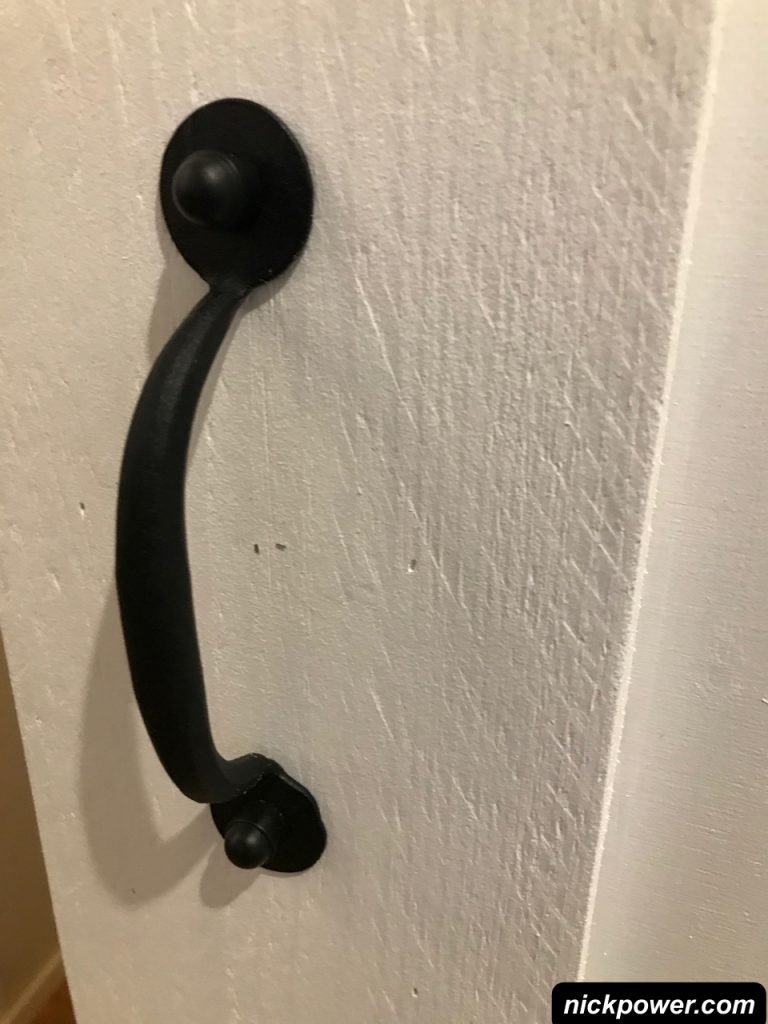
Now that you have the door handle in place, the second one can be secured exactly the same way. When you position the second door handle, ensure that you do not install it into the same position otherwise your screws will clash.
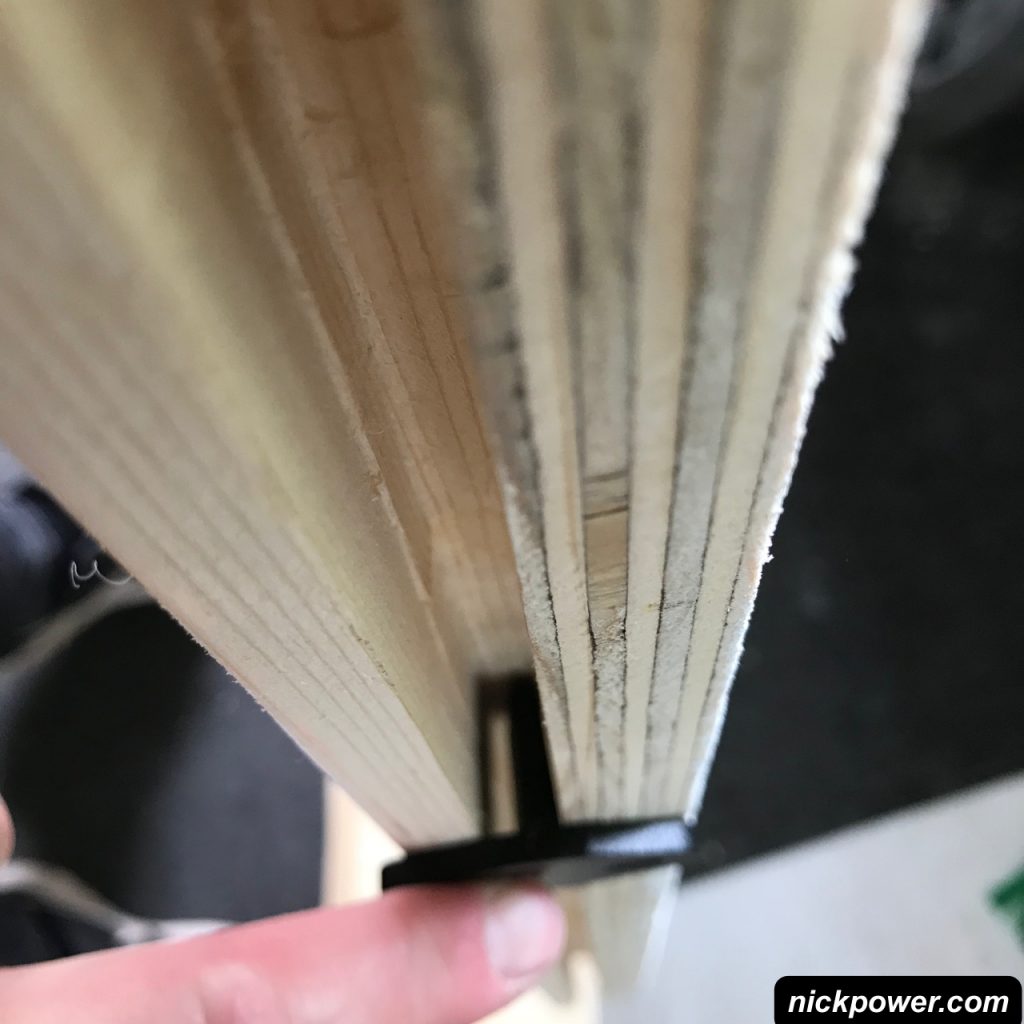
Sliding door safety guide
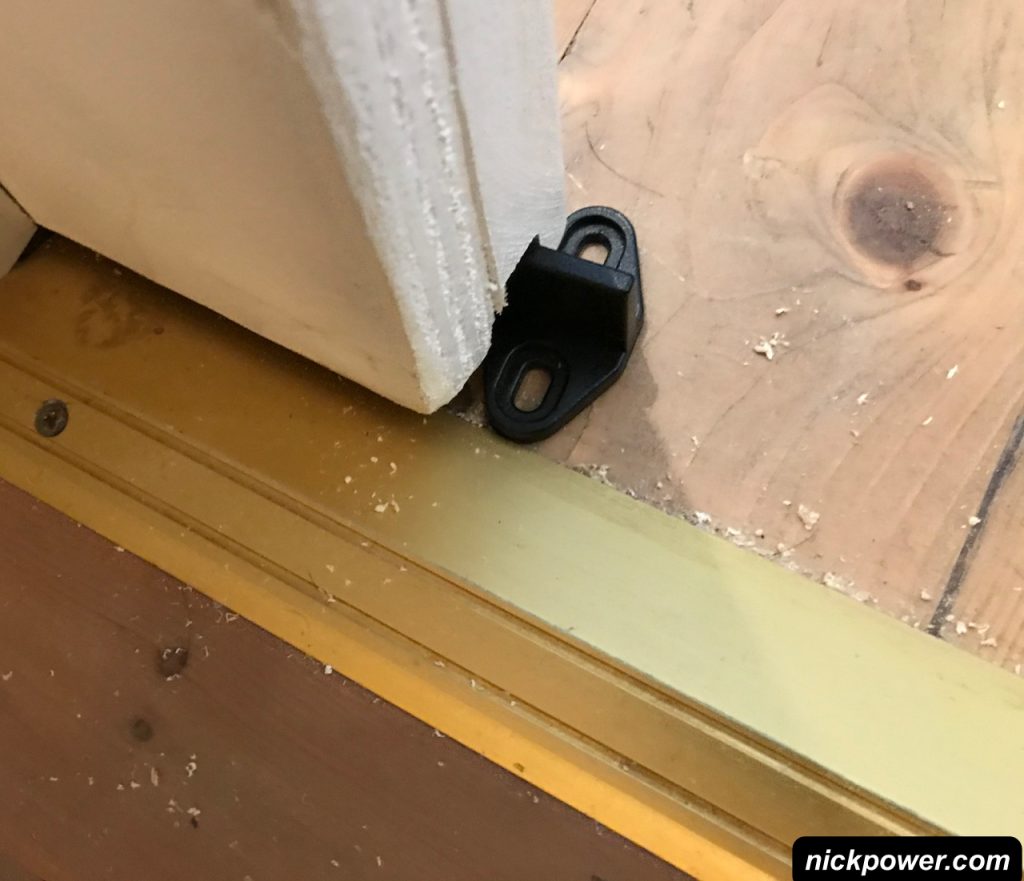
You’re very close to finishing the project, but there’s one more task that needs your attention. In the sliding door kit there is a small piece of metal that is designed to prevent the door from lifting away from the wall. You have two options with this, either make a groove in the bottom of the door or purchase a roller guide. Most likely the determining factor will be whether you have access to a router.
I will show you how to route a groove in the bottom of the door, but if you prefer to purchase a roller guide, here’s the links.
Barn Sliding Door Roller Guide on Amazon:
Installing a sliding door safety guide
With a 6mm wide router bit, you should have plenty of space for the glider bar. You can choose to use a smaller one if you have one. The guide is approx 3mm thick. With the router you’ll need to use the guide so that you route a straight groove.
The guide you install on the floor can also be used to keep the door at a certain distance from the wall. You might want to have a think about this as it will determine where you route the groove into the bottom of the door.
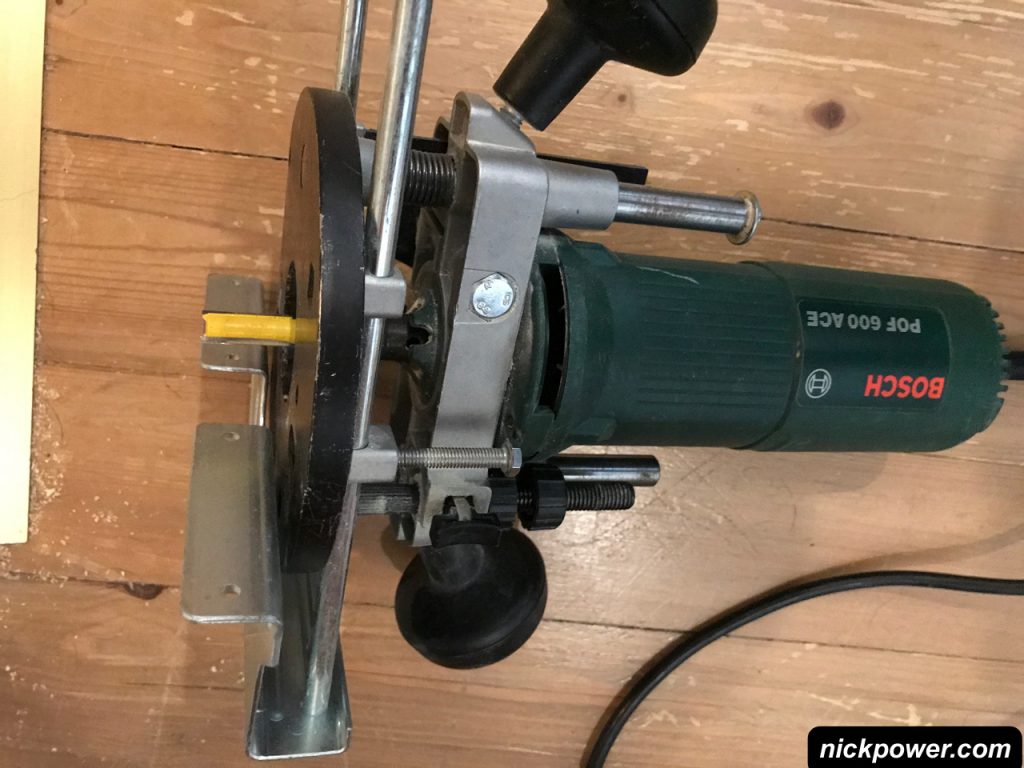
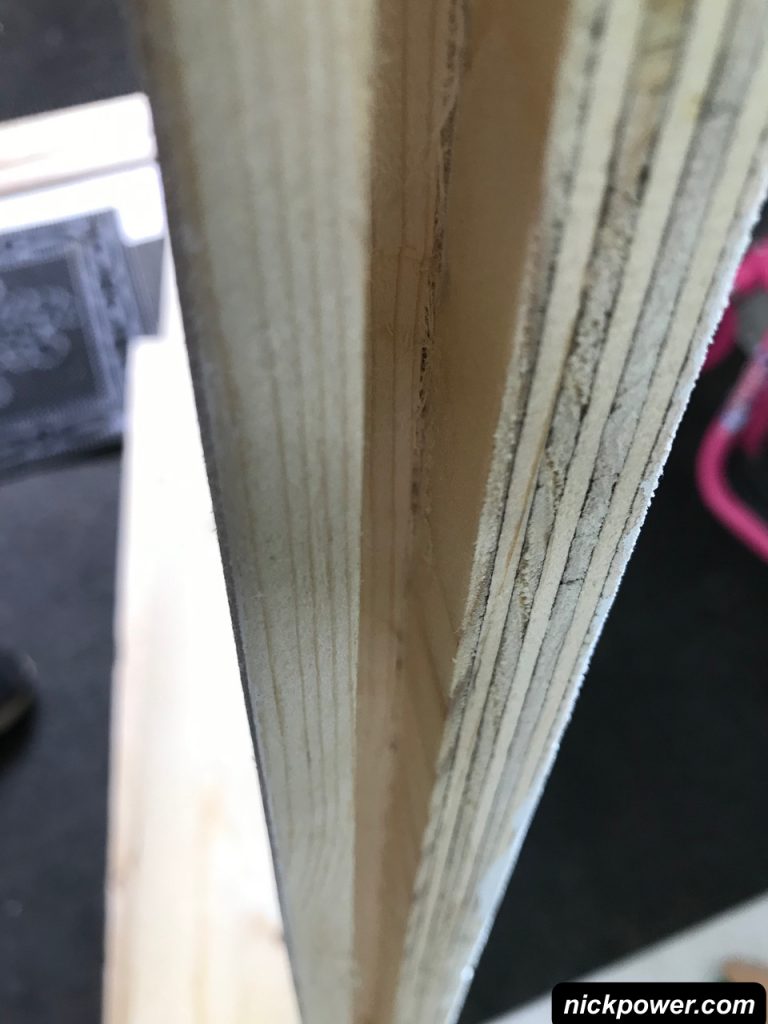
Mark on the door where the groove should be made. Lift off the door and get it in a good position where you can use the router.
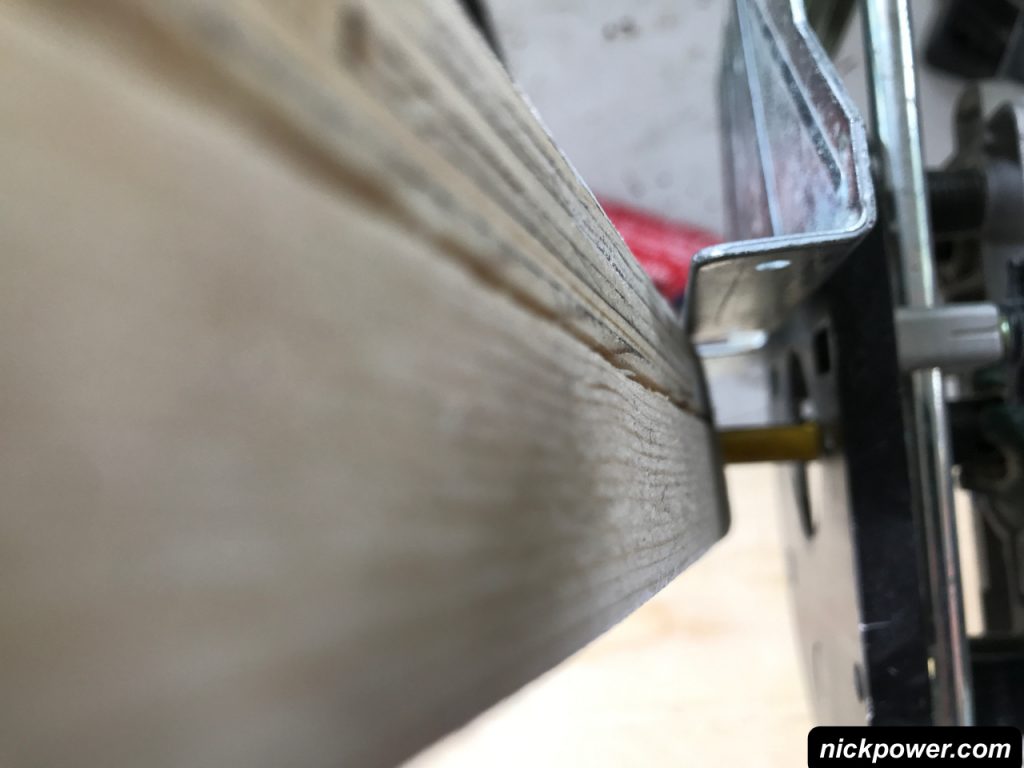
Set the guide of the router to the measurement required so that you have the router bit lined up to the place that you need to cut the channel into the wood. You won’t be able to create the channel in one pass, it will overheat the router bit and you’ll risk becoming a victim of ricochet, no joke! So you’ll need at least 3-4 passes. Remember safety glasses, gloves and ear defenders. Face mask is also recommended.
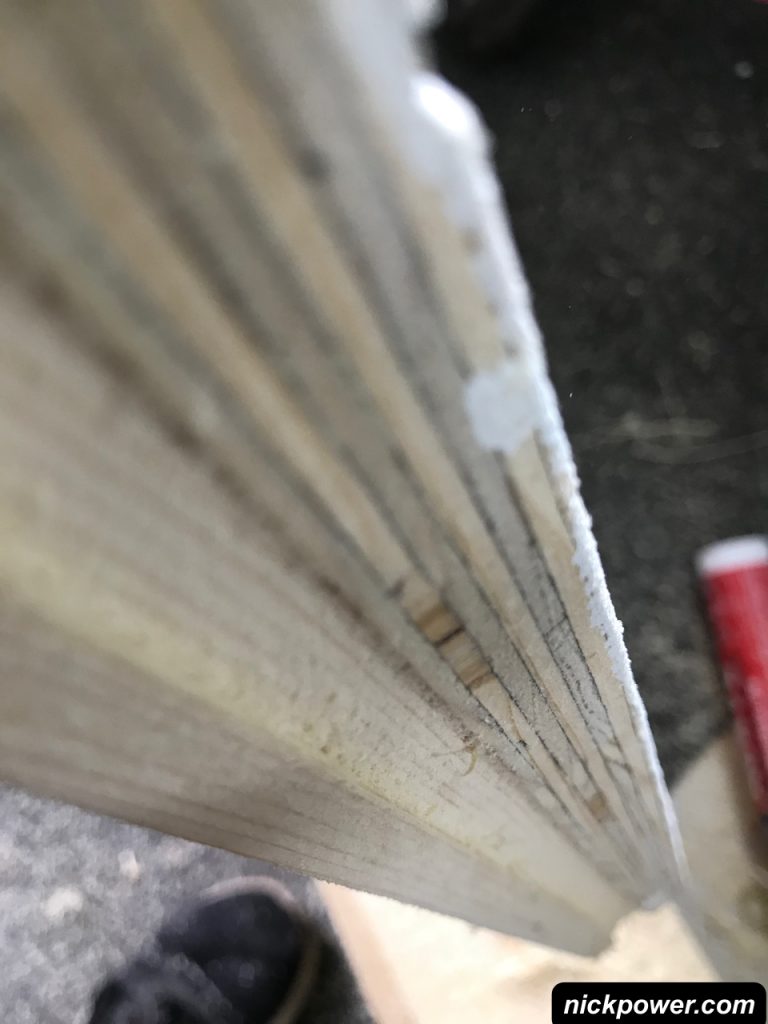
Now that the channel is finished, you can take a look to see if it is straight enough. I’ll be honest, my routing doesn’t win awards and yours doesn’t need to either. If you want to optimise the channel, you can install a plastic U shaped track into the channel. Plastic with metal runs quite smooth, no need to grease or lubricate.
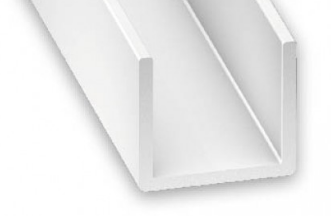
Plastic channeling can be secured with a construction glue. Cut the channel to length with a mitre saw or a sharp knife.
When you are finished, reinstall the door and test it out.
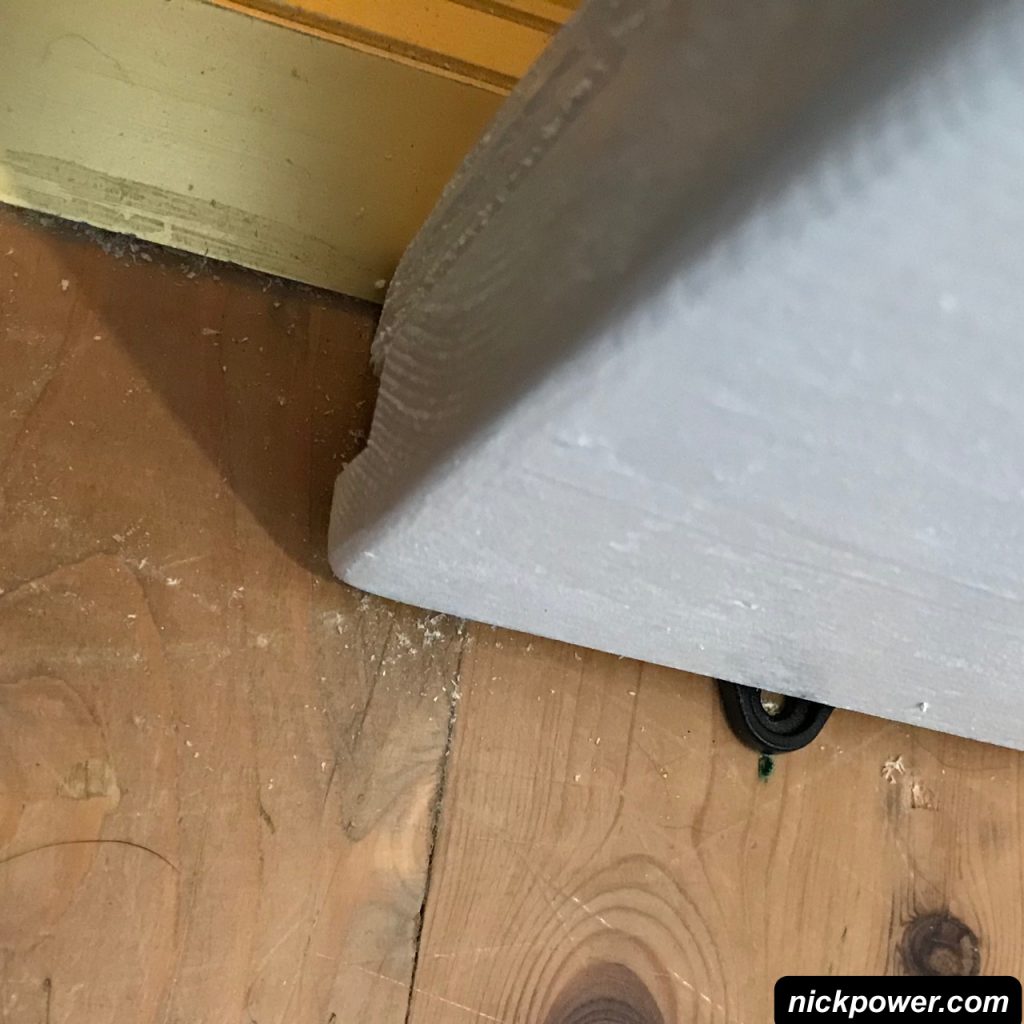
That’s it. All well and good, you should have yourself a sliding door!
I wish you the best with your project and feel free to reach out!
Leave a Reply